
Choosing Your Beans
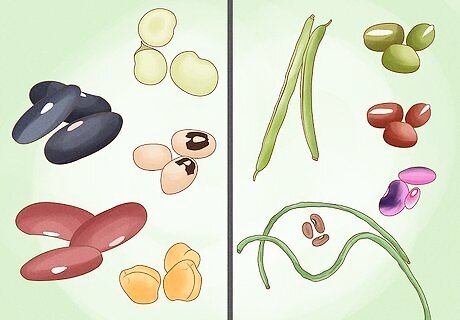
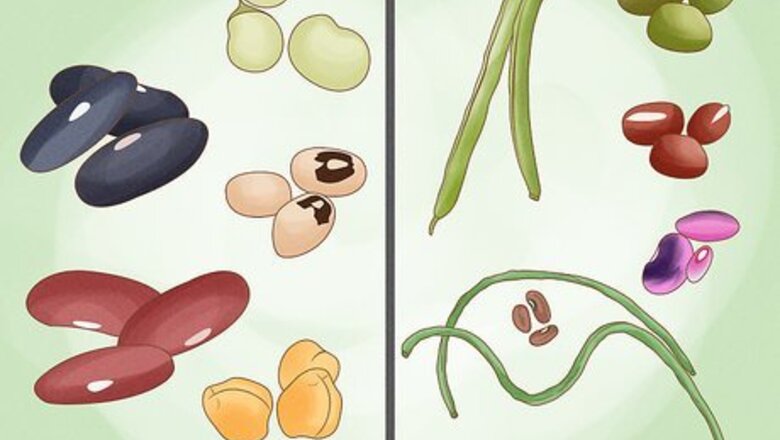
Learn the two different types of beans. In general, there are two overall types of beans: shell beans and snap beans. Both types can grow in either the pole- or bush-style, but the pods of the beans are what make them unique. Shell beans are primarily removed from their pod to be eaten, and are consumed fresh or dried to save for later. Snap beans are eaten inside their pod, and are only eaten fresh (not dried for later use). You can grow multiple styles of these beans directly adjacent to one another, because bean plants are self-pollinating and won’t cross-contaminate each other. Popular shell beans include black beans, fava beans, black-eyed peas, garbanzo beans, and kidney beans. Popular snap beans include snap (green) beans, adzuki beans, mung beans, asparagus beans, and scarlet-runner beans.
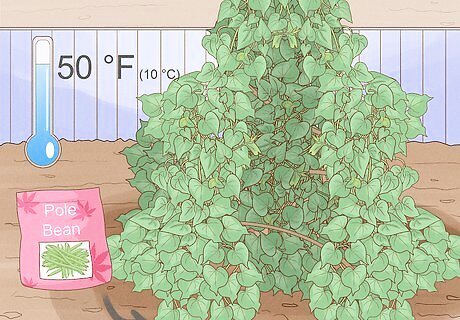
Consider growing a pole-bean variety. Pole beans are a type of beans that are vining and must be supported with a trellis or pole. Pole beans grow an average of 5- to 6-feet tall, and can grow either shell or snap bean. Pole beans generally thrive in cooler summer temperatures, as low as 50 °F (10 °C) in the summer. In the US, they thrive in the northern states. You can use whatever support system (trellis, pole, fence, arbor, etc.) that you want for pole beans.
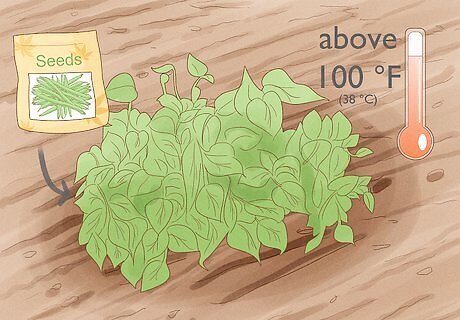
Consider growing a bush-bean variety. Bush beans are a type of beans that grow in off a bush, and do not need a trellis or pole for support. Generally, bush beans grow best in warm environments with summer temperatures reaching above 100 °F (38 °C). In the US, they thrive in the Southern states. Bush beans should be planted in large rows, requiring much more space than pole beans. A variety of bush beans called ‘half-runners’ is a bush/pole hybrid, and may require some support or placement near a fence for stabilization.
Preparing for Planting
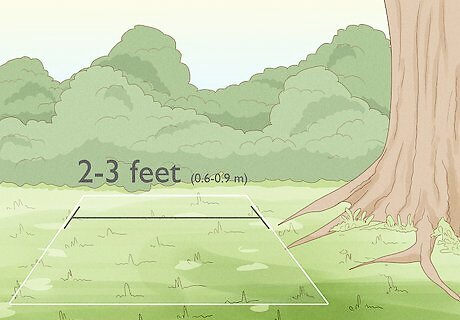
Choose your garden plot. Beans are flexible plants, able to grow in both sun and shade. When possible, choose a garden plot in most or partial sunlight. Because pole beans grow primarily upwards, you need only a small space for them. Bush beans grow outwards, meaning that they require much more space; choose a plot 2–3 feet (0.6–0.9 m) wide and as long as you desire (for the total number of beans you wish to plant).
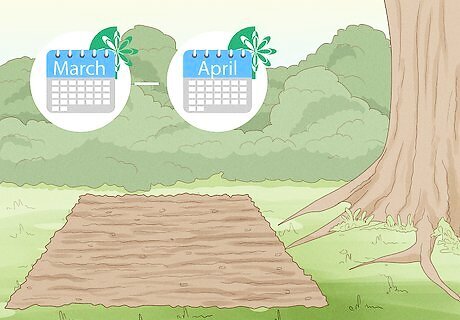
Know when to plant. Beans should be planted after the last frost has passed, typically in the spring months of March and April. Planting too early in the season will cause the seeds to freeze and die, while planting too late may not give them enough time to mature for a harvest in the fall. Check with your local agricultural extension to find out the best planting time for your area.
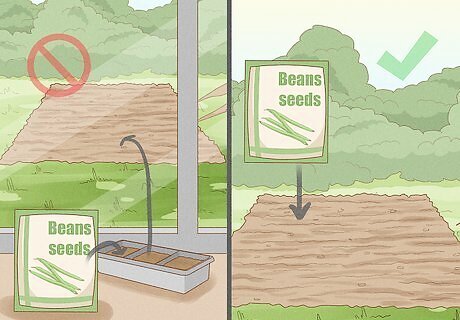
Know how to plant. Beans are one of the few plants that should not be started as seedlings indoors or transplanted into your garden. This is because they have a delicate root structure that is easily damaged, and may not survive the transfer. As a result, you should sow your seeds directly into the ground come spring.
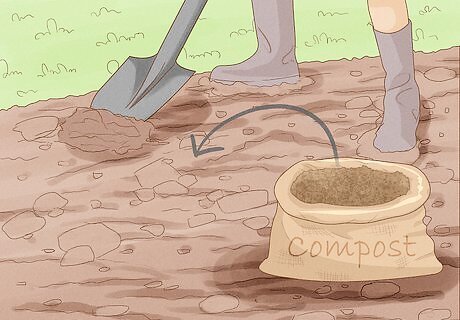
Prepare your soil. Beans grow best in soil with good drainage and lots of nutrients. To prepare your soil, mix in a garden compost and gardening topsoil into your garden plot. Use a hoe to till the soil thoroughly and break apart any clay-like chunks. Incorporating the compost into the soil will help to provide plenty of nutrients to help the beans grow. Beans are nitrogen fixing, meaning they can pull nitrogen from the air and add fertility to the soil. They do this in symbiosis with bacteria. If you have not previously grown beans on your plot, consider adding a bacterial inoculant. You can dust your seeds with it, or add some to each hole when planting.
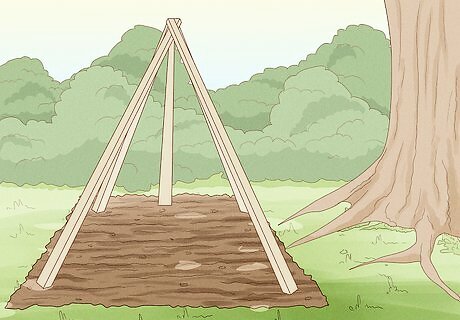
Set up your trellis. If you’re planting pole beans, you will need to put your trellis in the ground prior to planting the beans. Place the trellis, stake, or pole in the exact area you plan to plant. As the beans grow, they will naturally wind themselves around the structure for support. Dig a hole deep enough to stabilize the trellis/pole, should there be bad weather or heavy winds.
Planting Your Beans

Dig a hole. Pole beans should be planted so that there is one seed per hole, and each seed is at least 3 inches (7.6 cm) away from the next. Bush beans should be planted so that there is one seed per hole, and each seed is at least 2 inches (5.1 cm) away from the next. The hole should be 1-inch deep. Remember that bush beans need more space in between plants than pole bean as pole beans grow vertically.
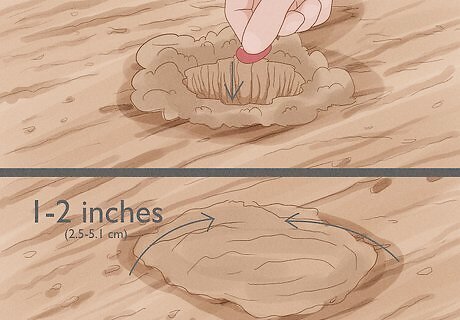
Place the seeds. Carefully put one seed in each hole you’ve dug; it may be tempting to put multiple seeds at once, but this will cause the seedlings to compete for space and nutrients as they grow, and possibly result in the death of the plant. Cover up each seed with 1–2 inches (2.5–5.1 cm) of your garden soil.
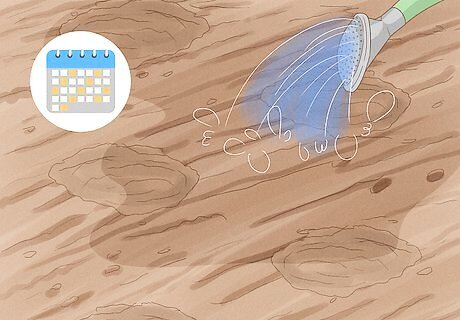
Water your seeds regularly. Immediately after planting, give your seeds plenty of water to aid in their germination. After planting, you should continue to water the seeds once every 2-3 days, so that the soil is always moist. Avoid over watering though, as too much water (leaving puddles or pools on the topsoil) will cause the seeds to rot.
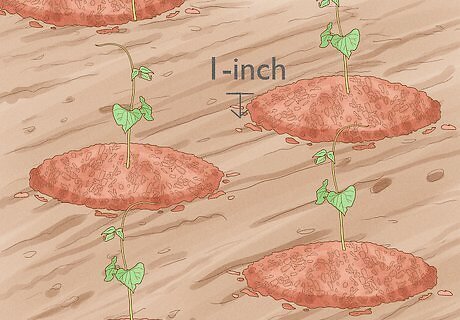
Put down a layer of mulch after the seeds sprout. Mulch is an incredibly helpful tool for new gardeners. Made from trees, leaves, or straw, mulch is a layer of shredded plant limbs you place over the topsoil in your garden. This blocks out weeds and traps in moisture, two good things for new plants. Spread a layer of mulch 1-inch thick over your garden soil after your seeds have grown several inches tall.

Fertilize your garden every four weeks. Fertilizer adds nutrients to garden soil, helping increase the growth of your beans and the overall harvest. Fertilizers are made of a combination of three primary ingredients: nitrogen, phosphorous, and potassium. Beans naturally produce a lot of nitrogen, meaning that you should look for a fertilizer that has low nitrogen content (such as a 5-20-20 mixture). Ask your local nursery worker with help on choosing a fertilizer for your beans, if you have questions. Do not add nitrogen fertilizer to the soil if you added a nitrogen-fixing bacteria. The bacteria will help the plants make their own.
Harvesting Your Beans
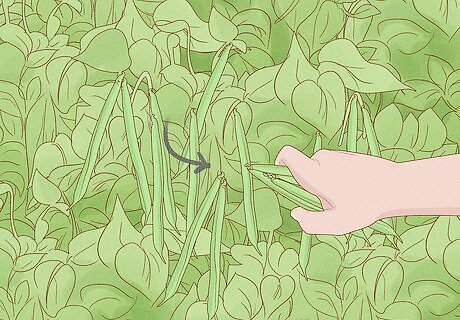
Pick bean pods before the shapes of the beans show through. If you want to eat your beans fresh, you should pick your beans when the pods are large and full. The pods should not yet show the shape of the beans, because by that stage they have begun to dry out. Harvest the pods by snapping them off at the top; don’t tear them, as this can damage the plant and prevent new pods from sprouting. If you harvest at the right time, your bean plants could continue to produce new pods for several weeks.
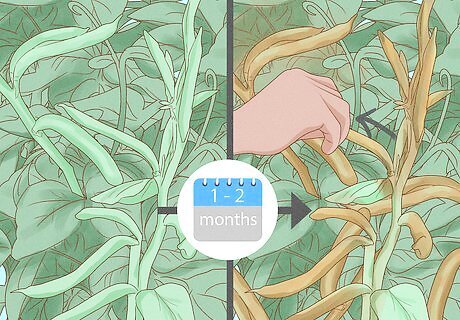
Dry your beans on the plant. If you want to dry your shell beans for later use, the process is easy: leave your beans on the plant until they are completely dry. This process usually takes 1-2 months after having reached peak ripeness. You can tell when the beans are totally dry and ready for storage, as they will rattle inside the pods.
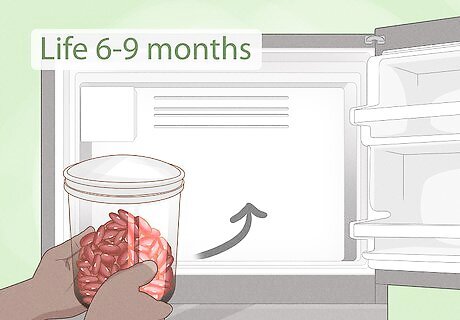
Freeze beans for later use. Fresh beans can be frozen and used later, if you don’t want them fresh but don’t want to dry them. Simply place them in an airtight container and put them in your freezer. They will remain good for 6-9 months after initially being placed in the freezer; thaw them by letting them rise to room temperature.


Comments
0 comment