
X
Trustworthy Source
PubMed Central
Journal archive from the U.S. National Institutes of Health
Go to source
A tourniquet isn't a long-term treatment, but if someone is seriously injured and bleeding profusely from a limb, applying one can slow or stop the flow of blood until the wound can be treated by trained professionals. Experts say that knowing how to use a tourniquet correctly could help you save someone's life in an emergency situation.
Assessing the Injury

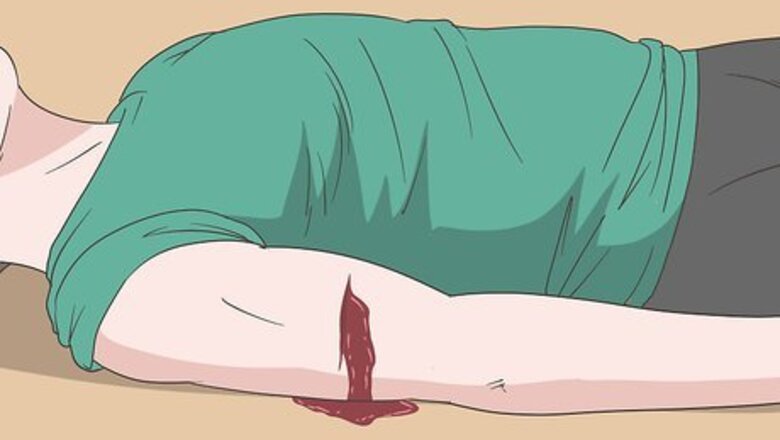
Discover where the blood is coming from. If you find yourself in an emergency situation where someone (or an animal) is severely injured and bleeding, approach with confidence and reassurance. Helping someone in a life-threatening situation is brave, but you must try to discover and assess the injury as quickly as you can. Have the person lie down and find out where the blood is coming from. Tourniquets only work on limb injuries, not trauma to the head or torso. Injuries to the head and torso require applied pressure with some absorptive material in order to slow or stop bleeding, not a tourniquet. A severely injured person may also require basic life-saving measures, such as CPR (clearing airways, mouth-to-mouth resuscitation, chest compressions) and shock prevention. The term "tourniquet" originated in the late 1600s from the French word "tourner," which means to turn or tighten.
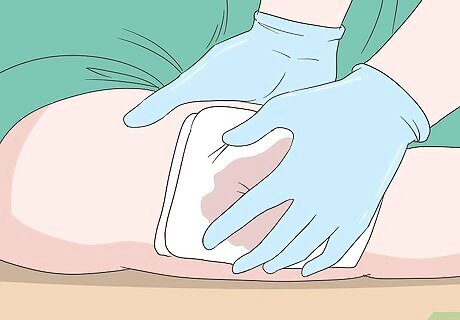
Apply pressure to the wound. The majority of external bleeding injuries can be controlled by direct pressure. Therefore, grab something absorptive and preferably clean, such as a sterile gauze pad (although it may have to be your own shirt), and place it over the wound while applying significant pressure. The aim is to plug the wound and promote blood clotting, because blood will not coagulate while freely flowing. Gauze pads (or something absorptive such as terrycloth or cotton fabric) work well to prevent the blood from escaping the wound. If the gauze, towel, or article of clothing soaks through with blood, add another layer — don't take off the original make-shift bandage. Peeling off a blood-soaked bandage from the wound removes the quickly forming clotting factors and encourages bleeding to resume. However, if the wound is too severe and the bleeding cannot be stopped with applied pressure, then (and only then) should you consider a tourniquet. If left uncontrolled, bleeding will eventually lead to shock, then death. If at all possible, use latex or similar types of gloves while in contact with the blood of another person as it will help stop the transmission of certain diseases. Even if you have to use a tourniquet, leave the make-shift bandage on the wound because it will help promote clotting when the blood flow slows down. Elevate the wound if possible. Often the combination of pressure and reducing the pull of gravity on the flow of blood in the vessels will be enough to stop the bleeding and allow clot formation.

Calm the injured person down. In any emergency situation, panic is a detriment, so try to calm the person down in a reassuring tone. Prevent them from looking at their wound and the bleeding if you can, as many people are frightened by the sight of blood. You should inform them of your actions though, such as when you apply a bandage and/or a tourniquet. It's also important for the person to know that medical help is on the way. Try to make a quick 911 emergency phone call (or ask a bystander) as soon as you are able. In most severe injuries, the use of a bandage and/or tourniquet is merely buying time so that trained medical personnel can take over and do what's necessary. Make the injured person as comfortable as possible while you're giving them help. Put something padded underneath their head.
Applying the Tourniquet

Select an appropriate material. If you have a well-designed medical tourniquet at your disposal then that's great, but in most emergency situations you'll have to improvise. In the absence of a specially designed tourniquet, choose something that is strong and pliable (although not too stretchy), but long enough to tie around the injured limb. Good choices would be a necktie, bandana, leather belt, straps from knapsack or handbag, cotton shirt or long stocking. To minimize cutting into the skin, ensure that the improvised tourniquet is at least an inch wide and preferable two to three inches in width. If the tourniquet is for a finger, a somewhat smaller width is fine, but avoid string, twine, dental floss, wire, etc. In an emergency situation with lots of blood, you need to resign yourself to the fact that you'll be getting blood on your clothes, so don't hesitate to use an article of clothing for a tourniquet.
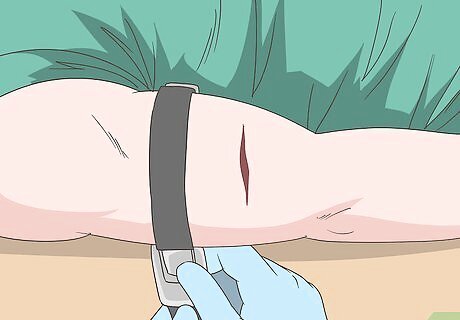
Apply the tourniquet between the heart and injury. Place your tourniquet around the injured limb, between the open wound and the heart (or proximal to the wound) — the purpose is to cut off the strong blood flow within arteries leaving the heart, not the more superficial veins returning blood back to the heart. More specifically, place your tourniquet about two to four inches away from the edge of the wound. Don't place it directly over the wound because the arteries upstream from the injury will still drain into and out from the open wound. For wounds that are just below a joint (such as the elbow or knee), place your tourniquet just above and as close to the joint as you can. Your tourniquet should have some padding underneath it to prevent skin damage, so use the victim's clothing (pant leg or shirt sleeve) to place under it if you can. If your tourniquet is long enough, wrap it around the injured limb numerous times, keeping it as flat as possible. You want the tourniquet to stop blood flow in the arteries, but not cut into and damage any soft tissues while doing so.
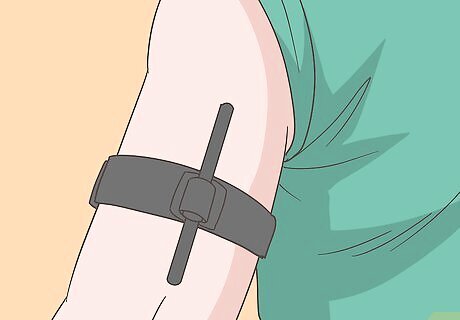
Use a stick or rod for tightening. Tying a regular knot after you have tightly wrapped your tourniquet may not be sufficient to control the flow of blood, especially if the material expands a little when wet. Use some sort of elongated wooden or plastic stick or rod (at least four inches long) as a torsion device. First, tie a half-knot with the tourniquet, then place the rigid object on top before tying a full knot over it. You can then twist the elongated object until the tourniquet is tight around the injured limb and the bleeding stops. Small tree branches, a screwdriver or wrench, thin flashlights, or thick marker pens all work well as torsion devices for tourniquets.
Reducing Complications
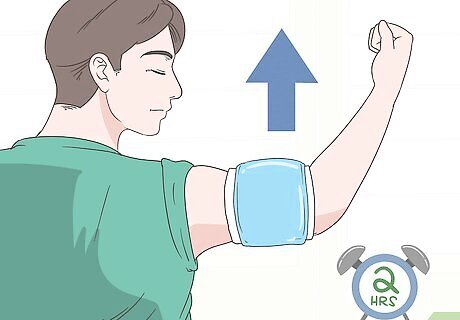
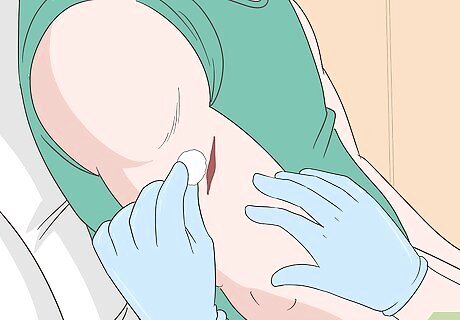
Don't leave the tourniquet on too long. Tourniquet use is temporary and short-term only, although there is no research that indicates exactly the time limit before the lack of blood supply starts to cause tissue death (necrosis), as all people are physiologically a little different. If necrosis sets in, then leg amputation is very likely. As a general guideline, two hours is considered the length of time a tourniquet can be tied before neuromuscular injury begins (loss of normal function) and perhaps three to four hours before necrosis becomes a serious concern. However, in an emergency situation with no medical help close by, you may have to make the choice of sacrificing a limb to save a life. If you think medical help will take longer than two hours to arrive, then cool the limb down with ice or cold water (while elevated) if you can — it may help delay tissue injury and loss of function. Mark the victim's forehead with a "T" to indicate a tourniquet has been applied, and also note the time when it was applied so medical personnel know.
Keep the wound as clean as you can. Ideally, your tourniquet will stop or considerably slow down the flow of arterial blood from the wound, although you should still take care to prevent any debris from landing on the injury. Any open wound is at risk of infection. Before applying a pressure bandage, rinsing the wound with clean water is a good idea, but once the gauze or bandage is applied you shouldn't remove it. However, you can prevent debris from landing on the make-shift bandage by covering it with a blanket or article of clothing. If you don't have any latex gloves to wear, look around or ask any bystanders for some hand sanitizer before you touch the wound. If you have sterile saline available, this is the best for cleaning wounds. Otherwise, alcohol, vinegar, natural honey, hydrogen peroxide, and bleach are all good antiseptics that may be available for you to use on your hands or the victim's injury before you dress it.
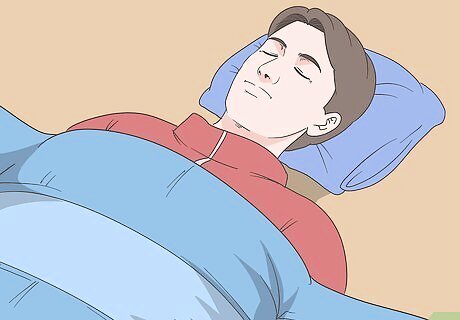
Provide warmth and hydration. If medical help is delayed for whatever reason, then the victim is likely to experience some shivering and severe thirst from blood loss. The degree to which they will experience these issues depends on the environmental conditions and amount of lost blood. Find a blanket or some clothing to keep the victim warm and give them water or juice to drink. Shivering may also be a sign of hypovolemic shock, which also causes rapid breathing, confusion, anxiety, clammy skin, bluish coloring, and loss of consciousness. There may not be much you can do to prevent shock, but you can tell the medical personnel your observations when they arrive. The greater and more rapid the loss of blood, the more severe the shock symptoms. Post-tourniquet syndrome typically lasts from one to six weeks and includes weakness, numbness, pallor, and stiffness in the injured limb.


Comments
0 comment