
Prep Your System for the New Refrigerant
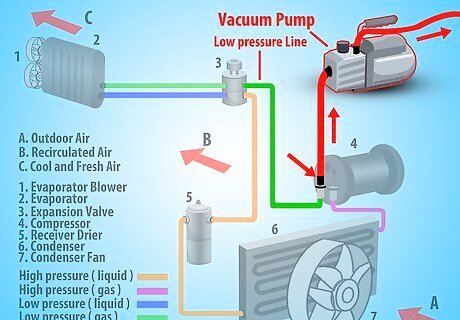
Make sure that all of the old refrigerant has been vacuumed out of your air conditioning system. It's best to have a mechanic do this both for maximum safety and to ensure safe refrigerant disposal. Your mechanic will know the required EPA procedures for removing and getting rid of old refrigerant. Have the mechanic remove any remaining mineral oil from the system. Make sure that the mechanic flushes the system with a solvent that's compatible with R-134a.Retrofit Air Conditioning in Cars to New Refrigerant Step 1Bullet1.jpg The mineral oil that is put back into your system should match the old oil. If you had PAG oil, then the mechanic should use PAG oil again.Retrofit Air Conditioning in Cars to New Refrigerant Step 1Bullet2.jpg
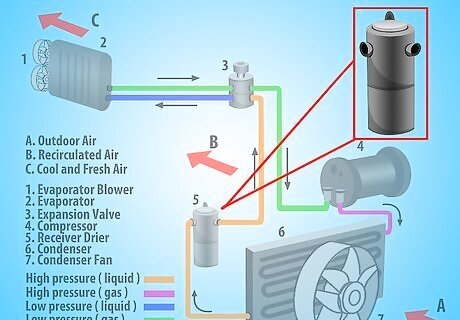
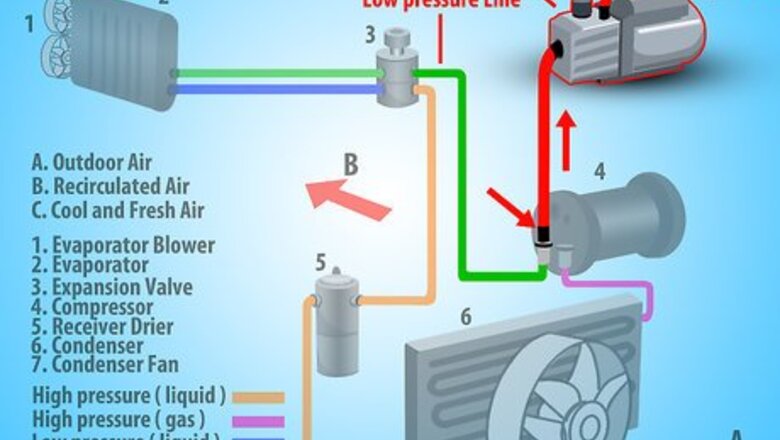
Install an accumulator or receiver-drier that contains desiccant. The desiccant helps to remove moisture that may accumulate in your A/C system. If your A/C system uses an accumulator, you'll find it at the evaporator outlet.Retrofit Air Conditioning in Cars to New Refrigerant Step 2Bullet1.jpg You'll find the receiver-drier in systems that use an expansion valve to control refrigerant flow. It's connected to the high-pressure liquid line, between the condenser and the expansion valve.Retrofit Air Conditioning in Cars to New Refrigerant Step 2Bullet2.jpg Make sure that your desiccant is compatible with R-134a refrigerant.

Replace the O-rings, which are usually found at every connection. Do this even if you don't think that you need to replace them so that you don't have to do it later if they don't seal. When you remove an old O-ring, tape it to a piece of paper. Write down exactly where that O-ring came from and keep the papers for a while.Retrofit Air Conditioning in Cars to New Refrigerant Step 3Bullet1.jpg If you have a leak at a connection, grab the O-ring that you took replaced. Double-check to make sure that you replaced the old O-ring with a new O-ring that was the right size. Most A/C leaks are caused by O-rings that aren't properly installed.Retrofit Air Conditioning in Cars to New Refrigerant Step 3Bullet2.jpg
Double-check your hoses. The hoses that you used with the R-12 refrigerant should work as long as they aren't cracked or damaged. If they are damaged, replace them.
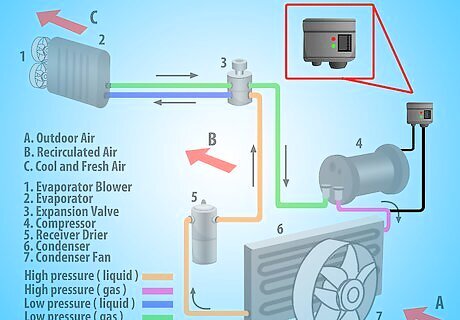
Install a high-pressure cutout switch if you don't have one or replace your old one. When your system pressure gets too high, the cutout switch will shut off the compressor to keep from damaging your A/C parts and to prevent the system from venting refrigerant.
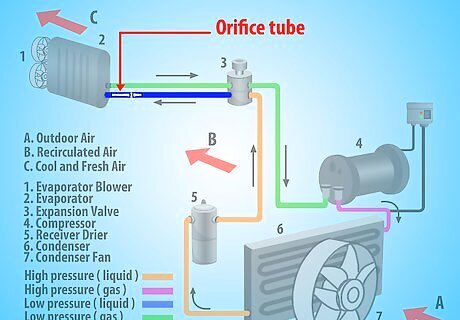
Check the orifice tube. You'll find this tube connected to the high-pressure side at or near the evaporator. In some cases, you may find it in the condenser outlet. Don't try to clean an orifice tube. You'll need to replace it instead.
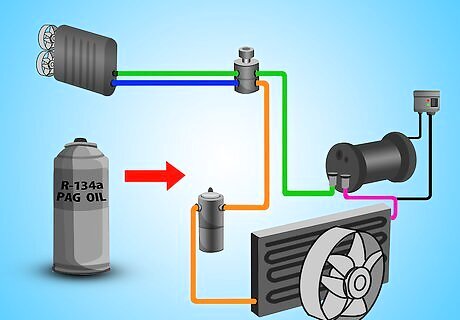
Add the appropriate PAG oil if your mechanic did not. Make sure to use the viscosity recommended in your car's operating manual.
Add the New Refrigerant
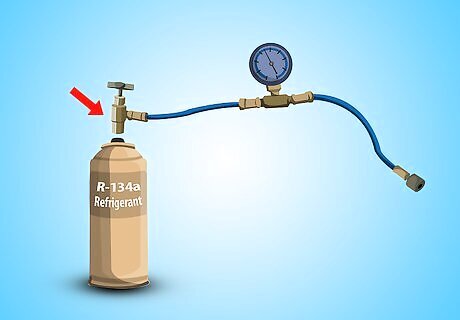
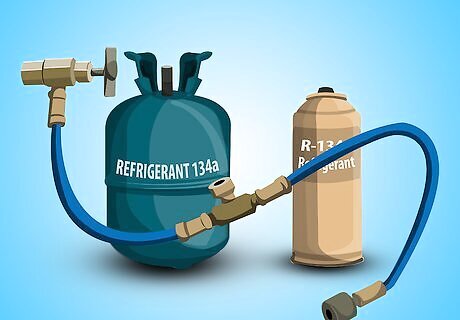
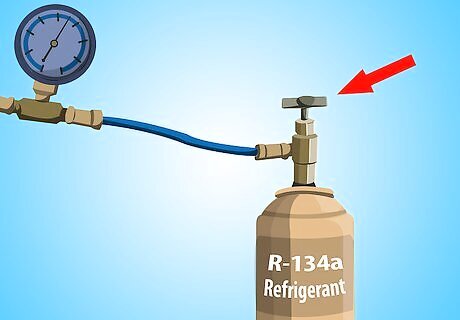
Connect the recharge valve and service hose to your refrigerant can.
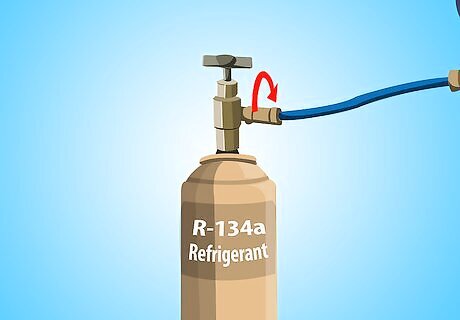
Turn the valve on the service hose. Doing this will puncture the top of the can.

Twist the valve back out slowly to release a little bit of refrigerant into the hose. The refrigerant will push air out of the hose so that it doesn't get into your air conditioning system.
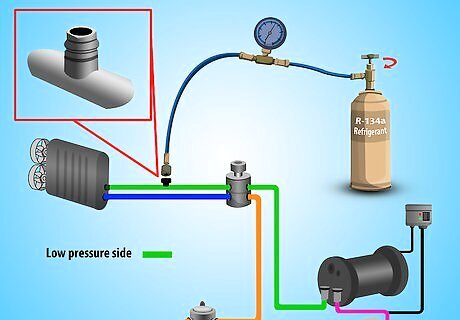
Close the valve to keep more refrigerant from escaping. Connect the other end of the service hose to the low service fitting on the air conditioner.
Hold your refrigerant can upright so that the A/C doesn't suck liquid into the system. You only want vapor to be pulled into your A/C.

Attach a high pressure gauge to the high service port. The gauge will help you to make sure that your recharge is accurate.
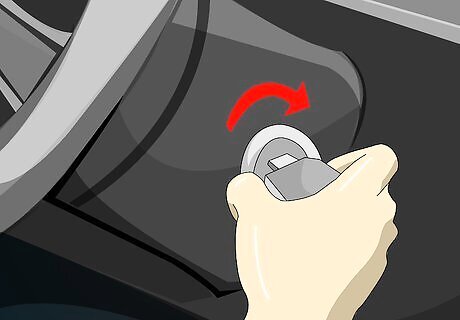
Start your car engine. Turn the air conditioner on its maximum setting.
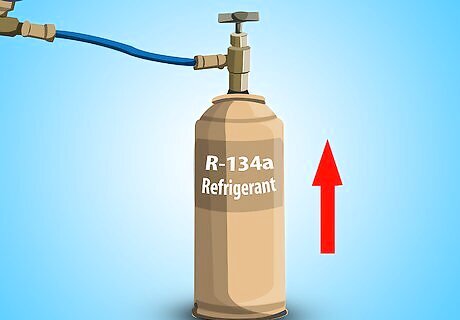
Open the valve on your refrigerant and let the A/C extract vapor from the can. The extraction may take up to 10 minutes. The air blowing from your car vents should grow gradually colder.

Watch your high pressure gauge. When the gauge reads 225 to 250 PSI, close the valve on your refrigerant can. Always close the valve before disconnecting the can so that you don't spray refrigerant into the atmosphere. Generally, your A/C will take in about 12 ounces (355 ml) of refrigerant. If your system isn't fully charged after your refrigerant can is depleted, then you can add another can of refrigerant until your gauge reads in the right PSI range.Retrofit Air Conditioning in Cars to New Refrigerant Step 16Bullet2.jpg
Finish the Job

Store your refrigerant can with the service hose attached. Refrigerant doesn't go bad, so you can use what remains in the can another time. Just make sure to store it in a cool place so that the can doesn't overheat and explode. You can also look into selling refrigerant back to a reclaiming facility or to a certified technician.
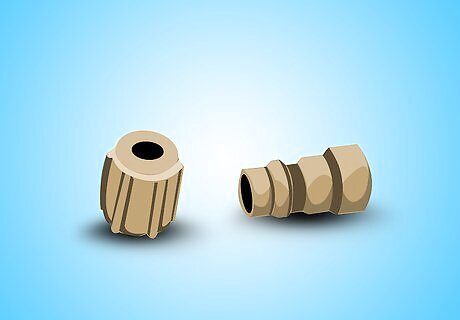
Install R-134a fittings on the upper and lower service ports. Doing this will prevent cross-contamination of refrigerant, and it is required by federal law.


Comments
0 comment