views
- Measure from the end of your non-dominant hand to the corner of your mouth on your dominant side. Then, add 2 in (5 cm) to get the arrow length.
- Mark the arrow with your measurement and slice it with a rotary cutter.
- Alternatively, use an arrow saw to cut down the arrow to your desired length.
Getting Arrow Measurements

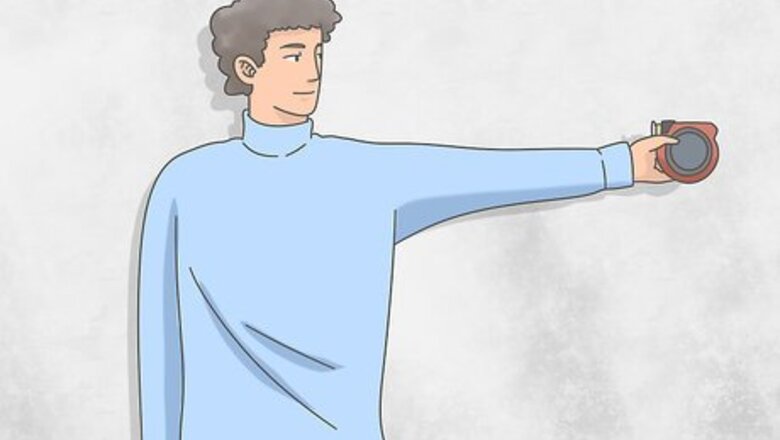
Hold a tape measure out to your side with your non-dominant hand. Grip the tape measure in your nondominant hand so the tape points toward your wrist. Fully extend your nondominant arm out to your side so it’s parallel to the ground to simulate holding a bow. Make sure you can easily grab and pull the tape toward you, and reposition the tape measure in your hand if you can’t. Avoid using a fabric tape measure since it may give you an inaccurate measurement.
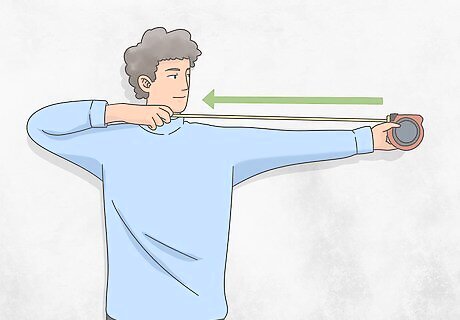
Pull the tape to the corner of your mouth with your dominant hand. Grab the end of the tape with your dominant hand and slowly pull it out. Keep pulling the tape until the end touches the corner of your mouth on the dominant side of your body. For example, pull it to the right corner of your mouth if you’re right-handed. Once the tape measure is fully extended, look at the measurement. Pulling the tape measure to the corner of your mouth simulates drawing a bowstring so you can get an accurate measurement for your draw length.Tip: Put your nondominant thumb on the tape measure before checking the measurement so it doesn’t retract. Otherwise, you’ll have to measure again.
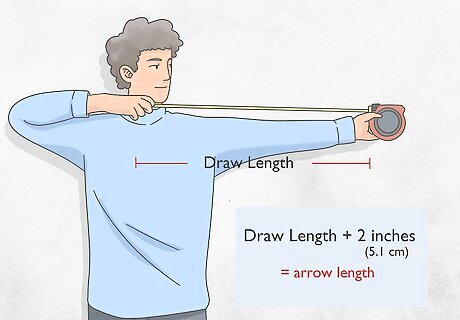
Add 2 in (5.1 cm) to your measurement to find the arrow length. If your arrow is too short, it could jam your bow or cause the arrow to shoot improperly. Take the draw length measurement you just found and include an extra 2 inches (5.1 cm) to ensure that the arrows are long enough for your bow. For example, if your draw length measurement was 29 inches (74 cm), then the length of your arrow should be 31 inches (79 cm).
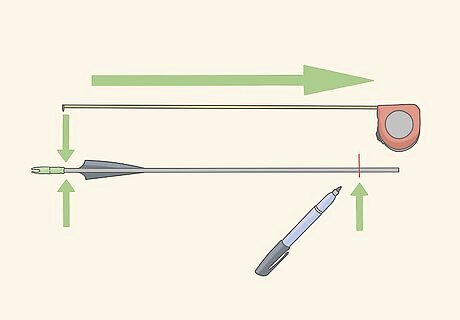
Transfer your measurement onto the arrow shaft. Start your measuring tape at the back of the arrow shaft and extend the tape toward the front. When you reach the measurement you found, use a marker to draw a line or dot on the arrow shaft so you know where to cut. Rotate the arrow 180 degrees and make another mark in the same place to use as reference. Don’t include the arrow’s nock in the measurement since nock sizes vary between arrows. Start at the base of the arrow shaft instead.
Rotary Cutter
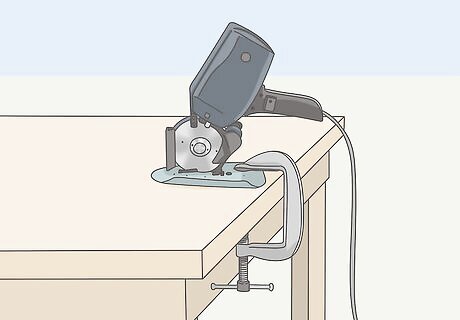
Clamp a rotary cutter horizontally over the edge of the table. A rotary cutter is a handheld multitool that spins quickly to cut through materials. Use a rotary cutter with a circular carbide blade so it can easily cut through the carbon arrows without deforming them. Lay the rotary cutter horizontally so the blade is vertical and hangs over the edge of your work surface. Use a C-clamp to secure the tool to your work surface so it doesn’t shift around while you’re using it. You can buy a rotary cutter from your local hardware store.Tip: Make sure you can easily access the power switch on the tool so you can turn it on and off when you need it.

Position the hose of a shop vacuum behind the rotary blade. Cutting carbon arrows creates dust that can cause irritation if you breathe it in, so it’s easiest to vacuum it immediately to prevent it from spreading. Set the end of the hose on your work surface so it’s directly behind the rotary cutter’s blade. Connect the other end of the hose to the intake port on your vacuum. You can also use your regular vacuum if you don’t have a shop vacuum available. Always put on safety glasses and a face mask before turning the machines on. Carbon dust can cause irritation if it gets in your eyes or lungs, so it’s important to stay protected while you work.
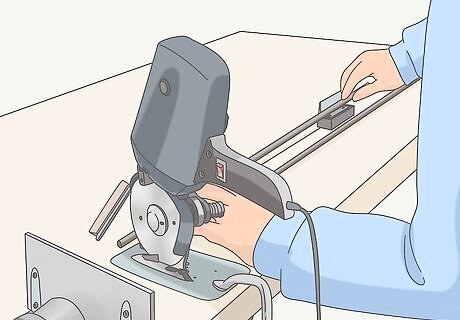
Cut the arrow along the mark you made. Once your rotary tool is spinning at full speed, carefully guide the arrow so the blade lines up with the marks you made earlier. Push the shaft gently against the blade so it cuts into the carbon. Continue pushing the arrow into the blade until it cuts completely through the other side. If the blade has difficulty cutting the arrow straight through, try rotating the arrow while you hold it against the blade to make it easier.
Arrow Saw

Attach a shop vacuum hose to the port on the back of an arrow saw. Many arrow saws have a port on the back where you can attach a vacuum hose to collect dust. Push the end of a shop vacuum hose into the dust collection port on the arrow saw until it’s secured in place. Attach the other end of the hose to the intake port on your vacuum. You can buy arrow saws from hunting supply stores or you can order them online. Arrow saws usually cost around $130 USD. You can use your regular vacuum if you don’t have access to a shop vacuum. Always wear safety glasses and a face mask while you’re cutting arrows. Carbon arrows create carbon fiber dust when you cut them, which can be irritating if you inhale it or if it gets in your eyes. Wear safety glasses that cover your eyes completely and put on a face mask to protect your mouth and nose.Tip: If your arrow saw doesn’t have a port for a vacuum hose, then set the hose as close to the blade as you can.

Position the arrow on the saw so the back sits inside of the notch on the support. Your arrow saw will have a support with a notch on it so your arrow doesn’t roll around while you’re cutting it. Set the back of the arrow in the notch and line up the front of the arrow so the mark you made on the shaft lines up with the saw blade. Your arrow saw may have multiple supports on it. If so, make sure the arrow sits in all of the notches to ensure you make a straight cut.

Rotate the arrow while it’s against the saw blade to cut completely through it. Once your arrow saw is running at full speed, slowly push the arrow shaft into the blade. Once it starts cutting into the arrow, spin the arrow so the blade cuts around the circumference of the shaft. As soon as you around the circumference of the arrow, the end will fall off and you can turn off your saw. Your arrow saw may be powerful enough to cut through the shaft without rotating it.


Comments
0 comment