views
Holding a Sitar
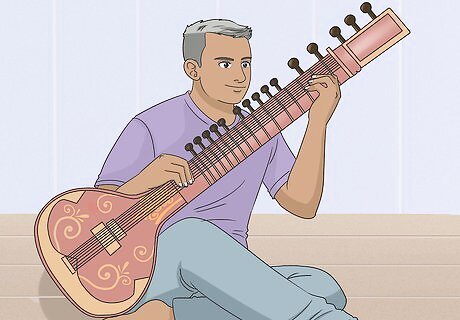
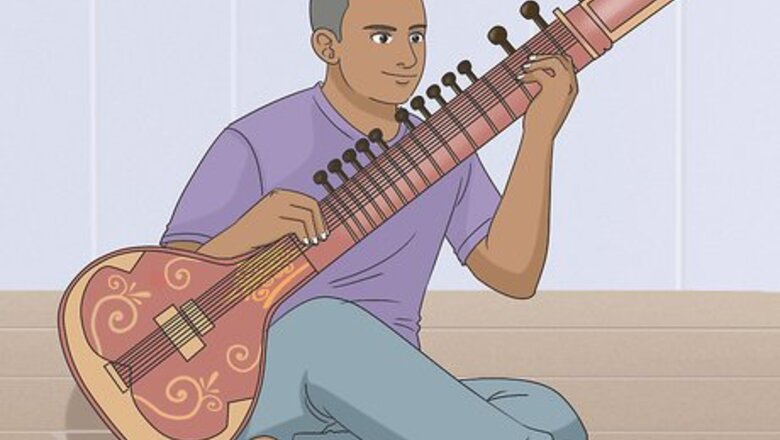
Get into a comfortable cross-legged position on the floor. Unlike with other string instruments, you need to play the sitar while sitting on the floor so you can use your whole body to support the instrument. Wear loose-fitting pants to reduce the likelihood of your legs falling asleep. Take off your shoes too, since you'll be supporting the body of the sitar with one of your bare feet.Tip: Sit on a pillow or blanket to make yourself more comfortable if you’d like.
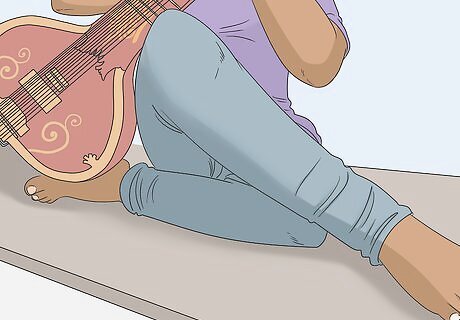
Lift up your right knee, then rest the body of the sitar in the arch of your left foot. First, lift your right knee up so it's directly in front of you, with your right foot still touching the floor. Your left leg should be bent under your right leg so the bottom of your left foot is facing up. Place the body of the sitar, also called the gourd, over the bottom of your left foot so it is resting in your foot’s arch. Keep your right knee raised—you'll use it to hold up the neck of the instrument. You can slightly extend your right foot out in front of you if that's more comfortable. Drape a cloth over your foot if you're worried about the oils from your foot damaging the body of the instrument.
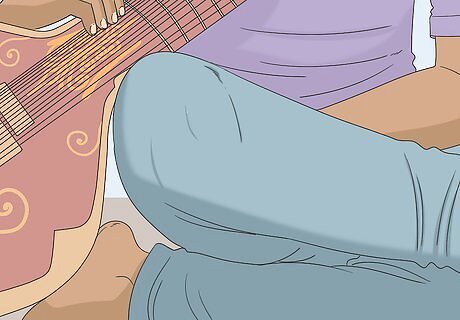
Support the neck of the instrument with your right knee. Rest your right knee in the crook of the instrument right where the neck and body meet. With your knee like this, the neck of the guitar should be at a 45-degree angle.
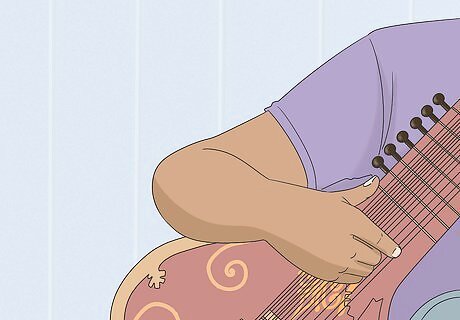
Rest your right arm on top of the sitar’s body. Your right hand should be at the base of the neck. Place your right thumb on the back of the instrument’s neck, just below the bottom fret. Position the rest of your fingers so they’re hovering above the strings on the front of the instrument. Remember to sit up straight and avoid leaning on the instrument with your arm.
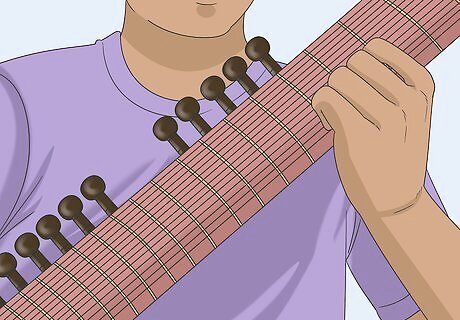
Hold the neck of the sitar with your left hand. Place your left thumb on the back of the neck. Hold the rest of your fingers over the strings on the front.

Place a mizraab, or metal pick, on your right index finger. You’ll use this to pluck the strings on the sitar. A mizraab will slip over the end of your index finger and have a metal tip at the end for plucking. It should feel snug. If it feels loose, squeeze the metal sides to tighten it around your finger. You can purchase a mizraab online or at any store that sells sitars.
Learning the Strings and Frets
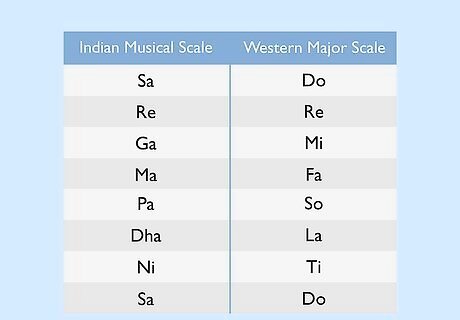
Learn the Indian musical scale. The indian musical scale is similar to the Western major scale. Instead of “Do, Re, Mi, Fa, So, La, Ti, Do,” the Indian names for the notes are “Sa, Re, Ga, Ma, Pa, Dha, Ni, Sa.” Each string on the sitar corresponds with one of these notes. Since India uses a relative tuning system, the names of the notes that correspond with each string never change, regardless of what key you’re tuning the instrument to. Sa is always the tonic note (the first note of a scale). For example, if a sitar is tuned to the key of C, then Sa is C.
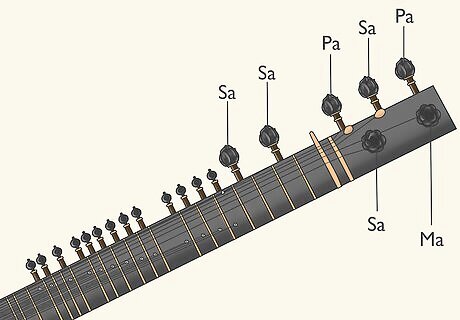
Familiarize yourself with the top strings on the sitar. The sitar has 18-21 strings in total: 6-7 top strings and 11-14 bottom strings. The exact number of strings depends on the type of sitar. Similar to a guitar, you’ll notice that the strings are attached to pegs. These pegs are used for tuning. Each of the top strings on the sitar is tuned to a different note. These notes can change depending on the key that the sitar is tuned to, but usually sitars are tuned to the key of C for beginners. When tuned to the key of C, the notes for each string are: First string (closest to the floor): F one octave below middle C (Ma) Second string: C one octave below middle C (Sa) Third string: G (Pa) Fourth string: C two octaves below middle C (Sa) Fifth string: G one octave above the third string (Pa) Sixth string: C (Sa) Seventh string: C one octave above middle C (Sa)
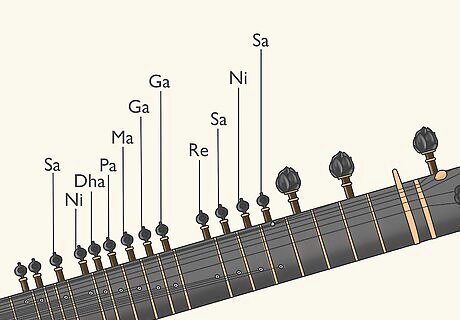
Don’t worry about playing the bottom strings as a beginner. The 11-14 bottom strings on a sitar, called the sympathetic strings, are what produce the instrument’s distinct vibratory tone. When you play the top strings, the bottom strings vibrate and produce their own sound. You don’t need to play the bottom strings with your finger, although experienced sitar players sometimes do to create special effects. When you're first learning the sitar, it will be easier to play without the bottom strings.

Practice using the sitar’s frets. The frets are the curved metal pieces all along the neck of the instrument. They allow you to play a wide variety of notes at different octaves. To use the frets, press the top strings into them with your left index finger. While you're playing, you'll only press one string into one fret at a time. Each fret corresponds with a different note depending on which string you're using, but the frets themselves won't produce sound on their own. The sound comes from plucking the strings with the mizraab. The frets just alter the note. The notes for each fret changes depending on which string you're pressing against them. For example, if your sitar is tuned to the key of C, the notes for each fret on the first string in order from the first fret (the fret furthest from the body) to the last would be: Ma, Pa, Dha, Dha, Ni, Ni, Sa, Re, Ga, Ga, Ma, Ma, Pa, Dha, Ni, Ni, Sa, Re, Ga. The notes for each fret on the second, third, fourth, fifth, sixth, and seventh strings would be different.
Playing Notes

Use your mizraab to pluck the top strings at the base of the neck. Pluck one string at a time with the mizraab. When you pluck one of the top strings, it will produce the corresponding note. When you’re playing multiple notes in a row, pluck the strings using a back and forth motion with your finger, similar to strumming a guitar. This back and forth is called the “Da” and “Ra” stroke. When you pluck toward yourself, it's called “Da.” When you pluck away from yourself, it's called "Ra." Move all of your fingers back and forth, not just your index finger with the mizraab on it. However, only pluck the strings with the mizraab—your other fingers should just hover above the strings.

Press the strings against the frets with your left index and middle finger. First, choose which top string you want to pluck. Then, use your left index finger to press that string into one of the frets, depending on which note you want to play. Position your finger just behind the fret you’re using. Only use one finger at a time to press the strings against the frets.Tip: Use your middle finger to press a string against the fret whenever you’re moving back up or down the frets during a song. You’ll be able to play faster that way than if you just used your index finger.
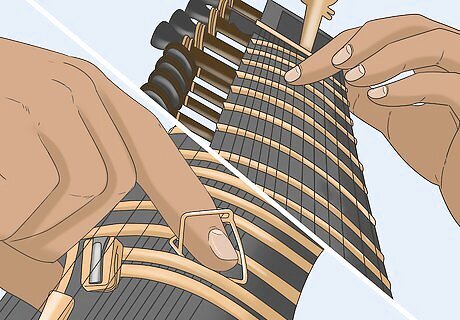
Pluck a string while pressing down on a fret to play a note. Once your left index or middle finger is pressing one of the strings against a fret, pluck the same string at the base of the instrument to produce a note. Then, lift up your finger to release the string from the fret. For example, if your sitar is tuned to the key of C and you want to play an F note, you could pluck the first string while pressing it against the first fret. In the key of C, the first fret for the first string is “Ma,” and “Ma” is the name of an F note in that key.
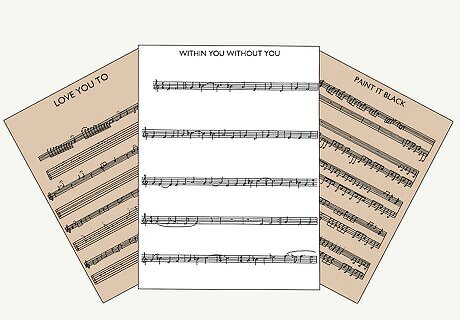
Learn the different notes so you can start playing full songs. The right strings and frets to play to produce a certain note will depend on how your sitar is tuned. Each key will have a different arrangement of notes. To read sheet music and follow along to songs, you’ll need to know where the different notes fall on the frets, which can take time and practice. By practicing the sitar every day and looking up the notes online as you go, you can start memorizing them and playing faster! You can find free sitar sheet music online. There are also popular songs featuring the sitar that you can practice, like "Love You To" and "Within You Without You" by the Beatles and "Paint it Black" by the Rolling Stones.


Comments
0 comment