
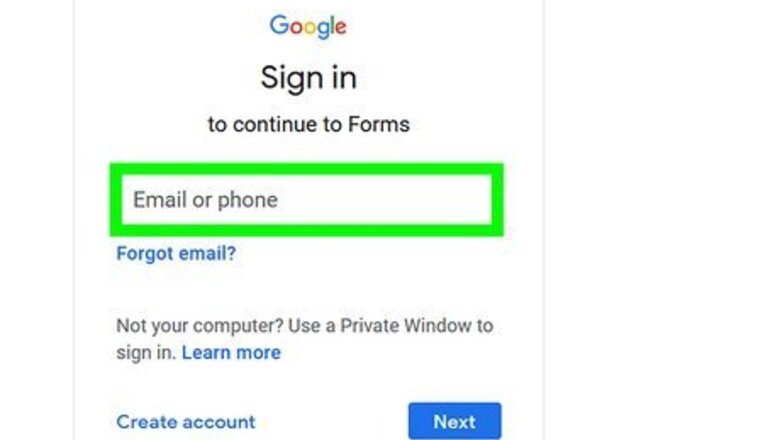
Sign in to Google Forms.
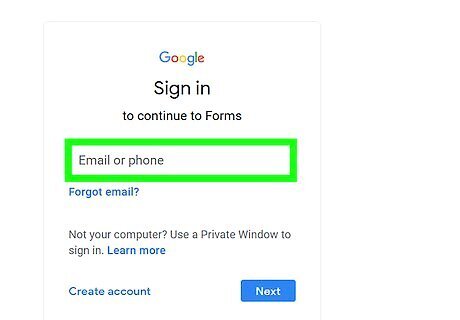
Go to https://docs.google.com/forms and sign in. Once you sign in with your Google account, you'll see a list of forms you've created or have access to.
Start a new blank form.
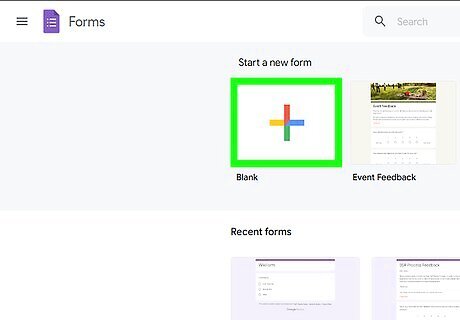
Click the + to create a blank form. You'll see it at the top-right corner.
Title your quiz.
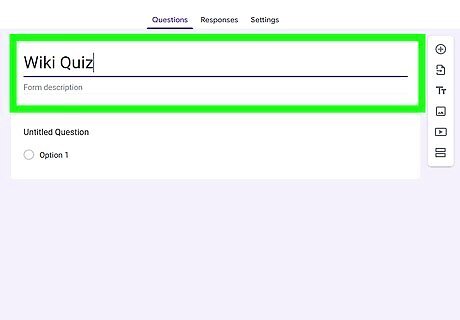
The title you enter at the top will be displayed to people taking the quiz. Be sure to choose something descriptive for the title so users know which quiz they are taking. You can also add a description below the title. For example, if you're giving an open-book quiz, you can enter the chapters or pages referenced by the quiz questions.
Add your quiz questions.
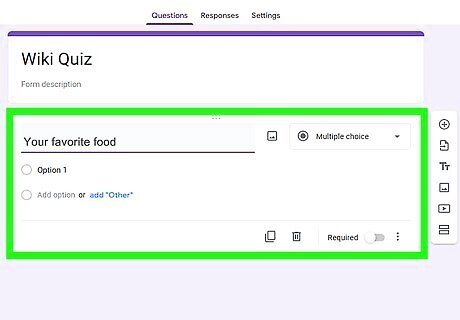
Type your first question into the "Untitled Question" field. You can then use the drop-down menu to select the answer format, such as multiple choice, checkboxes (for questions with multiple correct answers), short answer, paragraph, file upload, and more. If you don't want people to be able to skip the question, click the "Required" switch to make the question required.
List the answers for each question.
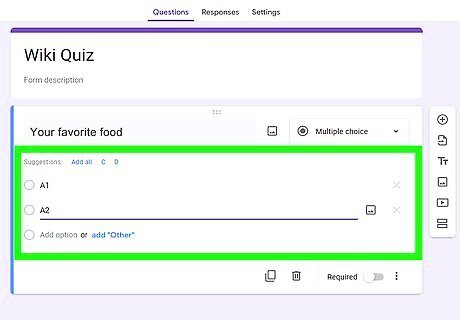
Adding the correct answer for each section will help you grade answers. It will also be helpful if you decide to share correct answers with the people taking the quiz.
Make the form a quiz.

Making the form a quiz allows you to grade the answers. You can easily make a form a quiz and choose whether to instantly grade the results or wait for your manually approval: Click the Settings tab at the top. Click the "Make this a quiz" toggle switch.
Customize your grading preferences.
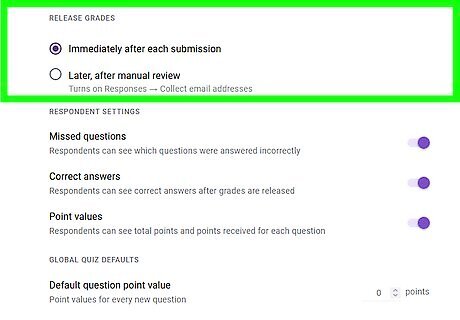
You have several options for grading this quiz. The "Release Grades" section determines when each user will see how they've done on the quiz. You can also choose options under "Respondent settings," such as whether to display questions answered incorrectly, and whether to display correct answers once the quiz is graded. To release grades automatically once a user submits the quiz, select Immediately after each submission. If you'd rather grade the quizzes your self and then manually release the grades, choose Later, after manual review.
Customize the colors and fonts.
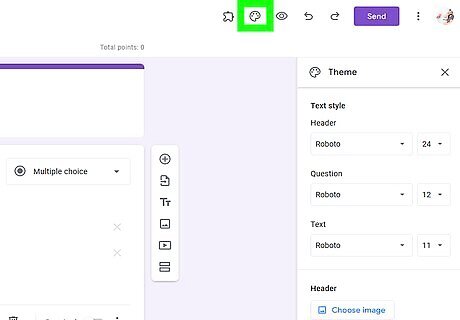
Click the palette icon at the top to choose colors, add a header image, and more. This area is a great way to add branding to your quiz or just spruce it up a bit.
See a preview before sharing the quiz.
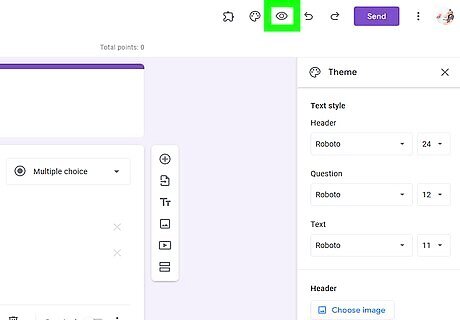
Click the eye icon at the top-right to open the quiz in view mode. This shows you how the quiz will look to those taking it.
Share your quiz.
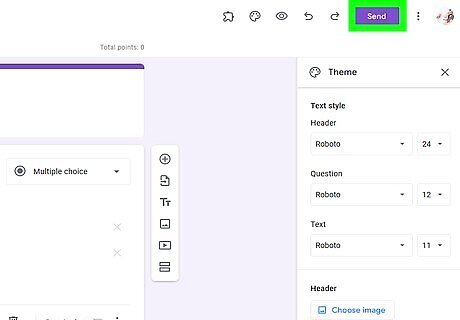
Now that you've created a quiz, it's time for people to take it. Click the Send button at the top-left, fill out the "Send form" window, and click Send to share the quiz.
View and manage responses.
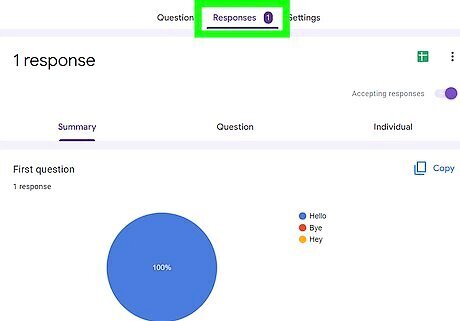
Click the Responses tab at the top to see responses to the quiz. You can manage responses in your browser, or click the three dots and choose Select response destination to choose another location, such as a Google Sheets file. If you want to stop accepting quizzes at any point, click the "Accepting responses" switch here.


Comments
0 comment