
Cutting out the Pattern

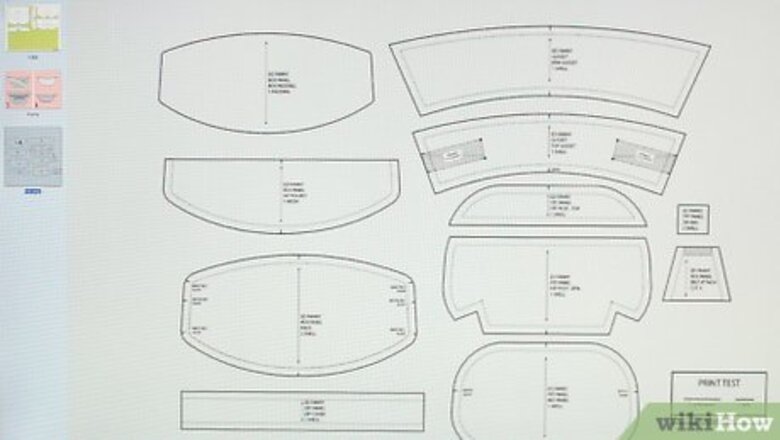
Choose a pattern to make the fanny pack. Following a pattern will help to ensure that your fanny pack’s pieces are precisely cut and fit together well. There are many free fanny pack patterns available online, so you won’t have to purchase one if you don’t want to. Search for a “free fanny pack pattern" and choose one that you like. Patterns range from easy to advanced, so make sure to choose a pattern that matches your skill level. You can opt for a fanny pack that only has one pocket or multiple pockets depending on how big you want it to be.
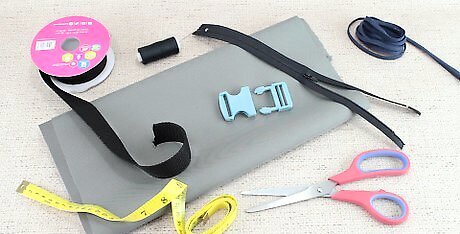
Purchase the required materials for your pattern. The pattern you choose will tell you how much fabric you’ll need and what other materials to buy as well. However, in general, making a fanny pack requires: ⁄4 yd (0.23 m) of durable fabric, such as canvas, vinyl, or denim 42 in (110 cm) of webbing (for the belt) 1 buckle 1 zipper Double fold bias tape Thread that matches your fabric
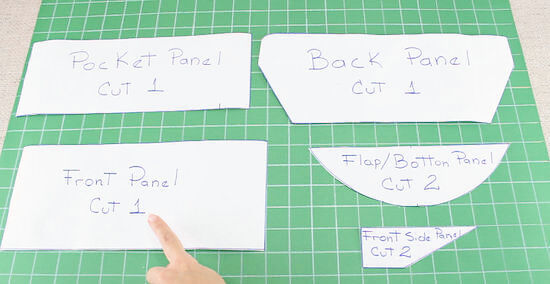
Cut out the paper pattern pieces with a sharp pair of scissors. Check to see what paper pattern pieces you will need and then cut these out. Follow the lines on the pattern pieces and cut slowly to avoid any jagged or uneven edges. Some other pieces you may need to cut out include: Front panel Pocket panel Back panel Side panel Flap

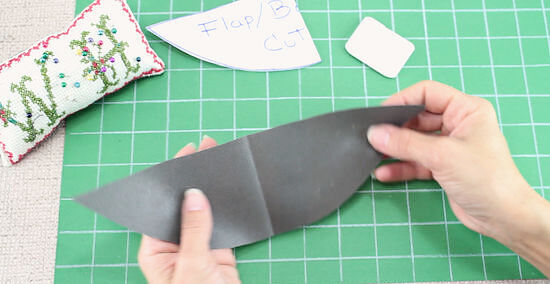
Trace the pattern pieces onto the fabric. Lay the pieces on your fabric as instructed by the pattern. Some pieces may require that you fold the fabric first and then lay the piece along the folded edge of the fabric. Trace around the outside of the paper pieces with a piece of chalk or fabric marker to outline each of the pieces on the fabric. Tip: Make sure to use a piece of chalk or a fabric marker that contrasts with your fabric’s color, such as white chalk with black fabric or blue fabric marker with white fabric. Otherwise you won’t be able to see the lines clearly.
Cut along the lines on the fabric. After you have traced each of the pattern pieces, use a sharp pair of scissors to cut them out. Cut slowly to avoid creating any jagged or uneven edges. You will likely need the following pieces to complete your pattern: 1 front panel 1 pocket panel 1 back panel 2 side panels 2 flaps
Sewing the Front and Sides
Hem the pocket panel across the top edge. Fold over the top ⁄2 in (1.3 cm) of fabric on the pocket panel piece. Make sure that the raw edges of the fabric are on the wrong (back or inner) side of the fabric. Then, sew a straight stitch about ⁄4 in (0.64 cm) from the folded edge to secure the hem.

Attach the pocket to the front panel with a straight stitch. Place the pocket panel on top of the front panel so that the wrong (back or inner) side of the pocket is facing the right (front or outer) side of the front panel. Line up the edges of the pocket panel and the front panel. Then, sew a straight stitch down the center of the 2 pieces perpendicular to the hem you made on the pocket panel. To find the center of the 2 pieces, fold them in half so that the short edges are aligned. Then, mark the center line with chalk or fabric marker.
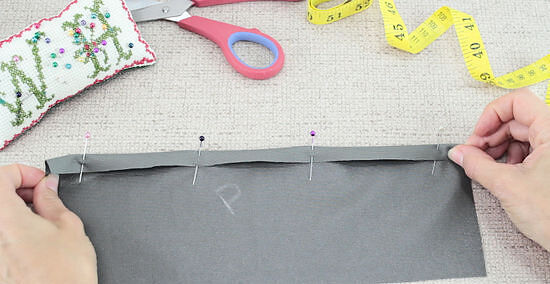
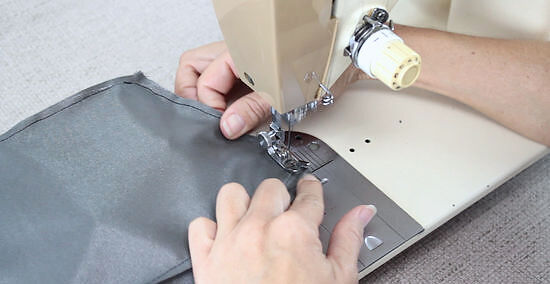
Sew the zipper onto the right side of the front panel. Pin the zipper to the raw edges of the front panel on the right side. Lay the zipper so that the right side is facing down towards the right side of the front panel and the raw edges of the zipper fabric are aligned with the raw edges of the front panel. You can also topstitch along the zipper after attaching it to the front panel if you want a neater looking edge. However, if you’re trying to make the fanny pack as quickly as possible, you can skip it.

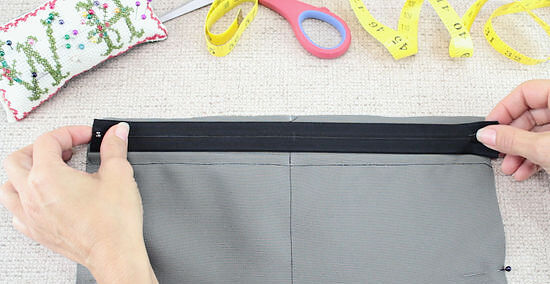
Pin the center of one of the flaps to the right side of the zipper. Locate the center of a curved flap piece and align it with the center of the other edge of the zipper. Pin the center of the flap to the center of the zipper so that the flap’s right side is facing the right side of the zipper.Tip: If you’re concerned about damaging the fabric, use a small binder clip to secure the edges of the fabric instead.
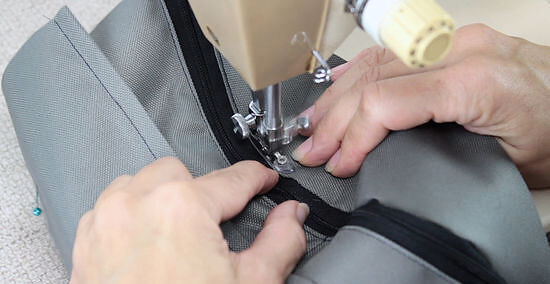
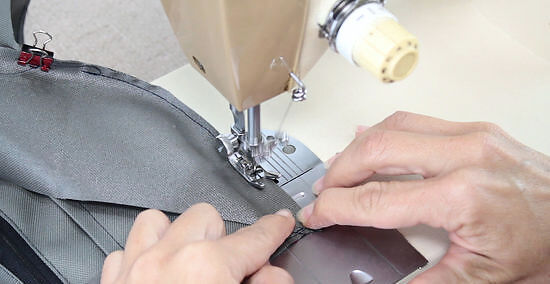
Sew a straight stitch along the curved edges of the panel and zipper. Start sewing at the center of the flap and zipper where you pinned them together and sew out towards the pointed edge of the flap. Use your fingers to keep the edges of the flap and the zipper lined up as you sew. When you get to the pointed edge, cut the thread and return the needle to the center of the flap. Sew out towards the other pointed end to finish the seam. If desired, you may also topstitch along the edge of this seam to make it look neater, but this is also optional.
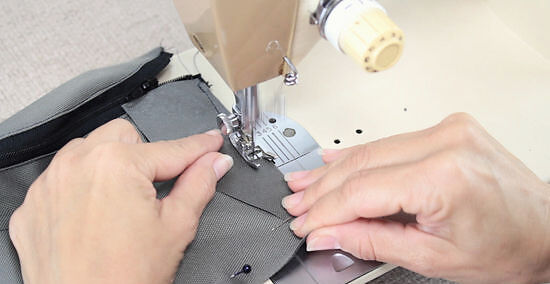
Pin a side panel to the front panel and sew a straight stitch across it. Line up the side panel with the side of the front panel as instructed by your pattern. Then, insert 2 to 3 pins to hold the side panel in place. Sew a straight stitch to secure the side panel to the side of the front panel. Make sure to remove the pins as you sew. Do not sew across a pin or you may damage your sewing machine.
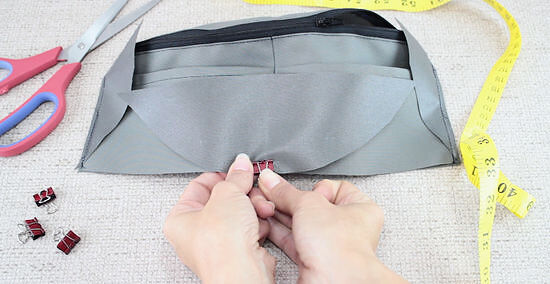
Pin the center of the bottom flap to the bottom edge of the fanny pack. Align the center of the curved edge with the center of the bottom edge of the front panel. Position the 2 pieces so that the right sides of the fabric are facing each other and the raw edges are aligned. Insert a pin to secure the 2 pieces together at the center.
Sew a straight stitch across the edges of the bottom and flap piece. Begin sewing where you placed the pin at the center of the curved edge and front panel pieces. Sew outwards towards the pointed edge of the flap adjusting the fabric as you go to keep the edges aligned. When you reach the pointed edge, cut the thread and move the needle back to the center of the fabric. Sew a straight stitch going in the opposite direction to secure the other side of the seam.
Creating the Strap

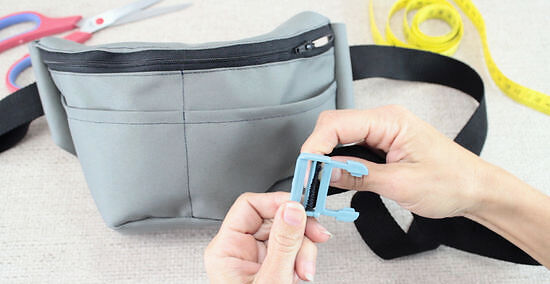
Sew a straight stitch across the ends of the webbing to secure them. Cut an 8 in (20 cm) piece of webbing and feed it through the female end of the clip. Then, line up the ends and sew straight across them about ⁄4 in (0.64 cm) from the raw edges to secure them together and attach them to the clip.Tip: You may want to sew across the ends of the webbing 2 to 3 times for extra security.

Attach the end of the webbing to the outside of the side panel. Position the raw edges of the webbing to the outer edge of the side panel so that the webbing is aligned with the raw edges of the front panel. Place the webbing against the right (outer or front) side of the fabric. Then, sew a straight stitch across the webbing and side panel to secure them together.

Cut a 34 in (86 cm) strip for the other end of the webbing. The second strip will be much longer and make up the bulk of the belt, but keep in mind that it is adjustable. The total length of this fanny pack with both strips will extend to a maximum length of 46 in (120 cm). If you need a larger circumference, you can add to the 34 in (86 cm) strip. For example, if you want the belt to extend to a maximum of 50 in (130 cm), then cut a strip that is 4 in (10 cm) longer or 38 in (97 cm) instead. Likewise, you can cut down on the maximum length if desired, by reducing the length of the longer strip. For example, if you want the belt to have a maximum length of 40 in (100 cm), then cut the longer strip 6 in (15 cm) shorter or 28 in (71 cm).

Align the end of the strip with the side panel and sew a straight stitch. Place the end of the long strip so it is in line with the raw edge of the right side of the other side panel. Then, sew a straight stitch across the webbing to secure it to the side panel. Position the end of the webbing so that it is about ⁄2 in (1.3 cm) from the raw edge of the side panel.
Feed the raw edge of the long strap through the buckle. Take the other end of the webbing and push it into the male side of the buckle. Then, bring it up and over the bar at the center of the buckle, and back down on the opposite side of the bar so that the strap is folded over against itself through the buckle. Imagine the webbing end is traveling up a hill and then coming back down on the opposite side.

Fold the end over 2 times and sew a straight stitch across to secure it. Pull the end of the webbing through the buckle piece so that about 6 in (15 cm) is through it. Then, fold over the last 1 in (2.5 cm) of the webbing 2 times so that the raw edge is tucked under and hidden within the end of the webbing. Sew a straight stitch across the webbing about ⁄2 in (1.3 cm) from the folded edge. This will secure the end of the webbing so it won’t slip out of the buckle when you adjust it.
Securing the Back Panel
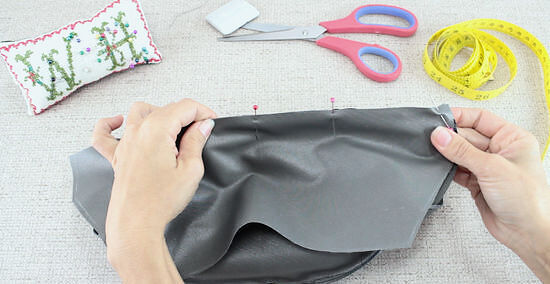
Pin the back panel to the edges of the fanny pack. Turn the back panel so that its right side is facing the right side of the front panel. Then, pin the center of the back panel’s top edge to the center of the flap with the right sides facing each other. Insert another pin through the center of the bottom flap and bottom of the back panel as well.Tip: If your zipper is zipped, unzip it by about 3 in (7.6 cm) before you sew. This will make it easier to get the zipper undone the rest of the way and invert the fanny pack when you’re finished sewing the back panel on.
Sew a straight stitch along the edges of the back panel. Place the fabric under the sewing machine near 1 of the pins you placed and sew along the edges of the fanny pack pieces to secure them together. Continue sewing all the way around the edges of the fanny pack until you get back to the beginning. Adjust the fabric as needed with your fingers to keep the raw edges aligned. Make sure to remove the pins as you sew. Don’t sew across a pin or you may damage your sewing machine.
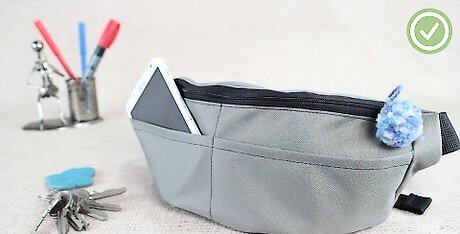
Cut the excess threads after you finish sewing and invert the bag. Use a sharp pair of scissors to cut the excess threads along the edges of the seams. Then, flip the fanny pack so it is right side out. Your fanny pack is all finished. Try it on and see how it looks! You can wear your favorite jeans and a cool graphic T-shirt for a trendy look. Tuck the T-shirt in the front and put a fanny pack where you put your belt. Then wear white sneakers. Let everything be simple and let the fanny pack be the statement piece.


Comments
0 comment