
- Make a base for the kiln on a flat surface using bricks packed tightly together.
- Stack bricks around 3 sides of the base to make the walls. Leave one side open so you can load the kiln.
- Place a corrugated iron sheet on top of the brick walls for the roof.
Kiln Dimensions
Make the kiln 1.5 times larger than the biggest piece you want to fire. The size of the kiln depends on what you plan to fire in it. You can make a small or large kin depending on what kind of pottery you make. If you plan to fire multiple pieces at once, write down the combined width and length of those pieces. Then multiply each figure by 1.5 to determine the interior measurements of the kiln. For example, if you wish to fire 4 pieces at once that are each 1 ft (0.30 m) tall, 1 ft (0.30 m) wide, and 1 ft (0.30 m) long, multiply 1 ft (0.30 m) by 1.5 and the combined width and length (4 ft (1.2 m) and 4 ft (1.2 m)) by 1.5 to determine the depth of the kiln. If you’re producing many pieces, consider putting multiple shelves in your kiln. Using shelves, you can build a taller and narrower kiln that can hold more pieces. Depending on the height, you may need to build a metal frame to bolster the walls.
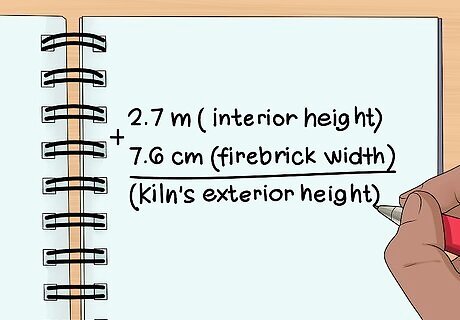
Find the kiln’s height by adding the interior height to the width of a firebrick. There are 2 standard sizes of firebrick, one 9 in (23 cm) by 4.5 in (11 cm) by 3 in (7.6 cm) and the other 9 in (23 cm) by 4.5 in (11 cm) by 2.5 in (6.4 cm). Add the height of the firebrick to the interior height of the kiln. For example, if your kiln’s interior was 9 ft (2.7 m), add either 3 in (7.6 cm) or 2.5 in (6.4 cm) (depending on which size brick you bought) to determine the exterior height.
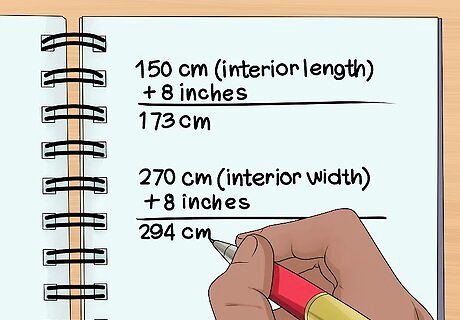
Add the combined width of the kiln walls to the interior dimensions. Since the kiln will have 3 walls – each 1 brick wide, add double the brick width to the interior length and interior width to determine these exterior dimensions. In each case, add 8 in (20 cm) to your interior length and width. If you estimate your kiln’s interior length is 5 ft (150 cm) and interior width is 9 ft (270 cm), by adding 8 inches to each you’ll need to build a kiln 5.66 ft (173 cm) by 9.66 ft (294 cm).

Multiply the kiln’s length by its width by its height to find its volume. Then find the volume of the interior of the kiln by multiplying the length by the width by the height of the interior. Subtract the interior volume from the exterior volume. Divide the difference by the volume of 1 brick. This dividend is the number of bricks you’ll need. Make sure you purchase a firebrick with the same dimensions you used to calculate the volume.

Build a square kiln to increase the number of pieces you can fire at once. A kiln with a square or rectangular shape will always have a greater volume than a cylindrical kiln of the same length. Many people produce cylindrical kilns for aesthetic reasons. However, these kilns are more complex to build and more expensive, as curved firebricks cost more than square ones. If you want to build a cylindrical kiln, examine the land you have available to see if you have the space to build one with the same interior depth as a square or rectangular kiln.

Identify a flat outdoor space that can house your kiln. Look for a space clear of vegetation that can accommodate for your kiln size. Make sure you can legally burn wood in this area, and that it is at least 15 ft (4.6 m) away from any nearby buildings. Gather your building materials and assemble them near the kiln site. When clearing the space of vegetation, make sure you pull up any plants or weeds by their roots. If the space is not wide or long enough for your proposed kiln, consider reducing the length and width and increasing the height proportionally by adding kiln shelving.
Purchase your building materials from ceramics stores or online retailers. In addition to firebricks, buy a corrugated sheet of iron the length and width of your kiln for a roof. If you can’t find corrugated iron, a sheet of ceramic fiber can make an effective substitute. You can typically buy firebricks for between $0.50 and $0.75 per brick. Firebricks are usually sold in pallets, often in multiples of 100 or 1,000.
Making the Kiln
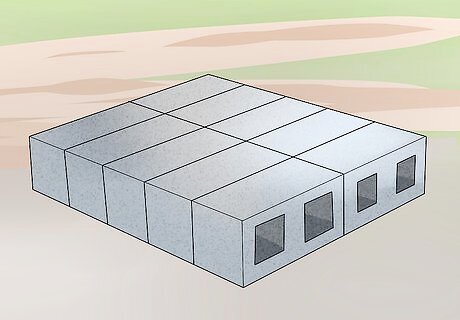
Build your kiln’s base by laying bricks flush against each other. You will not be using mortar, as mortar can expand and crack with each kiln firing, so make sure you pack the bricks tightly next to each other. Lay enough bricks to cover an area equal to the length and width of your kiln. These bricks will not only serve as your base layer, but also a shelf for your pottery.

Build kiln walls by laying bricks around 3 sides of the foundation. Lay these bricks flat and flush with each other, with no gaps in between. Stack them on top of each other until you’ve built a structure as high as you estimated your kiln should be. Leave one entire side open so that you can place pottery inside the kiln. For added stability, add each layer of bricks on top of the layer beneath it such that each brick’s end is perpendicular with the center of the 2 bricks underneath it. Repeat this process until you have built the kiln’s walls to their required height. When you have completed laying all the bricks, go to the wall that faces the wind direction. Remove a section of bricks 3 bricks high from the top of that wall. This gap will serve as your vent, allowing the smoke from the fire out and keep the kiln from overheating.

Lay the corrugated iron sheet on top of the kiln. This sheet will serve as your kiln’s ceiling and keep the heat in to fire and harden objects inside. Weigh the iron down with bricks on each side to keep it in place. Otherwise, when you light the kiln, the force of the heat may cause the ceiling to pop off. If your sheet is made of cast iron, it is prone to rust easily. Make sure you remove it from the kiln and cover it when not in use to prevent damage from rain.
Using the Kiln
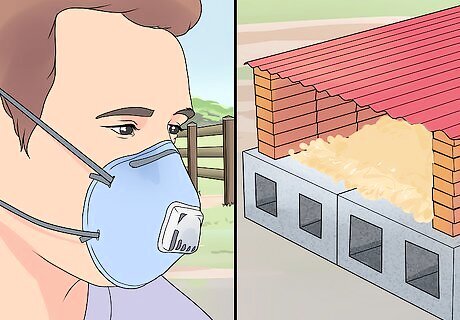
Put on a dust mask and coat the base of the kiln with sawdust. Coat the base with approximately 4 in (10 cm) – of sawdust. When you fire the kiln, the sawdust will give the pottery a polished finish. If your kiln includes multiple levels of shelving, go to the kiln’s opening and place approximately 4 in (10 cm) of sawdust on each level of shelving.
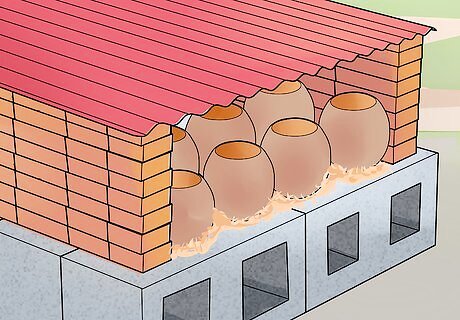
Load the kiln, starting with your pottery. Lay each piece on the bricks and space them evenly from each other and the walls. Make sure there is at least 1 in (2.5 cm) between each piece for best results. Individual pottery pieces should not touch each other. If you are unable to load the pottery without some pieces touching, place half of them at the kiln for an initial firing. Fire the rest later.

Add newspaper and firewood to the kiln. Place 1 to 2 clumps of newspaper around the pottery. Fill the remaining gaps between the newspaper and the kilns walls with firewood. Make sure there are no gaps between the walls, firewood, newspaper, and pottery. As you grow more experienced with your kiln, experiment with different types of sawdust shavings, as well as where you place the sawdust, which will result in different finished effects.

Light the kiln and let the fire burn for at least 24 hours. Crumple up and light a sheet of newspaper and place it in the kiln. The fire may burn up to 72 hours. It will also take as many as 12 hours or longer to cool down, so be very careful when examining your pottery. When stoking the fire or otherwise approaching the kiln, use heat-resistant gloves and protective gear, such as goggles to protect your eyes from the smoke. As the fire consumes the sawdust, the upper half of the kiln will begin to cool. The slower the fire burns, the darker the pottery will be. To lighten the pottery, stoke the fire and add additional fuel – newspaper and wood – if the fire appears to be burning slowly.

Remove your pottery when all the sawdust has burned down. Clean the pottery with a soft cloth and then apply a layer of wax to make them shine. Your pottery may have glowing markings on it – a result of resin from the sawdust. These can be removed using a kitchen scourer. You can then paint your pieces with glazes. If you’d like your pieces to have a matte – or non-glossy finish, do not apply wax. Painting your pieces with oxide stains is the best approach to preserving your matte finish.


Comments
0 comment