
Making a Basic Safety Pin Bracelet
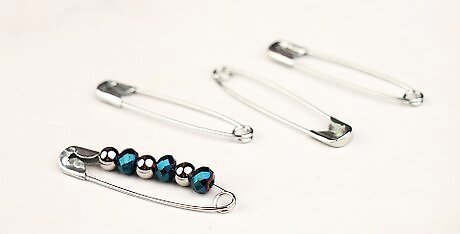
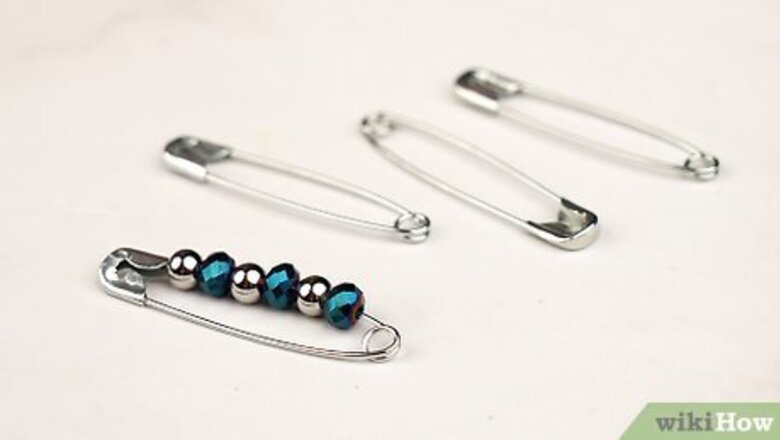
Open up a safety pin and slide seed beads onto the pin. Leave enough space on the top of the pin so that you can close it. You can use any color of seed bead you want, but avoid using ones that are too small, or you won't fit them onto the pin. A size "10/0" would be ideal. This design will create a thick cuff-like bracelet that is covered with seed beads. For a wider bracelet, use 1-inch (2.54-centimeter) safety pins. For a narrower bracelet, use ¾-inch (1.91-centimeter) safety pins.

Close the safety pin, then pinch the clasp with pliers. The clasp has a gap in it, which is what allows you to open and close the pin. You will need to pinch this gap shut so that you can't open the pin any more. If you can still push the safety pin open, you need to pinch the clasp tighter. For extra security, add a drop of glue into the clasp before you close the pin. Super glue would work the best.
Fill the rest of the safety pins in the same manner. You need enough safety pins to cover your wrist. Plan on using about 50 pins for a child's bracelet, and 75 pins for an adult's bracelet. You can use all the same color of beads, or you can experiment with different colors and patterns.

Cut two pieces of thin, round beading elastic. Each elastic should be twice the size of your wrist. Black or white elastic will work the best for this, but you can also use the clear kind instead. Choose a thicker elastic, about 0.7mm, to ensure that the bracelet will be sturdy enough. Tie a knot in the bottom of each elastic. This will keep the pins from falling off while you string them.
Thread the pins onto the first elastic, alternating the direction you thread them on. Slide the elastic through the top hole of your first pin. Next, slide the elastic through the bottom hole of your next pin. Keep going, alternating the pins, until you've used them all. Make sure that the beads on the pins are all facing forward. The last pin should be upside down. If the last pin is right-side-up, take it off.
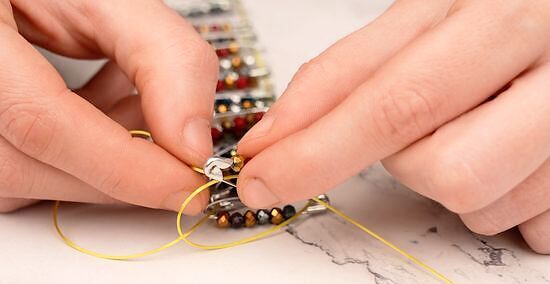
Thread the second elastic through the ret of the holes on the pins. At this point, it would be a good idea to test the bracelet. Wrap the bracelet around your wrist; you should have enough pins on there to cover it without stretching the elastic. Remove or add pins as needed.

Tie the elastics together. Tie the top two elastics together in a tight, square knot. Repeat the process for the bottom elastics. You need to tie the elastics tight enough so that the first and last pins touch, but no so much that they stretch.

Trim off the excess elastic. Trim the elastic down to about 1 to 2 inches (2.54 to 5.08 centimeters). Tuck each end back through the holes on the pins. Secure the knot with a drop of glue, then let the glue dry. You can also trim the ends of the elastic close to the knot, then heat-seal them with a lighter.
Making a Delicate Safety Pin Bracelet

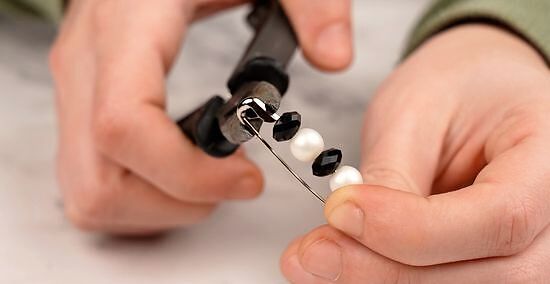
Open up a safety pin, then pry open the hinge with pliers. Open a safety pin, then bend the needle back until the pin is almost straight. Use pliers to open up the coiled hinge. The space needs to be wide enough for a seed bead. This deign will create a delicate chain of beaded safety pins joined together with jump rings.
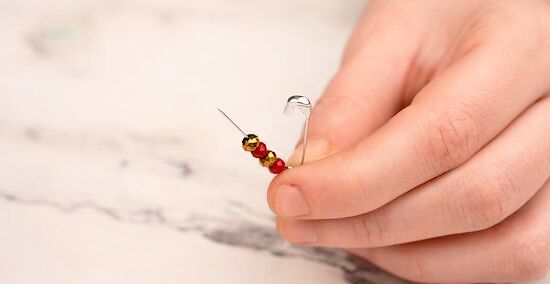
Thread seed beads onto the back of the safety pin. Slip the beads one at a time onto the pin. Loop them around the opened hinge and onto the back wire. Keep going until the back wire is filled. Use larger seed beads for this. A size 10/0 would work great. Anything smaller may not fit onto the pin.
Pinch the hinge close with pliers. Place the ends of the pliers over the hinge, then squeeze them to close the hinge. This will trap the beads on the back of the pin.
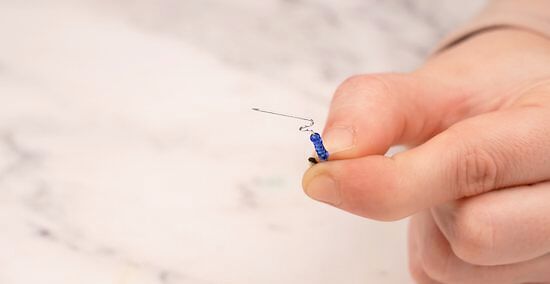
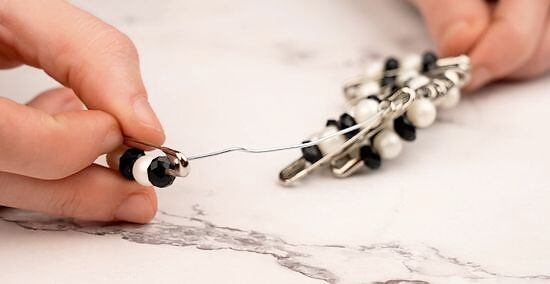
Fill the front of the pin with more beads. Leave enough space at the tip of the pin so that you can still close it.

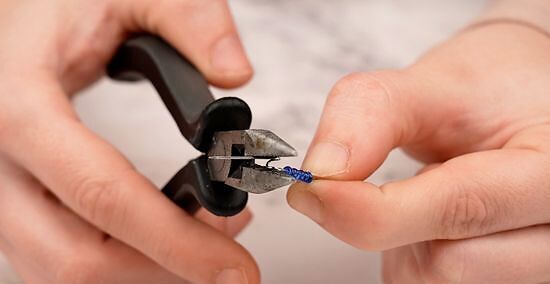
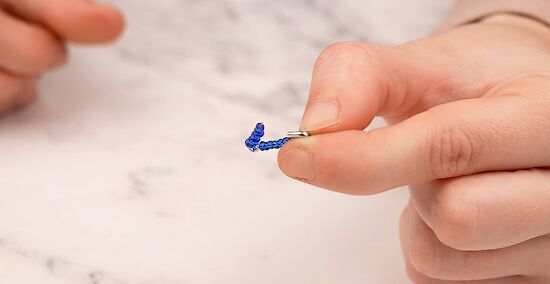
Close the pin, then pinch the clasp shut. When you close the pin, you'll notice that there's a gap in the clasp. This allows the pin to open and close. Pin that gap shut with pliers so that the pin can't pop open. Add a drop of super glue into the clasp for extra security.

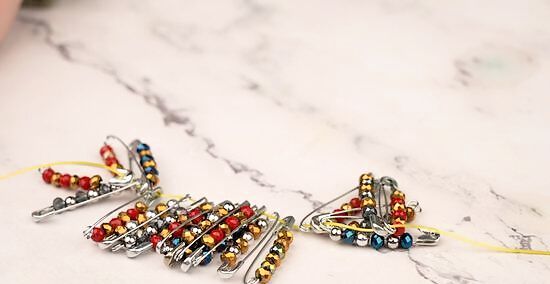
Make more pins in a similar fashion. You need enough pins so that they can wrap around your wrist when placed end-to-end.
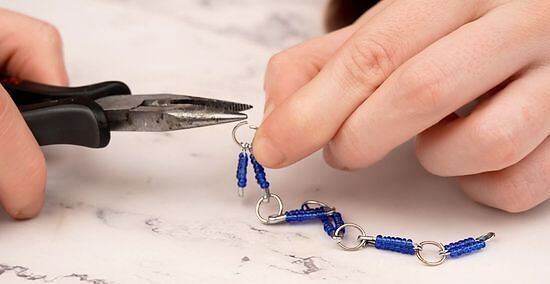
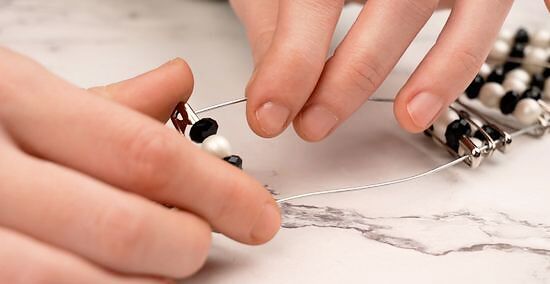
Connect the safety pins with jump rings. Pull apart a jump ring, then slide it through the top and bottom holes of two safety pins. Close the jump ring. Use this method to connect all of the safety pins in a chain. Pull the two ends of the jump ring past each other when opening it, not away. Push the two ends of the jump ring towards each other when closing it. If there is a gap in the jump ring after you close it, you can pinch it shut with pliers.
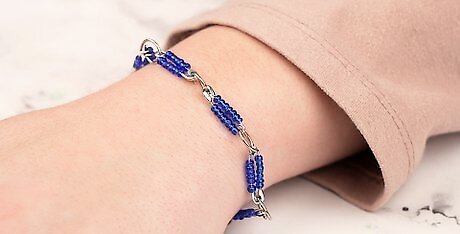
Add a clasp to the first and last safety pins. Find a necklace clasp, then connect it to the top and bottom holes of the safety pins using jump rings.
Making a Fashion Safety Pin Bracelet
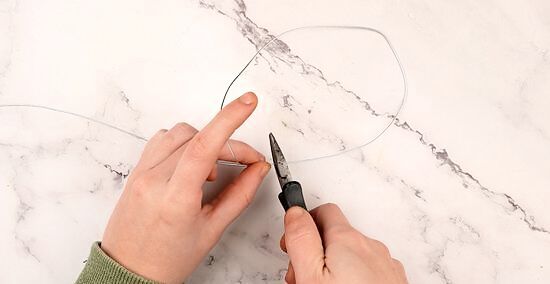
Cut off two rings of memory wire. Measure out a ring of memory wire, then cut it so that it overlaps by ¼ to ½ inch (0.64 to 1.27 centimeters). Cut a second ring off in the same manner. Make sure that you use heavy-duty wire cutters for this. This method will give you a statement cuff-like bracelet with fabric woven into it and a brooch on the front. You can use regular wire instead. In this case, cut two pieces, each a little longer than your wrist circumference.
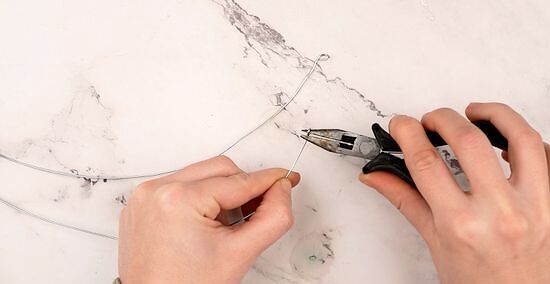
Make a loop in one end of each wire. Pinch the tip of your first wire with a pair of round-nose pliers. Wrap the wire around the pliers to make a loop, then pull it off. Repeat this step for the second wire. If you are using memory wire, bend the wire against the curve, not with it. You are only making a loop in one end of each wire, not both ends.

Open up a safety pin and thread 4 seed beads onto it. Use a larger seed bead, otherwise it won't fit onto the pin; a size 10/0 or so would be ideal. You can use just one color, but two would look more interesting.
Pinch the clasp of the safety pin shut. Use a pair if needle-nose pliers to press the clasp of the safety pin shut so that it can't pop open. For extra security, you could even put a drop of super glue into the clasp.

Make more safety pins. You need enough safety pins to string onto your first wire, minus about ½ to 1 inch (1.27 to 2.54 centimeters).
Thread the safety pins onto the first wire, alternating directions. Slide a safety pin onto the wire through the top hole. Slide the next one through the bottom hole. Keep going, alternating directions, until you have about 1 inch (2.54 centimeters) of wire left. Make sure that the beaded side of each pin is facing forward. For a more interesting bracelet, add a spacer bead between each safety pin.
Slide the second wire through the other side of the pins. If you added spacer beads onto the first wire, make sure that you add them onto this one as well.

Make a loop in the other end of each wire. Use the same method as you did before. This will close the wire and prevent the safety pins from sliding off.

Cut strips of fabric to weave into the bracelet. The strips need to be about ½ inch (1.27 centimeters) wide. T-shirt or jersey fabric will with the best for this, but you can use patterned cotton too. Alternatively, you can use ½-inch (1.27-centimeter) wide ribbon instead.

Weave your fabric through the front of the safety pins. Start weaving at one end of the bracelet finish at the other. Make sure that you weave between the beads, with two beads on top and two on the bottom. Weave back and forth across the bracelet until the space between the beads is filled.
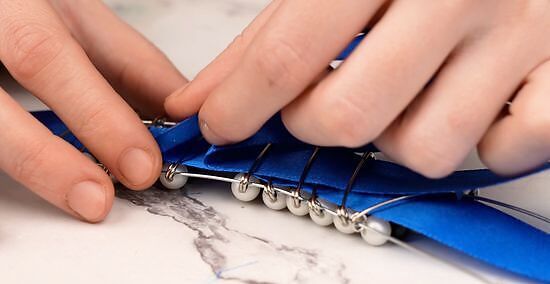
Weave across the back of the safety pins. Once the front of the bracelet is filled, weave the fabric through the back of the bracelet. Do this a few times until the entire back is filled.
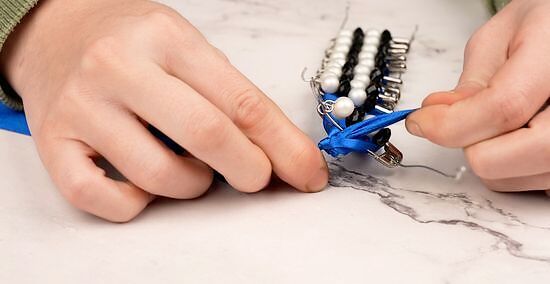
Secure the ends of the fabric. If you finished weaving on the same side of the bracelet as you started, you can knot the ends together, then tuck them into the bracelet to hide them. If you finished on different sides, secure the ends of the fabric to the underside of the bracelet. You can secure the ends of the fabric with a needle and thread or fabric glue.

Add a closure to each end of the bracelet if you used regular wire. You can add a necklace closure using jump rings, or you can sew on a hook and eye closure with a needle and thread. Skip this step if you used memory wire; the bracelet should be able to hold its curved shape on its own.

Add an embellishment to the front of the bracelet. You can use a brooch, cameo, or another embellishment. If you are using a brooch, you can simply pin it to the front of the bracelet. If you are using a cameo or a different type of embellishment, secure it with fabric glue or an industrial-strength glue.


Comments
0 comment