
Installing an Attic Fan over a Gable Vent
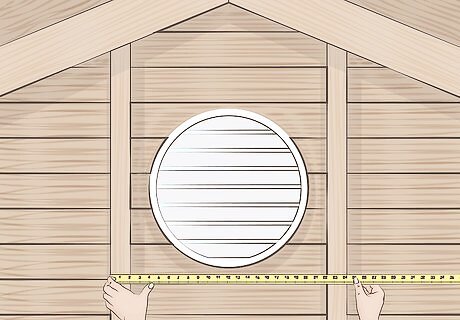
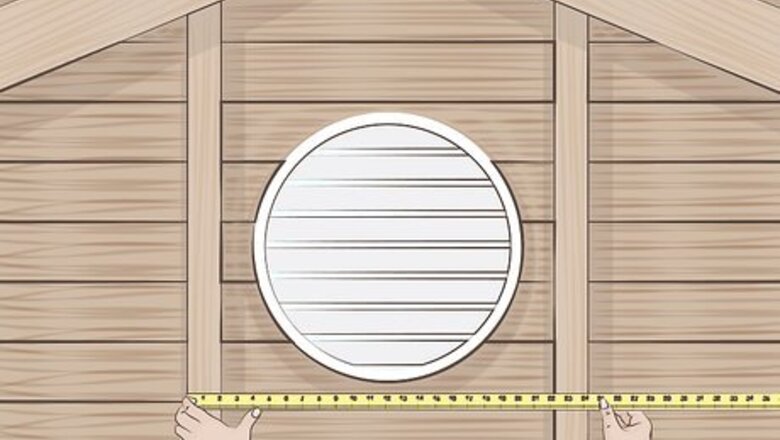
Measure the distance between the studs on the left and right side of your vent. Use a tape measure to get an accurate measurement. When you’re finished, write the number down somewhere — you’ll need it to find the right size piece of plywood for your attic fan to be installed on. Attic fans are usually installed under the gable roof. Basically, it should be away from anything that is protruding in the airspace or your crawlspace.
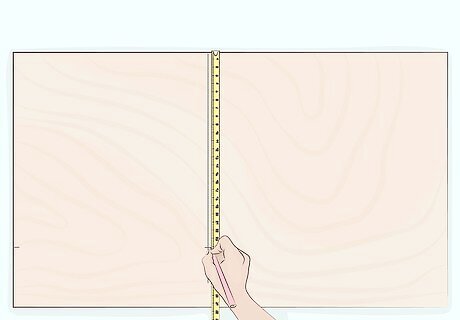
Find a piece of plywood that’s at least as wide as the distance between the studs. You’re going to be mounting the plywood on the 2 studs, so it needs to be able to reach both of them. Look for plywood that's around ⁄2 inch (1.3 cm) thick. For example, if the studs are 2 feet (0.61 m) apart, you’d need a piece of plywood that’s at least 2 feet (0.61 m) wide.
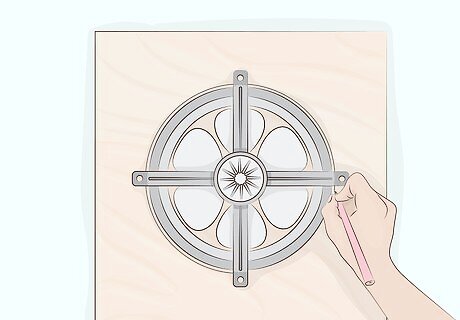
Trace the circular body of your attic fan onto the center of the plywood. Don’t include the fan’s mounting bracket in the circle you draw. Make sure the circle isn’t bigger than the actual fan or the fan won’t mount properly in the plywood. Check the box your attic fan came in to see if the manufacturer included a pre-cut circle that’s the same size as the fan’s body. If they did, you can trace that instead.
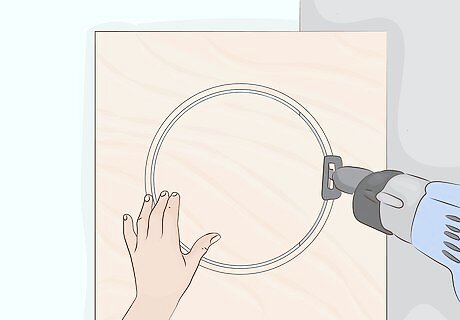
Use a reciprocating saw to cut out the circle you traced. A reciprocating saw is a handheld power saw with a blade that rapidly moves in and out of objects as it cuts them. To cut out the circle, drill a pilot hole in the center of the circle so you have a starting point for the saw. Then, carefully follow along the circle with the saw until it’s completely cut out from the plywood. Dispose of the plywood circle once it’s cut out.
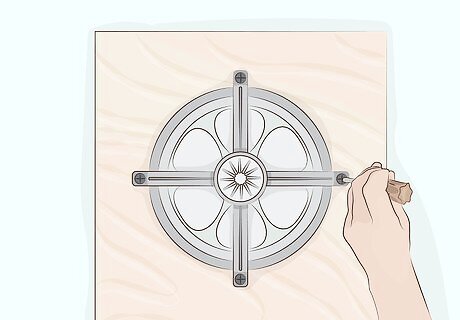
Mount the attic fan onto the plywood so it’s centered over the hole. Lay the plywood on a flat surface and line the fan up over the hole you cut out. Drill the screws that came with the fan through the screw holes on the fan’s mounting bracket and into the plywood. When you’re finished, the fan should be securely mounted on the piece of plywood. Install the fan in the specific direction indicated on the box.

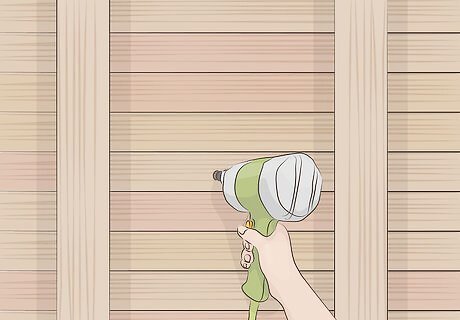
Nail the plywood into the studs on each side of the gable vent. When you position the plywood and fan over the vent, the back of the fan should be facing you and the front of the fan should be facing toward the vent. Center the fan over the vent before you nail the plywood to the studs. Once the fan is centered, nail the plywood into the studs to secure the fan over the vent. It might be helpful to have someone holding the fan while you hammer in the plywood.

Mount the fan’s thermostat to a nearby stud. The thermostat is the box that’s connected to the fan by a wire. You’ll use the thermostat to control the fan. To mount the thermostat, insert the screws that came with the fan through the screw holes and into the stud you’re mounting the thermostat on.
Follow the manufacturer’s instructions to wire the fan to your attic. Keep in mind that you’ll need to follow your local electrical codes and have your wiring inspected by a codes official. Wiring your attic fan improperly can be dangerous and lead to serious injury. If you’re unsure, it’s best to hire a professional electrician to wire your fan after you install it.
Installing an Attic Fan on a Roof
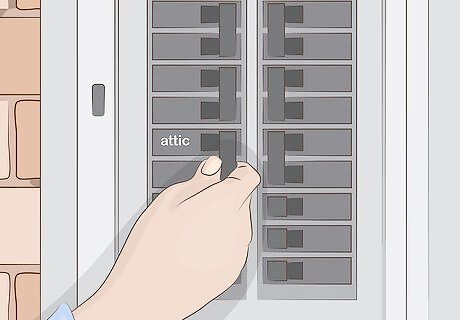
Turn off the electricity in your attic. Use the main fuse box or circuit breaker box to shut it off. Never try to install an attic fan on your roof with the electricity on. It’s also a good idea to turn any wall switches in the attic to the off position.
Drill a pilot hole through the roof where you want your fan to go. That way you’ll be able to tell where to cut out the hole when you climb up on the roof later. The pilot hole should be in the center of where the hole will be. Make sure the hole you’re going to cut out will be centered between 2 rafters so the fan fits.
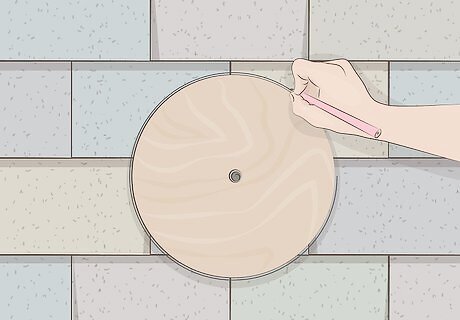
Draw a circle on the roof matching the diameter of your fan. The pilot hole you drilled should be in the center of the circle. Use a tape measure to determine the diameter of your fan, or check the manufacturer's specifications. Then, get on the roof and draw the circle around the pilot hole with a piece of chalk. Wear a hard hat and boots with good traction when you're up on the roof. Ask someone to be there with you when you get on the roof in case you need help for any reason. Don't get on your roof if it's wet or you could slip.
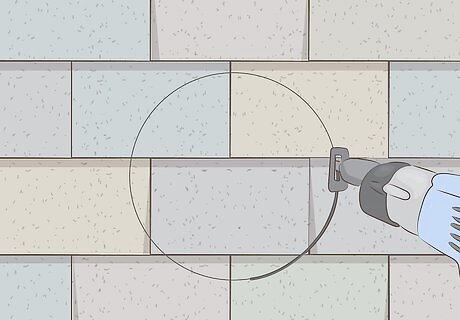
Cut out the circle with a reciprocating saw. A reciprocating saw is a handheld power saw with a blade that rapidly goes in and out of a surface. Use the pilot hole you drilled earlier as a starting point for the saw. Follow along the line you drew with the saw until the hole is cut out. Pop the cut-out section of wall or roofing out from the hole and dispose of it.
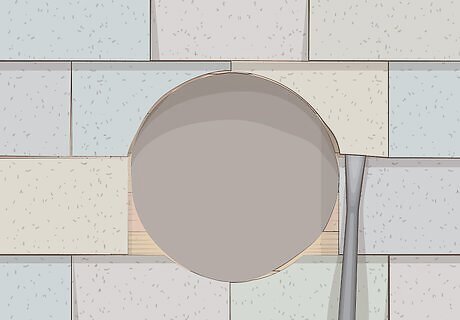
Loosen the shingles surrounding the hole with a pry bar. You need to loosen the shingles so you can slide the attic fan’s flange (the flat rim that extends off the body of the fan) between the shingles and the roof underneath them. If you encounter any nails or staples while you’re loosening the shingles, remove them with the pry bar. Just loosen the 2 corners closest to the hole on each shingle. Don’t take the shingles all the way off.

Slide the attic fan over the hole so the flange goes under the shingles. Place the fan flat on the roof just below the hole and gently slide it up into place. As you’re sliding it up, the flange should slip underneath the shingles you loosened. Only the bottom 2 corners of the flange should be exposed. When you’re finished, the center of the fan should be centered directly over the hole you cut. The open vent on the fan should be facing down into your attic, and the closed off top of the fan should be facing up.
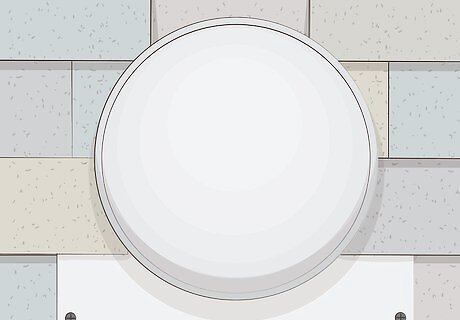
Screw the bottom two corners of the flange into the roof with a drill. There should be two screw holes located on the bottom corners of the fan’s flange. Screwing the flange down will secure the attic fan to your roof. Make sure the bottom edge of the flange is squared with the shingles before you screw it down.
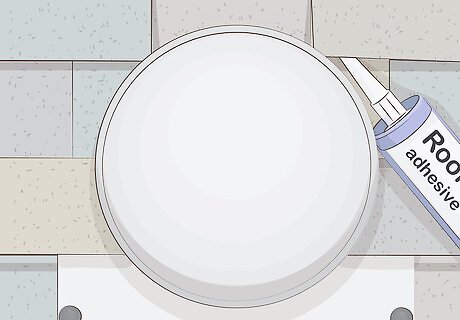
Reattach the shingles you loosened using a roofing adhesive. Roofing adhesives are thick, glue-like substances that can be used to seal things into place. Lift up the shingles you loosened and apply a generous amount of roofing adhesive between the shingles and the fan’s flange. Firmly press the shingles into the adhesive to reattach them to the roof. You can also apply a dab of roofing adhesive over the screws on the flange to protect them from water damage. You can find a roofing adhesive online or at your local home improvement center.

Mount the fan thermostat to a nearby rafter inside your attic. The thermostat is the box you’ll use to control the attic fan. Once you’re back in your attic, look for a rafter that’s close to your fan and screw the thermostat into it using the screws that came with the fan.
Refer to the manufacturer’s instructions on how to wire your attic fan. Look up your local electrical codes online, and prepare to have your wiring inspected by a codes official when you’re finished. Wiring your attic fan on your own can be a safety hazard and result in serious injury. Hire a professional electrician to wire your attic fan if you’re not confident in how to do it yourself.


Comments
0 comment