

- Begin with a perfectly square sheet of paper. Use origami paper or cut any sheet you have into a square.
- Make a series of folds to create structural creases in your paper. The creases will guide you while you create the box shape.
- Fold and tuck the flaps of paper along the creases to create the base and walls of the box.
Making Structural Folds

Begin with a piece of square paper. You can use origami paper or fold any piece of paper diagonally from the corner to the opposite edge and trim off the excess. It is important that the paper is square since you are creating a box. A trick is to fold your paper like a sail on a boat and cut the excess.

Fold the paper in half. Crease the fold with your finger then open the piece of paper.

Fold the paper in half along the other side. Use your finger to crease the fold, then open the paper again. You should now have two creases that intersect at the center of the square.

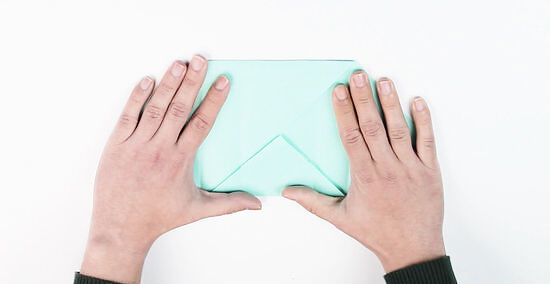
Fold the corners to the center. Bring each corner to the center, so that the points are all touching. Crease the folds with your finger. Rotate the paper so it sits squarely in front of you, but don't unfold it this time.

Fold the top and bottom edges to the center of the square. Crease the edges of both folds to secure them.
Unfold the square along one side. Unfold the halfway folds and the triangles beneath those folds. Leave the side triangles folded in.
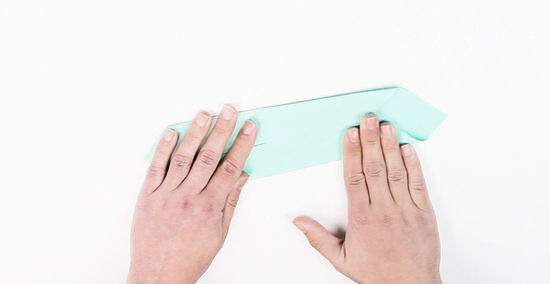
Fold the long edges to the center. Fold over the bottom of the still folded triangles. Crease the bottom edge. You should have what looks like a necktie with two points.
Creating the Walls of the Box
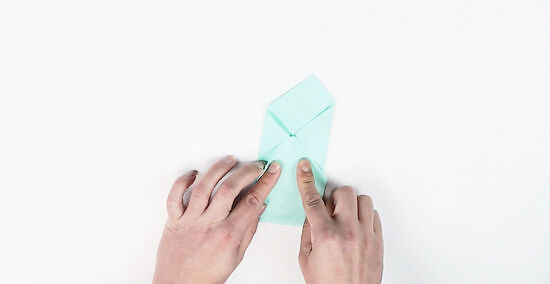
Reinforce the creases. For the purposes of the guide, the diamond furthest away from you formed by the "necktie" folds will be the "head" and the diamond closest to you will be the "foot." Match the bottom tip of the foot diamond to the bottom of the head diamond. Then, match the top tip of the head diamond to the top of the foot diamond. Crease along the long sides to solidify the folds.
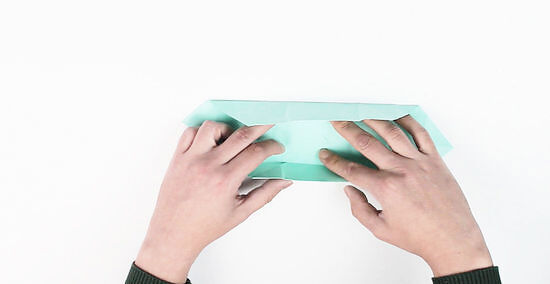
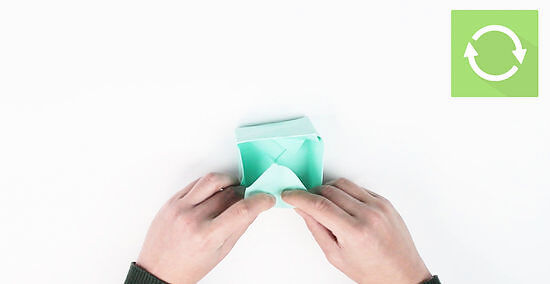
Create the side walls of the box. Pull up the flaps along the long side to create the side walls of the box.

Construct the head wall when the side walls are assembled. As you lift the head wall flap, the creases from previous folds should form two triangle shaped flaps that you will want to fold inwards. Be sure these triangles are folded inwards before proceeding. The head wall will fold over these triangle corners and the top triangle of the head wall will fit neatly into the bottom of the box where you will want to crease it snugly against the sides to keep the box together. After creasing, you should see a triangle on the bottom of the box.
Repeat the process for the opposite end or the foot wall. Try to make sure the folds are clean and not crinkly.
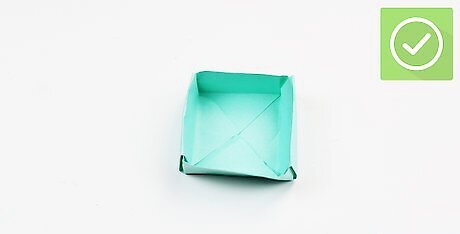
Finished.


Comments
0 comment