
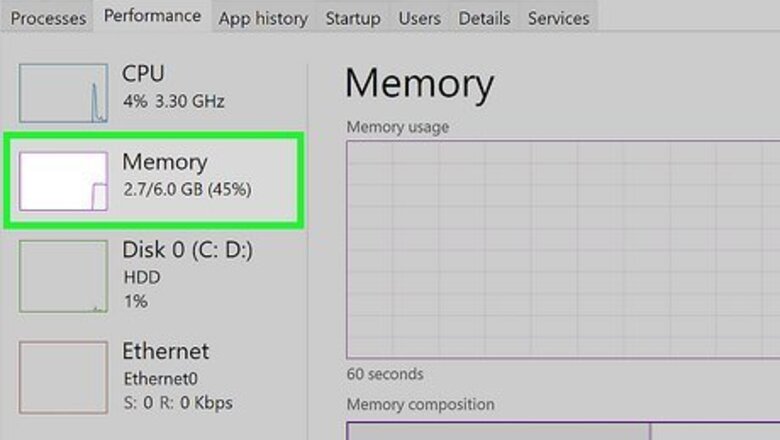
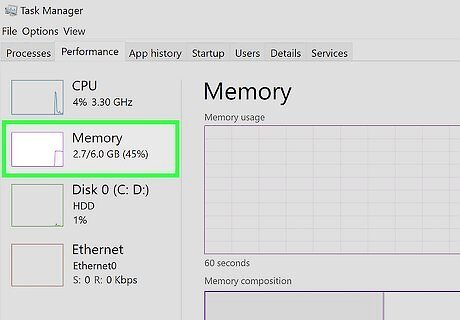
Check your current clock speed. To determine if you need to enable XMP, check your current clock speed against what your RAM is supposed to run at. You'll need to know what your RAM's maximum clock speed is, which is provided by your RAM's manufacturer. Right click the taskbar and select Task Manager. Click on More details to expand your Task Manager view, then click on Performance > Memory. In the bottom right of the window, check what speed your RAM is running at. For example, if your RAM's maximum clock speed is 3200MHz and your RAM runs at anything lower than that, you will likely want to enable XMP to get the most out of your hardware.

Restart your computer and open the BIOS/UEFI at the startup screen. You'll want to hit the button to open your BIOS/UEFI when you see your motherboard logo on the screen. The buttons to open the BIOS/UEFI for the most popular motherboard brands are F2 and DEL, but you may want to check your motherboard manual for specifics. If you're having trouble getting into the BIOS/UEFI upon restart, you can enter it by going to Settings > Update & Security > Recovery > Restart now > Troubleshoot > UEFI Firmware Settings on Windows 10 or Settings > System > Recovery > Reset PC > Troubleshoot > UEFI Firmware Settings on Windows 11. You can also get to the BIOS/UEFI with a command. First, enter Command Prompt, Windows PowerShell, Terminal, or Run and type shutdown /r /o /f /t 00 or shutdown /r /o. Then, click Troubleshoot > Advanced options > UEFI Firmware Settings.
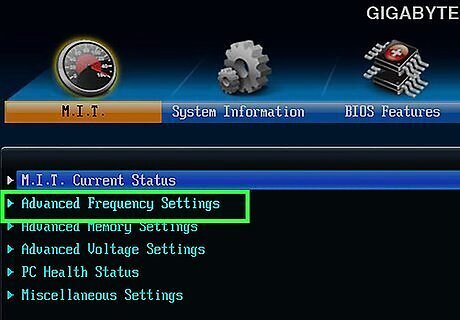
Locate the XMP setting. When you first enter the BIOS/UEFI, you may be in "Easy Mode" with limited settings and options. Check the UI of your BIOS/UEFI for the button to press to enter "Advanced Mode" (which is usually a function key). Then, navigate to the following locations to find the XMP setting: ASUS: Ai Tweaker tab > Ai Overclock Tuner ASRock: OC Tweaker tab > Load XMP Setting EVGA: Memory tab > Memory Profiles Gigabyte: Tweaker tab > Extreme Memory Profile (X.M.P.) MSI: OC tab > Extreme Memory Profile (XMP)

Select an XMP profile. You will have at least one XMP profile to select from. If you have multiple, select the profile that will give you the highest speed. If you only have one, select that XMP profile (usually named Profile 1).
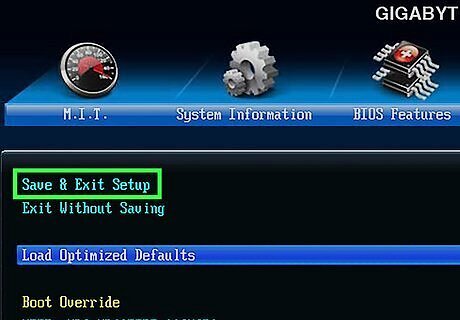
Return to the main BIOS/UEFI screen and save your settings. Along the top bar with the various tabs should be a button that says Save & Exit or just Exit. Be sure to save your settings when prompted.
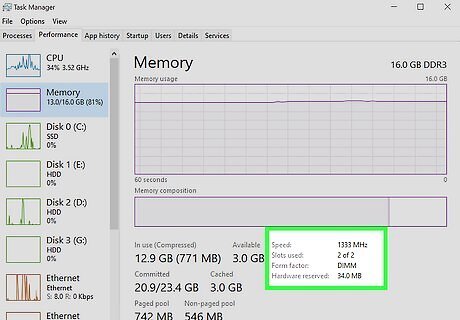
Check your clock speeds in the Task Manager again. If your clock speed is still showing as lower than your RAM's maximum clock speed, restart your computer and check again. If you want to disable XMP in the future, follow the steps of this wikiHow in order but select Disabled instead of an XMP profile.


Comments
0 comment