
Drying Persimmons in the Dehydrator
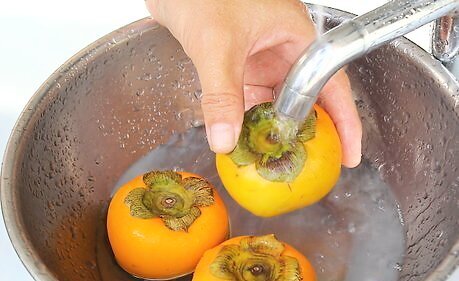
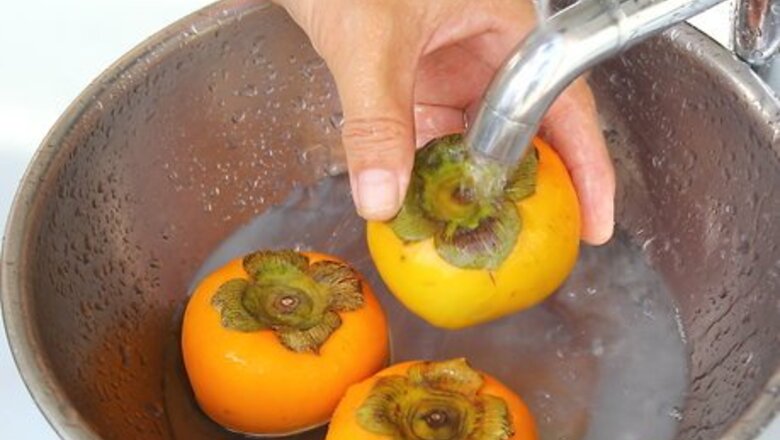
Wash and dry the persimmons. Rinse the fruit under a stream of cool running water, using your fingers to gently wipe away clinging dirt or debris. It’s important that your persimmons be nice and clean, especially if they’ve been picked recently. Any dust or dirt remaining on the fruit may affect its flavor once it’s been dried.
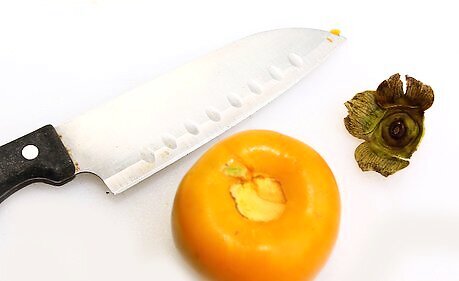
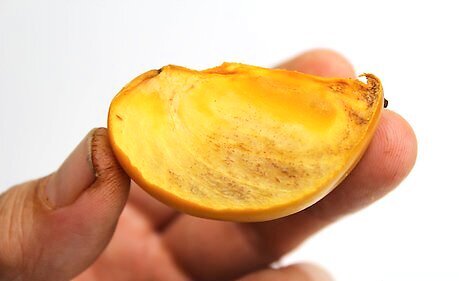
Remove the cap from the persimmon. Place the fruit on a cutting board with the stem-end up. Insert the tip of a sharp paring knife beneath the edge of the stem section, then rotate the fruit slowly to carve out the woody core. Make sure there’s no white pith left behind, as this part can be tough to chew. The persimmons will shrink considerably during the drying process, so be careful not to trim too much usable fruit. There’s no need to peel the persimmons prior to slicing them, but you can cut away any mushy or discolored flesh if you like.
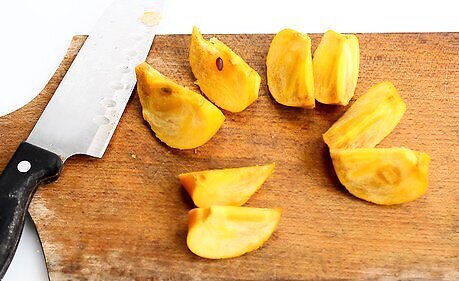
Cut the fruit into ⁄4 inch (0.64 cm)—⁄2 inch (1.3 cm) slices. Slice the persimmon the way you would a tomato, holding the fruit steady with the fingertips of your non-cutting hand and making each cut with a smooth lever action. You should be able to get 8-10 slices out of an average-sized persimmon. Aim for an even thickness to ensure that each slice dries at the same rate. Underripe persimmons may require a little more effort to slice, but avoid sawing the fruit too much, or you could damage the delicate meat inside.

Place the slices in a dehydrator. Arrange the slices directly on the rack, leaving a little bit of space between each. Once they’re inside, set the dehydrator to a temperature around 115–150 °F (46–66 °C). Low, constant heat will help solidify the sugary juices in the fruit without evaporating them or causing them to burn. Depending on the size of your dehydrator and the number of persimmons you’re working with, it may be necessary to do your drying in batches. You also have the option of drying the slices in a conventional oven if you don’t have a dehydrator. Keep in mind, however, that this method may not result in as pleasant a taste or texture due to the more intense heat.

Allow the persimmon slices to dry for at least 20 hours. In the meantime, avoid opening the dehydrator or disturbing the fruit for any reason. They need to be heated without interruption in order to cure properly.
Check the slices to see how they’re coming along. By the 20-hour mark, they should have taken on a deep orange-red color with a slightly wrinkled surface. You can also break or nibble on a slice to test its consistency. A perfectly dried persimmon will be gummy but not too chewy, with a soft bite that melts in your mouth. If your persimmons don’t look quite done, put them back in the dehydrator for 1-2 hours at a time until you’re satisfied with their appearance. Do your best to avoid overdrying the slices. When this happens, they’ll be become shriveled and brittle, and a lot less enjoyable to eat as a result.
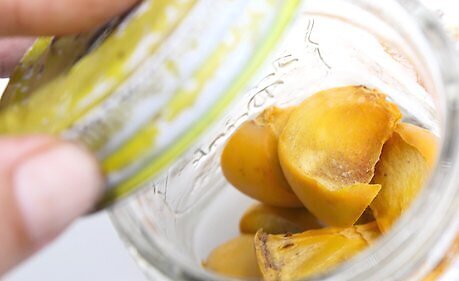
Store your uneaten persimmons in an airtight container. If you don’t plan on savoring the slices right away, transfer them to a lidded storage container or locking zipper bag and make room for them in your pantry. Alternatively, stashing them in the refrigerator or freezer will help maximize their shelf life if you’re holding onto them for a special occasion. A roomy mason jar with a sealing lid can also provide a more presentable storage solution for persimmons that you plan on keeping at room temperature. Since they’ll be well-preserved, your dried persimmon slices should last up to 6-8 months when properly stored.
Hang-Drying Persimmons Naturally ("Hoshigaki")
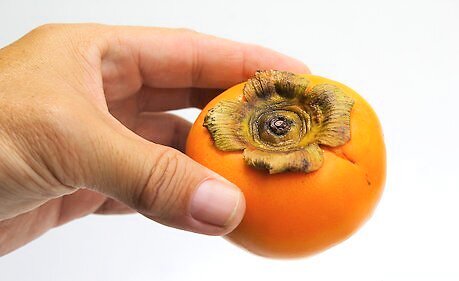
Start with underripe hachiya persimmons. While there are many different species of persimmons, hoshigaki is traditionally prepared using the hachiya variety. The fruits you select should be a little underripe—firm to the touch, but not overly hard. They’ll soften up as they sit in the sun, eventually turning spongy as the sugars break down and lend each bite a candied sweetness. You’ll typically be able to find hachiya persimmons at international supermarkets and specialty food stores that carry exotic produce. Mature persimmons naturally have a higher sugar content, which means they’re more likely to over ripen when dried in the sun for long periods of time.

Peel the persimmons, but leave the stem intact. Run the blade of a knife carefully around the outer edges of the fruit to remove the thin peel. Continue until you reach the woody stem, but don’t cut it off. This little nub is what you’ll be using to hang the persimmons and prepare them for drying. If you’re prepping a lot of persimmons, it may be easier to use a veggie peeler or mandoline to do the bulk of your peeling.
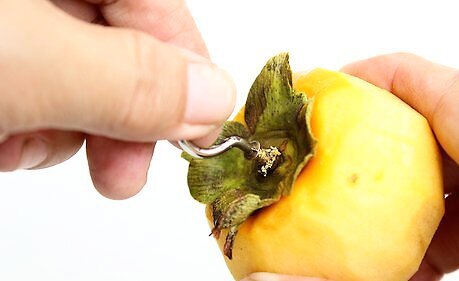
Insert a screw into the top of fruits that are missing their stems. Every now and then, you’ll come across a persimmon with a stem that’s broken or only partially formed. When this happens, reach for a small metal screw and twist it into the woody core. The screw will serve as a makeshift anchor point. You may have to use a little force to get the screw deep enough in the dense stem core to provide the stability you need.
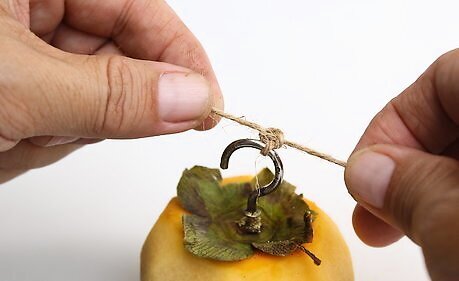
Wind a length of twine around the stem at the top of the fruit. The sturdy stem is useful for suspending whole persimmons, which can get a little heavy. After tying off the twine, test the knot to make sure it’s secure. Fruits that slip out of their rigging may not dry as consistently as the others. Any kind of thread will do if you don’t have any butcher’s twine on hand, including shoestrings, yarn, or even flexible metal wire.
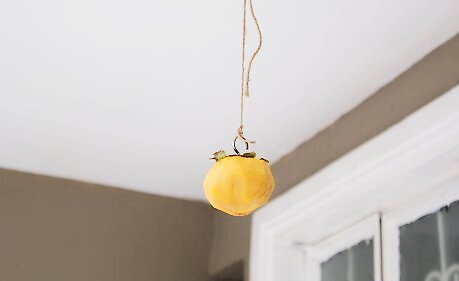
Hang the persimmons in indirect sunlight. Pick out a well-lit (but not too bright) spot in front of an east- or west-facing window or somewhere on your screened-in porch. Knot the opposite end of the twine around a nail or thumbtack to hold it in place. Positioning the persimmons where they can get at least 4-5 hours of partial sunlight a day will cut down considerably on the time it takes them to dry. If finding a suitable place to hang your persimmons is an issue, try trying 2 fruits together by the stems and looping them over a bannister or curtain rod. For greater control over the amount of light your persimmons get, consider buying a portable towel rack or similar item that you can move around at will.
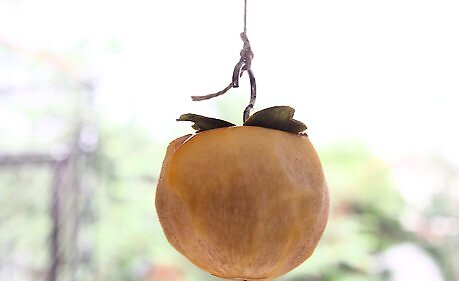
Leave the persimmons to dry for a minimum of 3-4 weeks. Now all that’s left to do is wait for the light and warmth of the sun to work its magic. Resist the urge to handle the fruit, unless it’s to give them a gentle squeeze to get the syrupy juices moving around. It may take quite a bit longer to dry persimmons outdoors if they’re kept in shade, or during long stretches of cool, wet weather. Hang-drying hoshigaki the traditional way requires patience. If you’re in a hurry to enjoy sweet, chewy persimmons, you’ll probably be better off preparing them in the dehydrator instead.
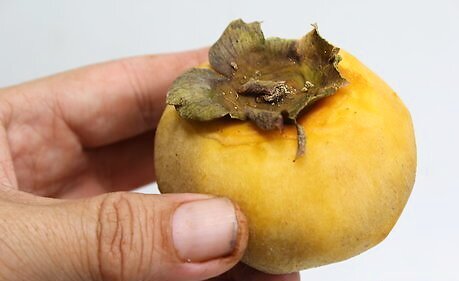
Remove the fruit when it develops a loosely wrinkled exterior. Properly dried persimmons will darken in color and shrivel up to about half of their original size. Inside, the fruit should be jelly-like and almost crystalline in appearance. Once your persimmons have cured to your liking, untie them and enjoy! If you prefer your persimmons slightly softer and more moist, feel free to eat them a little earlier. The longer you leave them hanging, the gummier they’ll grow. Some fruits may dry quicker than others, depending on how the sunlight behaves. When this happens, simply take them down and reposition the others so that they can receive as much light as possible. Store whole dried persimmons in an airtight container, or simply leave them hanging in a shady spot. Try to use them up within 6-8 months.


Comments
0 comment