
Prepping the Planer
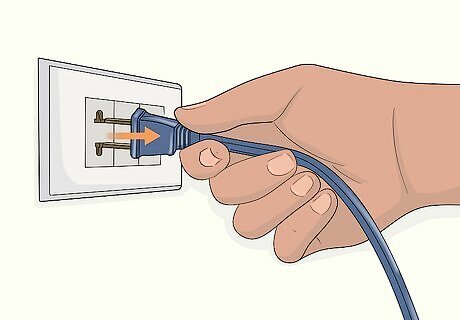
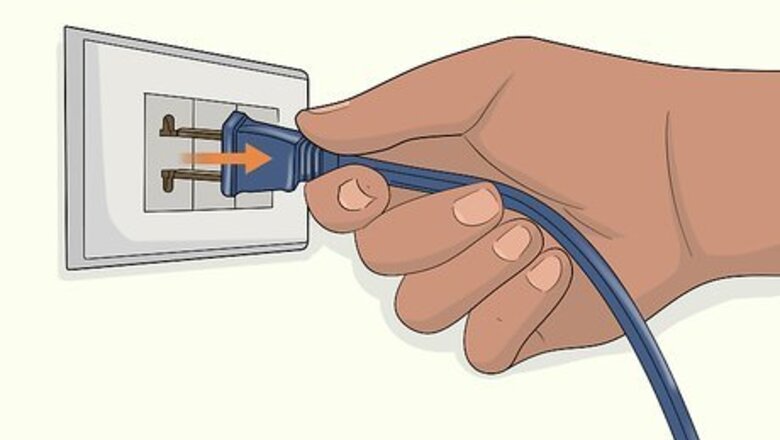
Unplug your planer before doing any work on it. Never work around your power tools while they’re plugged in. Always unplug it before you start making any adjustments. Confirm that the planer is powered-down by hitting the power switch and making sure it doesn’t start up.
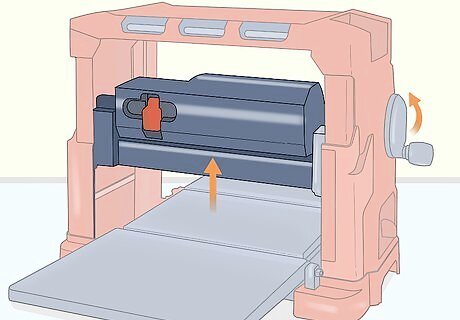
Retract the planer blade completely. The easiest way to check if the planer tables are level is by clamping a straightedge down with the cutter head. To avoid damaging the straightedge, pull the blade up first. There should be a knob or handle on the cutter head to set the blade height. Retract the blade so it doesn’t stick out at all. Different planer models might have different procedures for retracting the blade. Check your user manual if you aren’t sure how to do it.
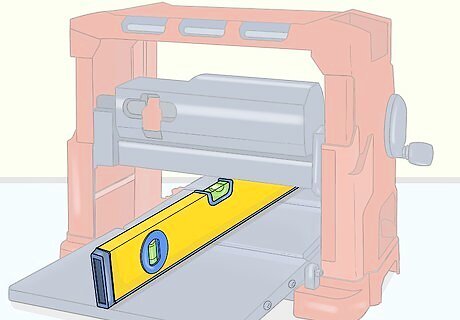
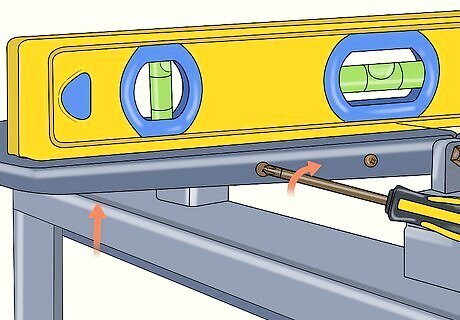
Lock a level in the middle of the planer with the cutter head. Get a level that reaches entirely across the planer to the end of both tables. Flip it on its side so the thinner edge rests on the middle part of the planer. Make sure it’s centered, then slowly lower the cutter head until it holds the level in place. Don’t apply a lot of pressure with the cutter head or you could damage it. Just let it hold the level steady. You don’t have to use a level. You could also use a block of wood or yardstick. You could also hold the straightedge by hand while you work, but then you won’t be able to use one of your hands and the level could move out of alignment.
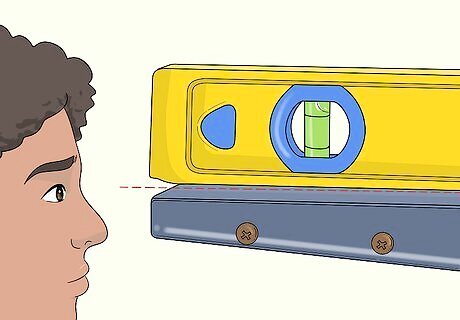
Check how much space there is between the level and planer table. Bend down so the planer tables are at your eye level. If your planer tables are perfectly aligned, then there should be no space between the level and tabletops. Any spaces at the end of the tables or near the planer body need adjustment, or your wood will be sniped. You can adjust both ends of each table, so take note of where the spaces are. If the tables touch the level at all points, then they're aligned and straight. There's not need to readjust them. Leave the level or straightedge locked down while you work. This will make the job much easier.
Aligning the Tables with the Planer
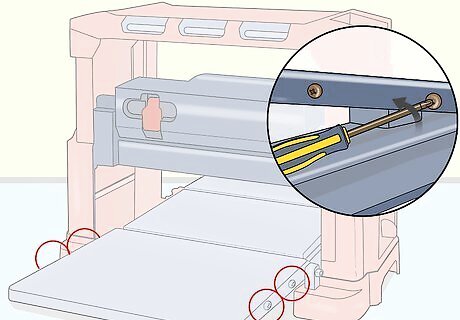
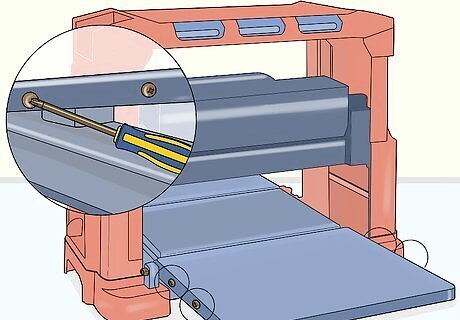
Loosen the 4 screws on one of the tables. Each planer table has 4 screws, 2 on each side, that control the table’s inner height. Start with 1 of the tables and turn each screw counterclockwise to loosen it. Don’t remove the screws entirely. These are usually Phillips head screws.
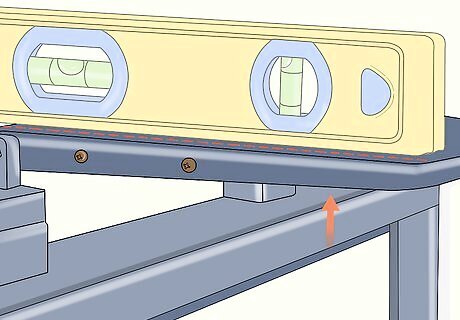
Push the left part of the table up so it’s flush with the planer. With the screws loose, you can move the table up and down. Start on the left side and push the table up until it’s perfectly flush with the planer. Even with the screws loose, you might have to bump or tap the table to push it up. If it still won't move, then try loosening the screws more. Don’t push the table up too high either. This will also cause wood sniping.
Tighten the screws on the side you adjusted. Hold the table in place and re-tighten the screws on the left side. Check to make sure that side is locked in place before adjusting the right side.
Repeat the same process on the right side of the table. Switch to the right side of the table and push it up from the bottom until it’s flush with the planer. Tighten those screws to complete the adjustment. Tap around the table to make sure it’s secure. If it moves at all, then it’ll cut the wood incorrectly. Tighten all the screws as needed.
Make the same adjustments on the opposite side of the planer. If the other table on your planer also needs adjustment, then follow the same steps. Loosen all 4 screws, bump up each side so it’s flush with the planer, then re-tighten all the screws.
Adjusting the Table Height
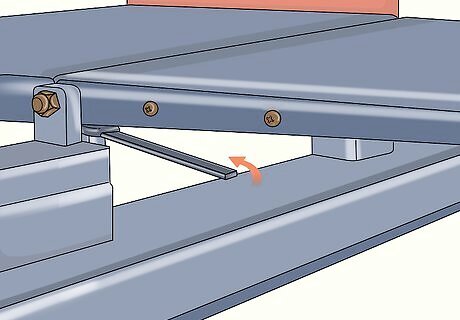
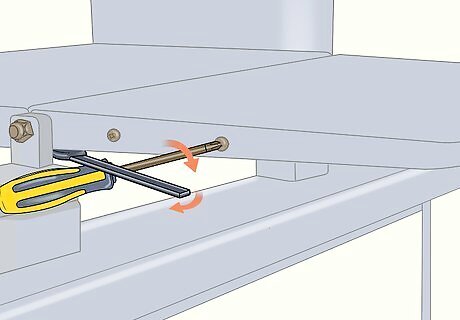
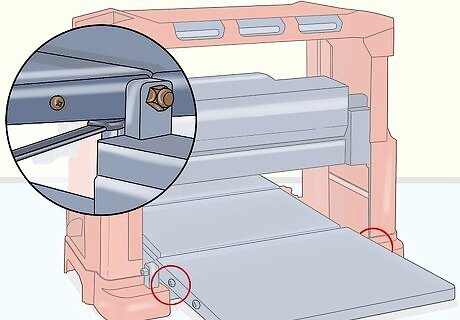
Loosen the locknuts on each side of the table. Each table has a bolt on each side near the planer body. These bolts set the height of the outside part of the table. Start by loosening the locknut on each bolt. Use one wrench to hold the top of the bolt in place. Then use another wrench to turn the locknut below it counterclockwise to loosen it. Do the same on the other side of the table. The bolt size might be different on different planers. Check your user manual for the correct wrench size, or just try a few out until you find one that matches.
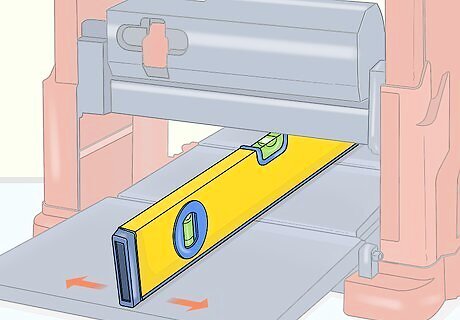
Move the level over to the left edge of the table. Lift up the cutter head to free the level. Slide it over so it’s even with the left edge of the table, then clamp it back down. You don’t have to start on the left side. Start on whichever side you want.
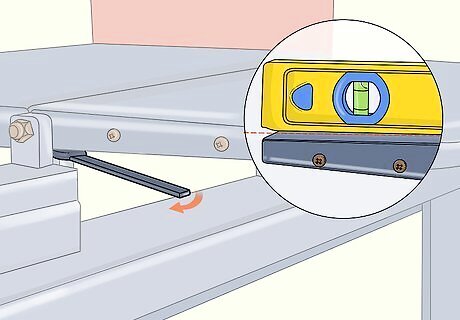
Turn the bolt on the left side until the edge of the table touches the level. Use a wrench and turn the bolt counterclockwise to raise the table up. Continue turning until the tabletop touches the level. Then re-tighten the locknut by turning it clockwise.
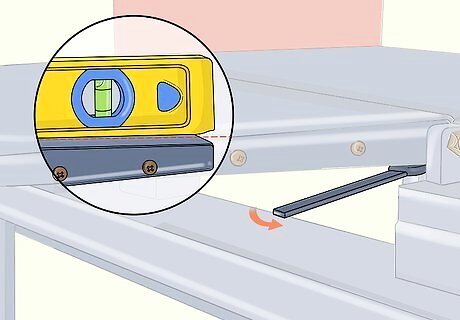
Raise the right side of the table the same way. Lift the cutter head and slide it over to the right side of the table, then lock it down again. Turn that bolt counterclockwise to raise the table until it touches the level. Tighten the locknut to complete the adjustment. For an extra test, you could use the level to make sure the table is completely leveled. This will show you if it's still crooked anywhere.
Adjust the table on the opposite side of the planer. If the other table needs adjustment as well, then repeat the same actions. Loosen the locknuts, align the level with the left side, raise the bolt until the table touches the level, then do the same for the other side. After this, your planer should be perfectly aligned.


Comments
0 comment