
Setting Up Your Machine
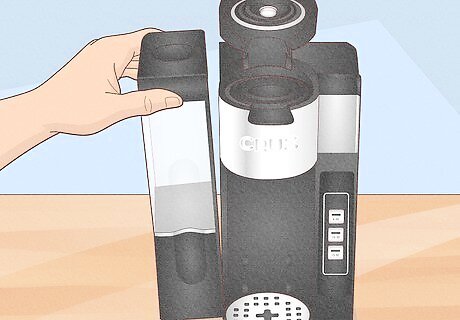
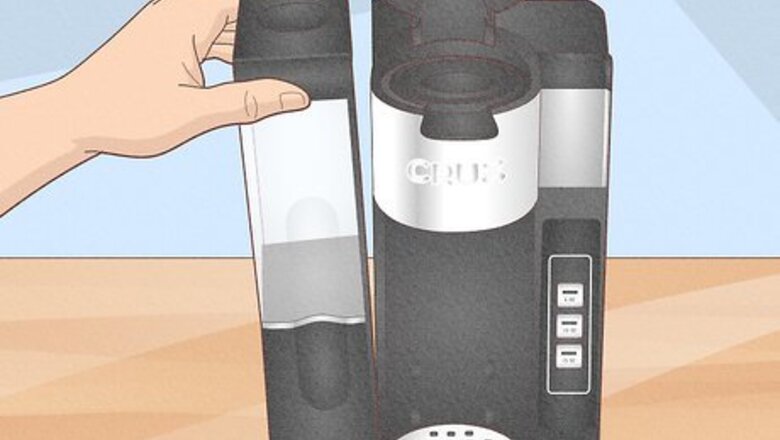
Assemble the machine. For first-time use, the coffee maker should come mostly assembled. However, you may have to attach the water reservoir, drip-tray, and other detachable parts.
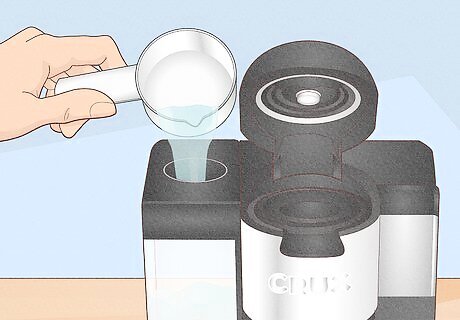
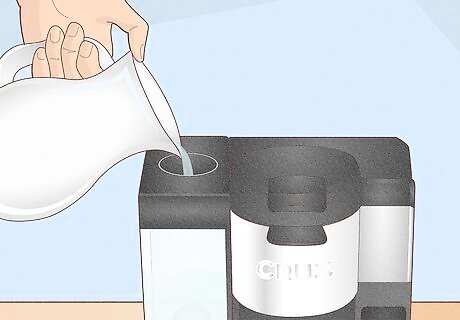
Pour water into the reservoir. While the reservoir is detachable and can be filled directly from the faucet, an easier way to do this is to fill your cup with water and pour it into the reservoir until it is full. The reservoir has two fill lines: a MIN line and a MAX line. Keep the water level between these lines as often as possible for efficient brewing.

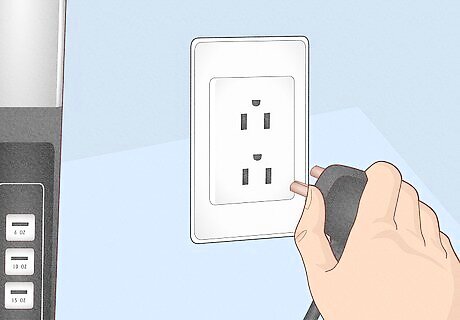
Plug in the machine. When you do this, the three front-facing buttons should flash 3 times. This will signify that the machine is receiving power.
Run a cleansing cycle first. Doing this before brewing a cup purges any dust, dirt, or other unwanted material out of the system. It also reduces the chance of these foreign particles going into your coffee. Place the mug (preferably one that holds 15 ounces or more) underneath the pour-spout. Choose the largest size (15 oz.), unless the user manual indicates otherwise. Do not add coffee. Allow only hot water to pour into the cup.
Brewing Coffee
Add water. If the reservoir is full from a previous brew, skip this step.

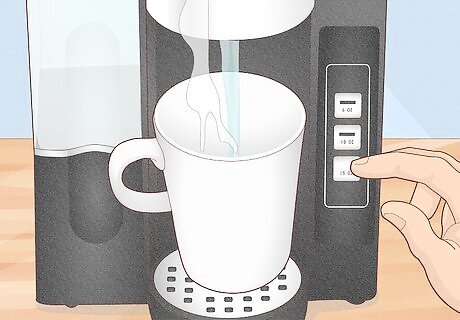
Position a mug or cup in the machine under the pour-spout. Make sure that your mug is large enough to hold your desired brew size. If necessary, remove the drip tray from below the cup.
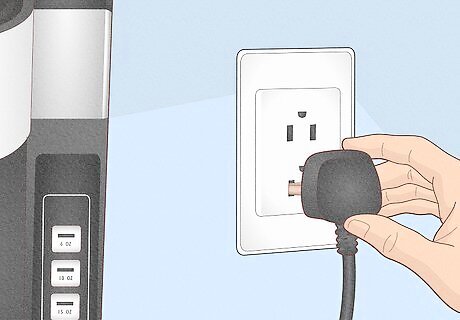
Plug in your machine. Make sure to use a wall outlet. Avoid a power strip, if possible, as an accidental spill may make its way to the power strip and cause a fire. To ensure proper power, make sure the front-facing buttons flash 3 times once you plug in the machine.
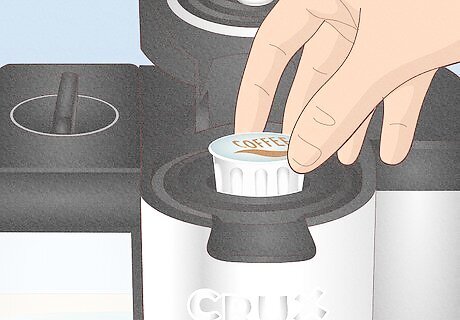
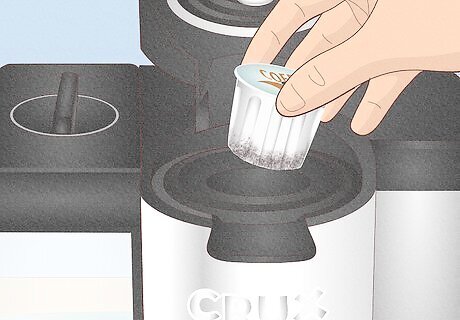
Add your coffee type. If you're using coffee pods or "K-cups", use the pod holder. If you're brewing loose grinds, use the netted coffee filter instead.

Close the spout. This is where you should have placed your coffee. Once closed, you should hear a click. If you're using a coffee pod, you should hear the needle puncture a perfect hole into the pod. Your machine will not work if the spout is ajar even slightly.
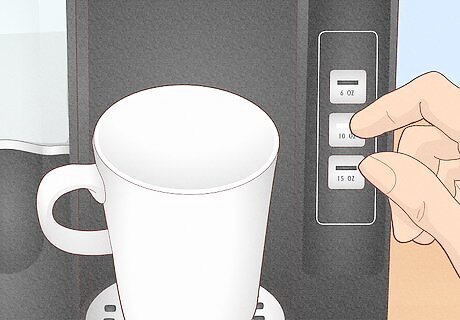
Choose your desired brew size. You have three options: 6 fluid ounces, 10 fluid ounces, or 15 fluid ounces.
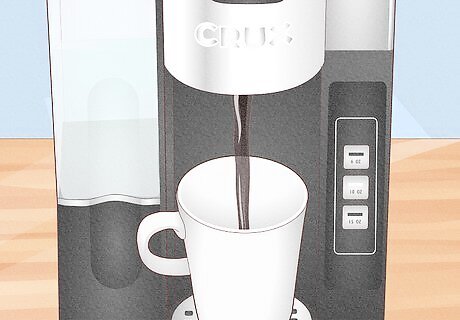
Wait for your coffee to brew. Once you choose your size, the machine will heat the water and combine it with the coffee grinds to brew a hot cup of coffee. This should take one to two minutes.
Unplug the machine. When your brew has finished, unplug your coffee maker from its power source. This will minimize or eliminate any chance of electrocution, or any other electricity-based hazards.
Remove your coffee pod or coffee filter. This should keep any dripping to a minimum.
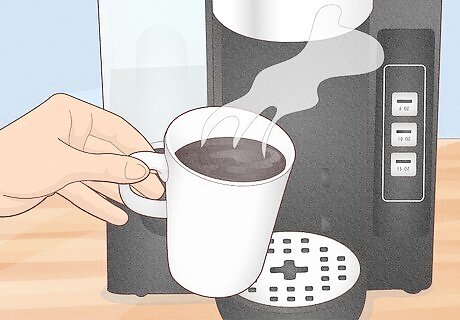
Remove your coffee mug. At this point, most of the dripping should stop, but some drips may still occur.
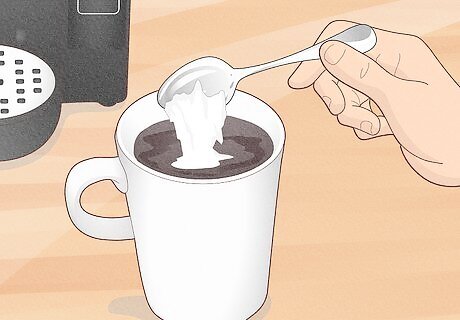
Add your desired mixings and enjoy.
Cleaning Up

Unplug your machine. Even under proper electrical standards, you cannot always prevent water-to-electric contact. You don't want an electrical hazard to occur.
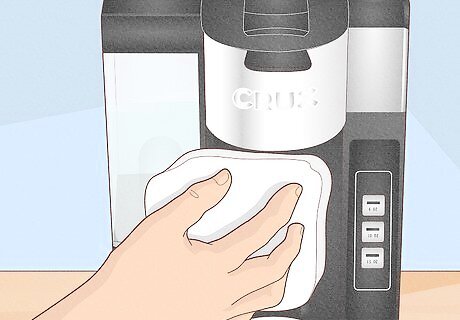
Wipe down your machine. For this, follow your user manual. It is best to use a slightly damp cloth unless otherwise stated in your manual.

Run some cleansing cycles. For the first set, dump your reservoir. Next, add anywhere between one-third and one-half of the reservoir with white vinegar. Fill the remaining space with clean water only. Remove your coffee pod, if needed, from your machine. Plug your machine into a wall outlet. Run your machine until the reservoir is empty. Make sure there is a mug, cup, or other heat-resistant container under the spout so it can catch the water. Empty the cup as often as needed. When finished, fill the reservoir with water only, and repeat this step one to two more times.

Clean your drip tray. There may be some stained drippings from the number of times you've brewed coffee. Use soap and warm-to-hot water, then scrub with a clean sponge.a When finished, be sure to rinse with as much (or as little) water as necessary to fully remove any soap residue from the drip tray. Do the same for other detachable parts, especially if they tend to come into direct contact with coffee.

Place all detachable parts back into their appropriate slots on your coffee maker. If you have interchangeable parts to your machine, place them in a safe and dry place.


Comments
0 comment