
views
Transforming an Image Using Photoshop
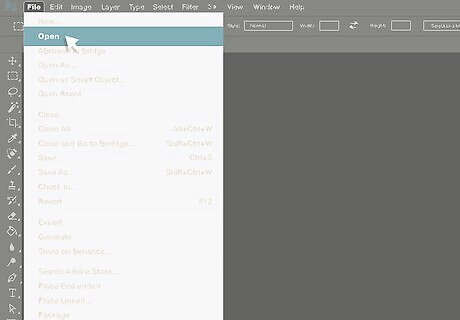
Open the picture you want to use. After opening the Photoshop program you’ve chosen to work with, click the “File” tab in the upper lefthand corner of the screen and choose the “Open Image” option. Then, select a photo from the appropriate folder on your computer. For best results, pick an image with a clear subject and well-defined edge detail. Portraits of people are good candidates for converting into digital sketches, as are small-scale landscapes and shots of one or two distinct-looking items. If the picture you want to use is stored on a separate device or camera, you’ll need to transfer it to your hard drive before you can edit it via Photoshop.Tip: If necessary, tinker with the contrast of your image so that your subject stands out better against its background before you get started.
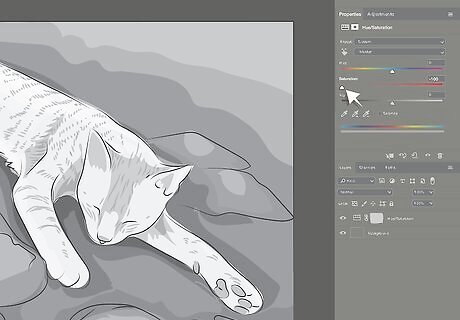
Turn the color saturation of your photo down to zero. Look for the boxlike panel labeled “Adjustments” on the right-hand side of the screen and click on the Hue/Saturation icon. This will be the first icon on the left in the middle row. When the Hue/Saturation slider bar appears, drag it all the way to the left until the slider rests on “0%”. You can also convert your image to grayscale by simply hitting “Ctrl+Shift+D” (or “Cmd+Shift+D,” if you’re using a Mac). Yet another way to desaturate your photo is by clicking on the “Image” tab and selecting “Hue/Saturation” from the expanding “Adjustments” menu or clicking the “Desaturate” option closer to the bottom of the list.
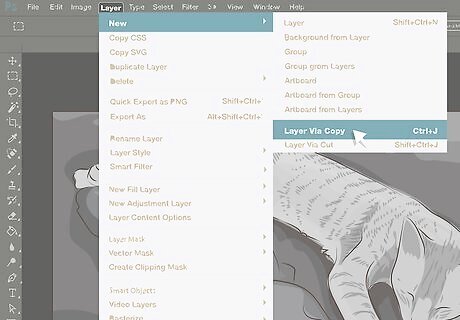
Duplicate the background layer of your image. From the “Layer” tab at the top of the screen, click on “New,” then “Layer via Copy.” Alternatively, you can press “Ctrl+J” or “Cmd+J,” or drag the layer onto the “New Layer” icon at the bottom of the Layers window. This will create a second identical layer of your existing image titled “Background Copy.” In order to achieve that authentic hand-drawn look, you’ll be merging two separate layers into one image.
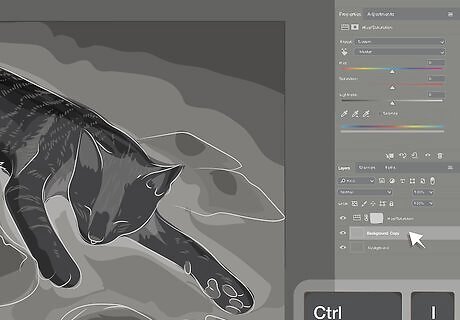
Invert the copy layer of your background image. Click on the layer labeled “Background Copy,” then hit “Ctrl+I” or “Cmd+I.” Doing so will invert the tones in your photo, turning the black portions white and the white portions black. This layer will now be the exact opposite of your original layer. It’s okay if you invert the original layer by mistake. All that matters is that you have one normal version and one inverted version of the image.
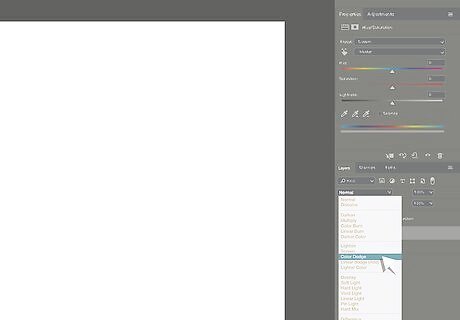
Change the blend mode to “Color Dodge” or “Linear Dodge.” Locate the bottom drop-down menu on your Layers panel—it should currently read “Normal”—click on it, and choose one of the two aforementioned blend modes. As you do, most of the detail will disappear from your image, leaving a predominantly white screen. Don’t worry, this is supposed to happen. Selecting the “Color Dodge” option will give your photo thin, sharp lines like those in an actual pencil sketch, while “Linear Dodge” will soften them a bit so that they resemble a charcoal sketch.
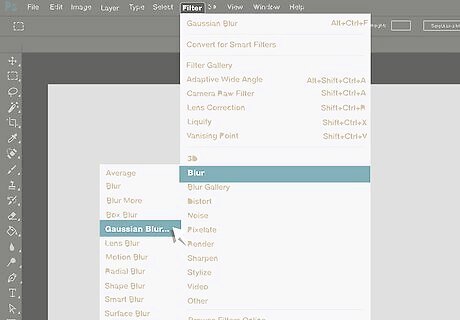
Apply the Gaussian Blur filter and adjust it until your image looks just right. Head to the “Filter” tab on the top toolbar and highlight the “Blur” option, then select the “Gaussian Blur” filter about halfway down the list. Move the slider left or right to increase or decrease the effectiveness of the filter. The higher the filter radius, the more detail that will be preserved, and the more like a photograph the image will appear. A radius somewhere in the neighborhood of 8-30px will usually offer the most convincing results. If the lines in your image still aren’t as bold as you would like, one thing you can do is create 2-3 additional layers of your edited image and merge them together to beef them up a bit. When you’re satisfied with the look of your image, right-click your original layer and click “Merge Layers.” This will combine the properties of all of your individual layers into a single layer. Keep in mind that you won’t be able to make any further edits once you’ve merged your layers.
Converting Your Photo with GIMP
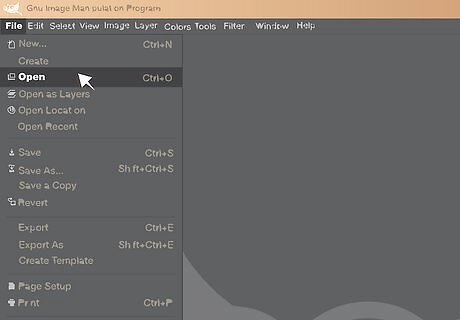
Import the image that you want to turn into a drawing. Open the GIMP editor and select the “File” tab in the upper lefthand corner of the top toolbar, then click “Open.” Choose your source image file from the appropriate folder on your computer’s hard drive. A well-framed photo with a clear subject and distinct edge details will work best. If it’s your first time using GIMP for this type of project, run a quick search for stock photos that you can play around with. Many stock photos are perfectly suited for converting to digital sketches and will give you a sense of what each step of the process does.
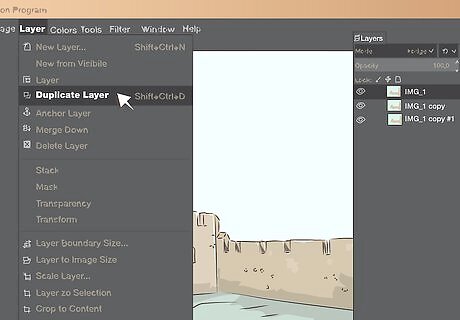
Open the “Layers” panel and create two duplicate layers of your image. Press “Ctrl+L” to pull up the Layers panel, or click the “Windows” tab and select “Dockable Dialogs>Layers.” Once the panel has appeared, click the duplicate button to the right of the down arrow near the middle of the Layers window two times to make two additional layers identical to the first one. The icon for the duplicate button looks like two overlapping photos. You’ll be using the Layers window to make all the necessary modifications to your original photo.
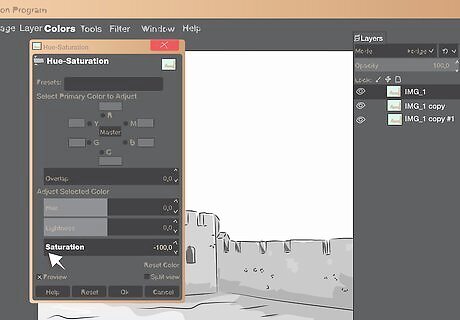
Desaturate your original image layer to make it black and white. Click the “Colors” tab in the top toolbar and choose the “Hue/Lightness/Saturation” option. Then, scroll down to the “Saturation” bar and drag the slider all the way to the left until the value reads “-100%”. Click the “OK” button to apply the effect. You can also click the “Desaturate” option in the “Colors” menu and select “Luminosity” for a slightly higher contrast look.
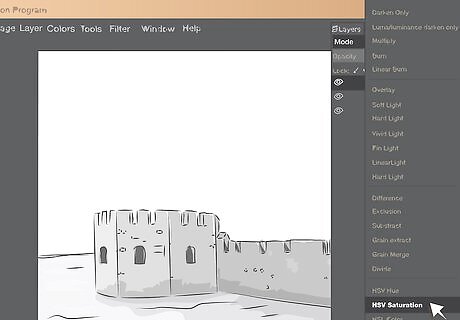
Change the mode of your first layer from “Normal” to “Saturation.” Look for the drop-down menu labeled “Mode” in the upper lefthand side of the Layers panel. Open the menu and scan the list of render modes until you see “Saturation,” then click this option. You may notice the contrast of your image change slightly when you apply Saturation mode.
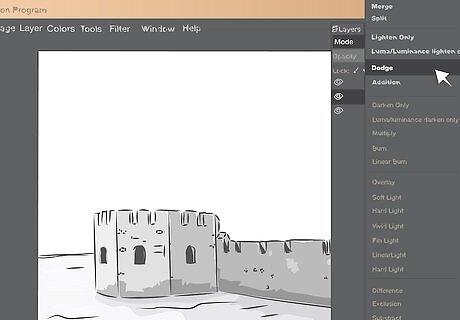
Switch your second layer to “Dodge” mode. Now, click on the first of the two duplicate layers (the second layer in the list) and navigate back up to the “Mode” menu at the top of the Layers panel. Open the drop-down menu and change the render mode of this layer to “Dodge.” Dodge mode will reduce the exposure of your image, flattening the and coaxing more detail out of dark spots. This effect will give the lines in your final “drawing” a rougher, sketchier look.
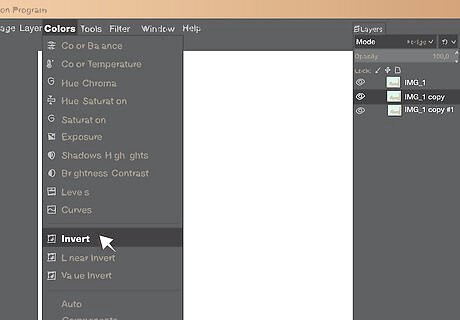
Invert the colors of your second layer. Go back up to the “Colors” tab on the top toolbar and select “Invert.” Doing so will cause most of the black tones to vanish from your image, leaving a mostly white screen. You’re almost there! If your image doesn’t turn white when you click “Invert,” you may have applied the effect to the wrong layer. Hit “Ctrl+Z” to undo the action and try again, being sure to select the middle layer in the list.
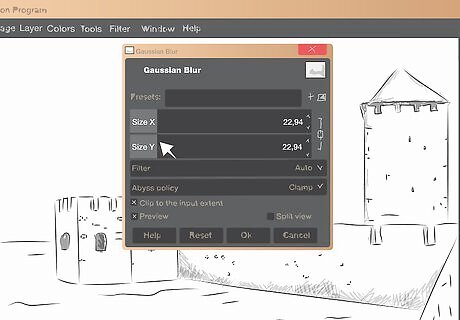
Apply the “Gaussian Blur” filter to the inverted layer. Go up to the “Filters” tab on the top toolbar and select the “Gaussian Blur” filter. A settings window for the filter will appear, allowing you to control the filter’s effects. Set the blur radius for both the horizontal and vertical dimensions somewhere between 10 and 30, then click “OK.” If you’re not sure where to begin, start a blur radius of 10 and slowly increase one or both values.Tip: The ideal blur radius setting will differ depending on the size and resolution of your image. You may need to play around with the numbers a bit in order to get your image looking the way you want it.
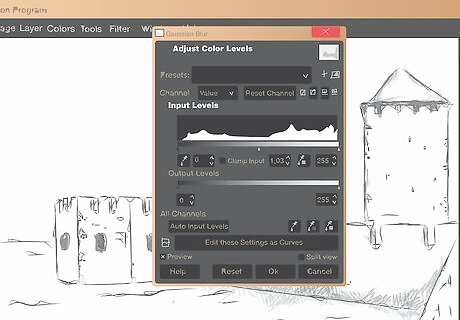
Adjust the color levels of your third layer for a more detailed image. If you feel a little underwhelmed with your digital drawing after applying the Gaussian Blur filter, there is a way you can tweak it a bit more. Select your second duplicate layer (the third one in the list), then head up to the “Colors” tab on the top toolbar and click the “Levels” option. You can then slide the small arrows at the bottom of the Input Levels box to the left or right to alter the depth of the image’s black-and-white tones. After making your final edits, right-click your original layer and use the “Merge Layers” function to bring all of your layers together into a single image. Don’t forget to save a copy of your image in your preferred file format when you’re done!
Using Free Apps and Websites

Download a photo editor program or app. Don't worry if a high-end photo editor like Photoshop or GIMP isn't within your budget or skillset. There are also lots of free apps and websites out there that will let you start experimenting with your photos in minutes. Most of these apps are easy to use, with intuitive controls and a number of tools that allow for greater customization. Photo Lab, Paint, Enlight Photofox, Prisma, and Clip2Comic are all free apps that boast a wide range of filters and effects meant to emulate traditional art styles. If you’re surfing the web, check out popular photo editing sites like Pixlr and Paint. NET. There’s no need to use a fancy photo editor if you just want to play around. These days, the newer version of many common programs, like Microsoft Word, Excel, and PowerPoint, feature their own built-in photo effects.
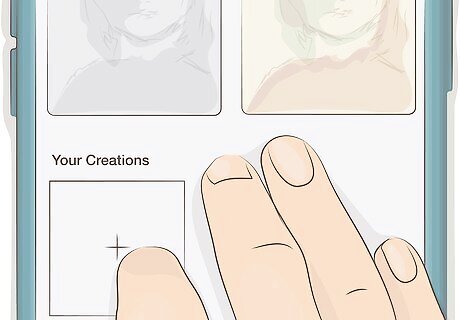
Choose a photo to turn into a drawing. Select an image file from your device’s camera roll or your computer hard drive. You can use any photo you like. However, you’ll get the best results from clear, well-framed photos that have a definite subject and aren’t too busy. Photos that contain lots of small details could end up looking muddled or confusing once you apply certain filters or effects.Tip: The picture you upload doesn’t have to be of a person. You can also use your photo editor of choice to transform nature shots, still lifes, or even snaps of food you’ve cooked.
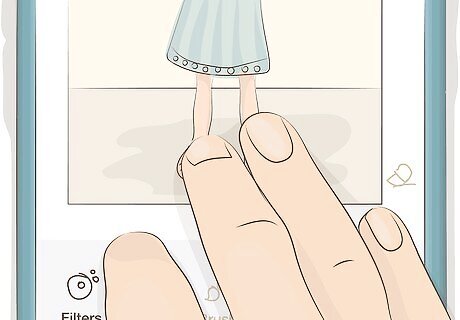
Locate the program’s “Effects” feature. Most photo editors have a tab near the top of the screen that says something like “Effects,” “Filters,” or “Stylize.” If you’re using a mobile app, you’ll usually be able to find the function you’re looking for by tapping the “Edit” button. Apps that are designed specifically to make photos look like drawings often display all of their effects options right on the main page.
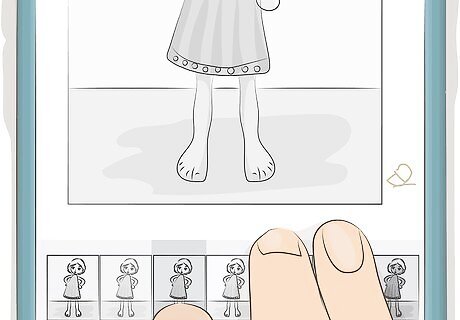
Apply the effect you want to use and try out different looks. Once you’ve pulled up a list of the editor’s effects options, you can tap or click freely on any of them that catch your eye. See how your photo looks as a basic black and white sketch, or perhaps a colorful cartoon or watercolor if you want to preserve the picture’s original hues. When you’re satisfied, tap or click the “Save” button to download a copy of the edited image. Some editors also have more specialized sorts of art effects to choose from, such as retro-fied comic book stippling, vibrant pop art, and subtle charcoal painting.
Sketching Your Photo by Hand
Grab a sheet of paper and a pencil. These two items are all you’ll need to create a simple sketch. Sharpen your pencil to a nice fine point, and make sure you’ve got at least one dedicated eraser. It’s also a good idea to keep a few spare sheets of paper handy just in case you mess up and want to start over. A pencil is much better suited for this project than a pen, as you’ll have more control over your lines. The eraser will also allow you to correct and drawback over any mistakes you happen to make.
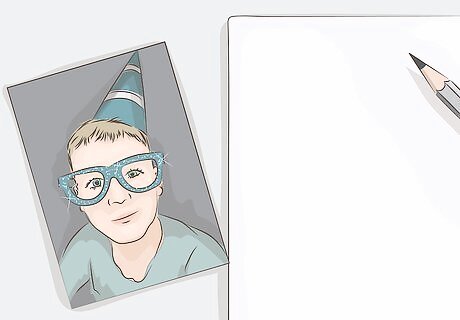
Keep your photo handy for reference. Pull up the photo you want to sketch on your device or computer or keep a physical copy next to your piece of paper. That way, you’ll be able to use it as a visual aid and have something to compare your drawing to as you work. Take a few moments to study your photo in depth before you get started. Familiarizing yourself with a many details as possible will help you reproduce the image more faithfully and keep you from having to stop and look at it every few seconds.Tip: Turning the color saturation in your source photo down to zero could help you translate it better to paper since it will be closer in appearance to your final drawing.
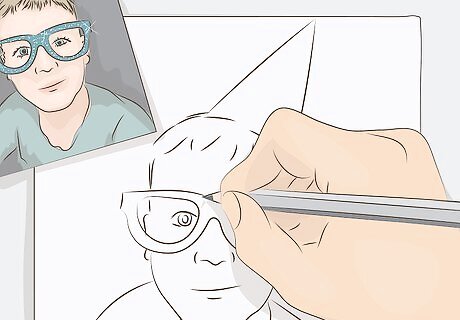
Start by sketching out the outline of your subject. Use short, light pencil strokes to gradually develop the shape of the person or object in your photo. Do your best to keep the proportions of your drawing the same as those in the original image. Scaling each individual part of your sketch so that it’s roughly the same size as your photo can help. Don’t bear down too hard. You can always go back and make your lines thicker and darker once you’re happy with the way they look. Another useful technique is to section off both your paper and original photo into identically-sized squares, then zero in and focus on copying only what you see in each square. You can start your outline wherever it feels most natural to you. As a rule, it’s just easier to start with the basic form before moving on to smaller details, rather than vice-versa.
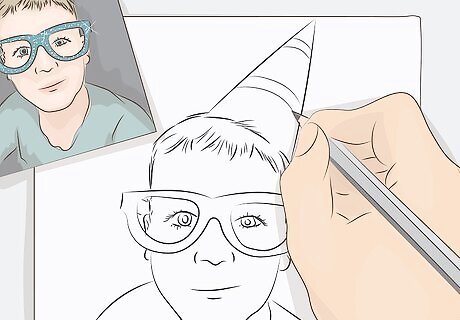
Fill in smaller details. Once you’ve completed your outline, flesh it out with that give your subject its unique character. If you’re drawing a person, this will include things like their facial features, hair, and clothing. If you’re bringing to life a nature scene, it might mean adding rippling water, leaves, and clouds. As you did with the outline, try to match the proportions of your drawing to those of your photo, and keep your lines light and loose until you’re ready to commit to them. The idea here is essentially just to recreate the kinds of lines, shapes, and contours you see in the original image onto your paper. This requires a keen eye and a steady hand more than anything else. If you need to make small touch-ups, like fixing someone's eyes, try a Tombow mono eraser. Since it's so small, you can erase tiny details with a ton of precision.
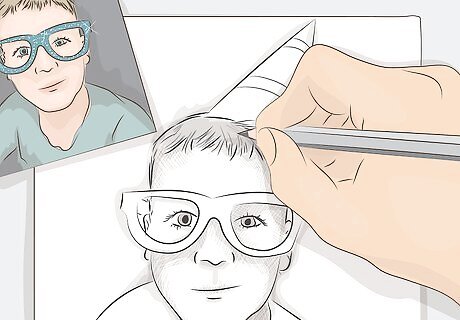
Shade your sketch for added realism. There are a number of ways to shade a drawing. The simplest and most common method is to hold your pencil at a narrow-angle to the paper and rub the side over broad areas. Apply more pressure in areas with deep shadows and lighten up when you get to spots that are meant to represent glare or light colors. To achieve the most realism possible, study how light falls on your subject as well as the shadows cast on them. You can also give techniques like hatching (drawing straight, parallel lines close together), cross-hatching (crossing your hatching lines perpendicularly to produce a gridlike pattern), and stippling (making small dots with the tip of your pencil) a shot for parts of your drawing where conventional shading may not look right. Shading is a crucially important artistic skill to possess if your goal is to make your drawings more lifelike.
Tracing Over Your Photo
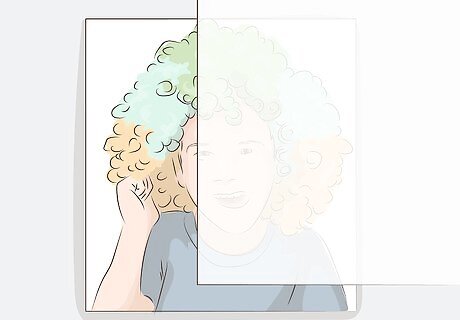
Place a piece of tracing paper over the photograph you want to draw. Line up the edges of the paper with the edges of the photo and make sure it’s lying smooth and flat. Tracing paper is thinner and more translucent than normal paper, which makes it possible to easily trace over the picture below. Alternatively, you can use a regular sheet of printer paper (or any other type of paper you want) and light both the photograph and your paper from underneath with an art projector. For best results, it’s important to use a type of paper that’s at least as big as the photo you’re working with, preferably larger.
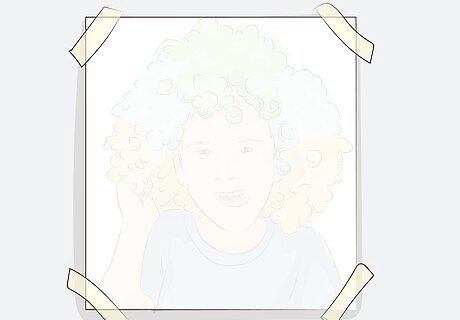
Stick strips of tape over the corners of your paper. This will prevent the paper from sliding around on top of the photograph. To avoid tearing the delicate tracing paper accidentally, use a low-hold type of tape, like masking tape. Be careful not to position the tape too close to the center of the paper, or it could get in your way once you start tracing.
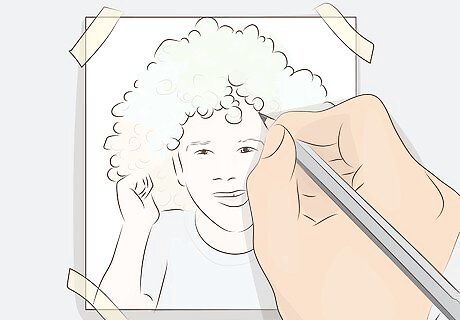
Guide your pencil along the features outlined on your tracing paper. Follow each main line and contour as closely as you can with the tip of your pencil. Use the edge to shade in darker sections and lend a sense of depth. Take your time and work carefully to avoid mistakes. Some smaller details may not be visible on your tracing paper. This usually happens when part of the picture is especially light or made up of thin lines.Tip: Equip yourself with a hard-tipped 3H-H grade artist’s pencil to ensure that your lines come out clean and precise. Softer pencils are prone to smearing and smudging when used on tracing paper.
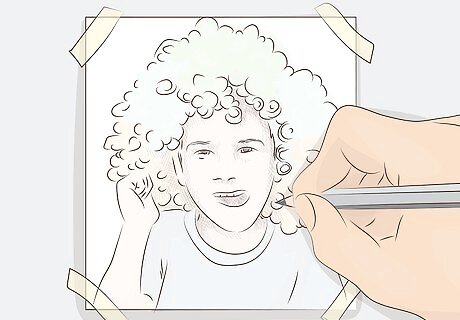
Incorporate fine details or embellishments of your own. If you like, you can add a few extra touches to put your own personal stamp on your finished drawing. You might free-hand new features into the scene or take some artistic liberties with the shading or composition. It’s totally up to you! Transfer your tracing paper to another photo to create a composite drawing made up of elements from different images. If you want to add some texture or special effects after you've colored in your drawing, take out a Tombow mono eraser and try out different strokes. For example, rub your eraser in downward strokes to create highlights in someone's hair.



Comments
0 comment