
Cutting and Tying the Sides of a Shirt
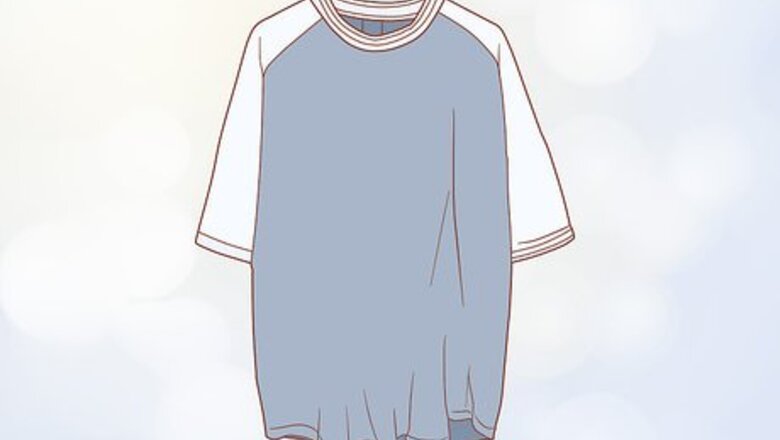
Choose a baggy shirt. Any type of baggy shirt will work for this activity, especially if you'd like it to be more fitted. Experiment with t-shirts, sleeveless shirts, and tank tops. If you don’t have a shirt that you want to cut up, go thrift shopping to find plenty of cheap, unique options. Avoid using woolen shirts for this technique, as the wool tends to come undone once you cut it. Experiment with different fabrics. Cotton, linen, polyester, velvet, and silk all work well.

Use fabric scissors to cut each side of the shirt up to the armholes. Carefully make vertical cuts up the side seams of your shirt. Stop cutting about 1 inch (2.5 cm) below the armholes, so that the sleeves don’t get damaged. If you don’t have fabric scissors, use sharp regular scissors instead. If you don’t want the ties to go all the way up the shirt simply cut halfway up the side seams.

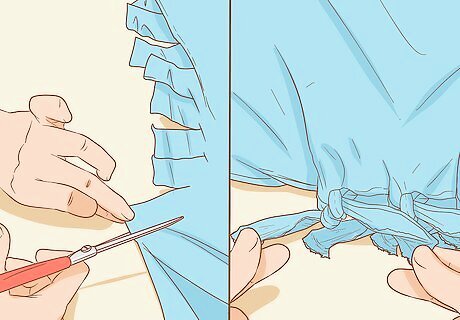
Cut 1 in (2.5 cm) slits every 1 in (2.5 cm) down the sides of the shirt. Make sure that the front and back of the shirt are lying directly on top of each other – this ensures that the cuts are in the same place on both sides. Then, hold the fabric together and make 1 in (2.5 cm) horizontal slits through both sides of the shirt every 1 in (2.5 cm) from the top of the cut to the bottom. Try to make each cut the same size so that the ties look even.
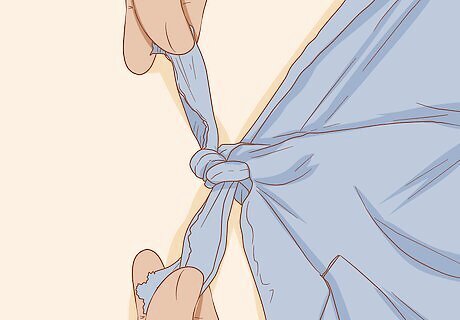
Knot each pair of tabs together. Each slit in the side of the shirt creates 1 in (2.5 cm) tabs. Take the top 2 tabs on 1 side of the shirt and double-knot them together. Then, work your way down to the bottom of the shirt using this same technique. Repeat this process on both sides of your shirt. Pull the fabric tight if you don’t want your skin to show on each side of the shirt. Alternatively, make the knots at the end of the fabric tabs if you want the gaps between the fabric to reveal your skin.

Adjust the tightness of the knots, if necessary. If the gaps between the ties aren’t even, simply make the knots tighter to make the gaps smaller or looser to make the gaps bigger. Try your shirt on to see how it looks and adjust any knots that don’t match the others. Use a full-length mirror to make it easier to see the knots under your arms.
Knotting the Bottom of Your Shirt
Trim and knot both sides of the shirt to give it a fitted look. Use a pair of fabric scissors to cut a 3 inches (7.6 cm) vertical line up each side of your shirt. Then, tie the 2 loose ends together on each side. This helps to showcase your waist and makes your shirt look more tailored. If you shirt is really baggy, make 5 inches (13 cm) vertical cuts.
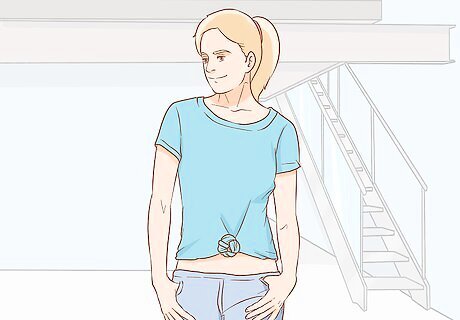
Knot the sides of your shirt at the front to create an on-trend look. If your shirt has buttons, leave the bottom 3 unbuttoned. Then, grip the bottom 5 inches (13 cm) of each side of the shirt and double-knot them in front of you. This can transform your shirt into a crop top and accentuates the shape of your body. This technique works best on shirts that fall to your hips or below. If you prefer to have the knot out of the way, tie the sides of your shirt at the back instead.

Knot the bottom of your shirt on 1 side for a fun, casual look. Pull the bottom of your shirt toward 1 of your hips. Then, grab the bottom 6 inches (15 cm) of the fabric and tie it in a double-knot. This style is a great option for going to the beach, catching up with friends, and general casual occasions. This technique works best on wide-fit shirts.


Comments
0 comment