

Choosing a Zipper

Purchase a zipper 2 in (5.1 cm) longer than the opening. Use a tape measure to measure the area where you want the opening on your dress to be. Consider how far down you want the opening to go. If the dress is form-fitting, then a longer zipper is best since this will reduce stress on the fabric when you put on or take off the dress. Zippers range from 7 to 22 in (18 to 56 cm). Opt for a zipper that will go from the top of the dress to just below the hips. This will likely be around 16 to 20 in (41 to 51 cm) depending on the wearer.Tip: If you are following a pattern to make your dress, make sure to check the pattern for a zipper size, type, and color recommendation.

Choose a zipper in the same color as the dress. Select a zipper that is meant for use in dresses and that will match the dress material as closely as possible. If the dress is a print, then choose a zipper in a complementary color, such as a hot pink zipper for a dress that has a lot of hot pink in the print. Even if you plan to hide the zipper with the fabric at the dress’s opening, choose a color that will blend well with the dress. Black is often a good choice for dark dresses and white is a good choice for light-colored dresses. Dress zippers are often more delicate than the ones you see in pants and on handbags. They also come in a wider range of colors and lengths.
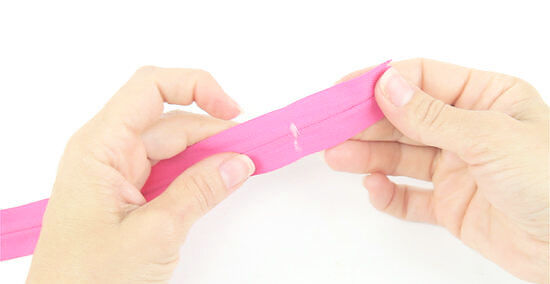
Adjust the length of the zipper if it is too long. Identify where you want the zipper to end and sew a zigzag stitch across the zipper teeth at this point. Then, sew another zigzag stitch across the zipper opening about 0.5 in (1.3 cm) below this point for extra security. Cut the rest of the zipper off 1 in (2.5 cm) below this stitch. Be careful not to sew through the zipper teeth. Adjust the zigzag stitch to the widest setting and sew back and forth into the fabric beside the zipper teeth You can also hand-sew across the zipper using a needle and thread, if you prefer. Thread a needle with a matching color thread and sew back and forth across the zipper teeth where you want the zipper to end. Stitch across the zipper teeth 7 or 8 times to ensure that the new zipper ending will be secure.
Creating the Opening

Mark the dress fabric to indicate the length of the zipper opening. If you have not done so already, then you will need to make an opening in your dress for the zipper. Place your zipper along the edge of the fabric where you want the dress opening to be. Position the top of the zipper along the top edge of the dress and mark the location of the bottom of the zipper on the wrong (inner) side of the dress fabric. Note that this mark indicates where the zipper pull will come to, not where the zipper’s fabric ends. If you adjusted the length of your zipper, then use the position where you stitched across the teeth as the end of your zipper. Use a fabric marker or chalk to make this mark. Tip: If you are placing a new zipper into an old dress, then use a seam ripper to take out the old zipper. Then, sew the new zipper into the opening.

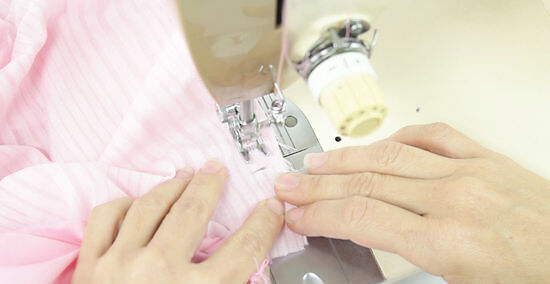
Pin the 2 sides of the dress so that the right sides are together. Line up the edges of the opening fabric so that they are perfectly even. Insert a few pins through both layers of fabric to hold the edges together where you want to sew. Leave the fabric unpinned above the mark you made to indicate where the zipper will end. Insert the pins so that they are perpendicular to the edges of the fabric. This will make it easier to remove them as you sew and avoid damaging your sewing machine.
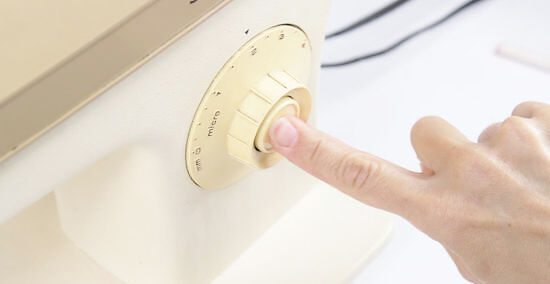
Backstitch at the top and then sew down. Position the fabric under the needle and lower the presser foot. Sew about 1 in (2.5 cm) down the pinned edge of your fabric. After the first few stitches, press the reverse lever on the side of your machine to backstitch by about 0.5 in (1.3 cm). Then, release the lever and continue sewing to the bottom edge of your dress. Position the stitches about 0.5 in (1.3 cm) from the raw edges of your fabric unless your pattern instructs you to do otherwise. This distance from the seam to the edge of the fabric is the most common seam allowance.
Sew a straight stitch from the bottom edge to the bottom zipper mark. Press the lever again when you reach the end of the pinned fabric and backstitch by about 0.5 in (1.3 cm) again. Then, release the lever and sew to the bottom zipper mark again. Cut the excess thread. Do not sew across the unpinned area! This area must remain open until you attach your zipper.

Iron the seam to press down the raw edges of fabric along the opening. Place the inside-out dress on a flat surface and smooth it out. Use your fingers to press down the seams you just added to secure the dress. Then, fold over the edges of the dress opening so that the raw edges will be hidden inside of the dress. Iron to press the seam and folds in place. Make sure to select the lowest setting on your iron, especially for delicate fabrics. You can also lay a clean towel or t-shirt over the fabric to help protect it from the heat. A flat seam and crisp edges will make it easier to attach the zipper. Taking the time to iron the dress opening and seam will give you a much neater looking result.
Attaching the Zipper

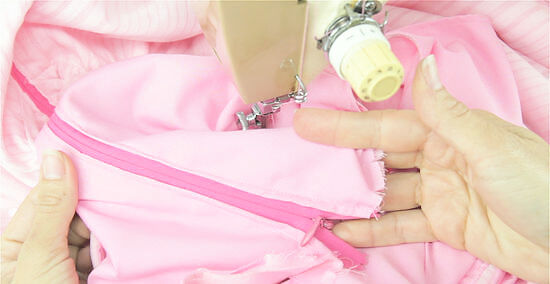
Pin the zipper into the dress opening. Position the zipper along the dress opening so that the zipper teeth are just peeking through the opening. Then, insert a few pins along each of the edges to hold the zipper in place. Make sure that the bottom point of the zipper is lined up with the bottom of the dress opening. To hide the zipper, position the zipper so that the teeth are aligned with the edges of the dress fabric. Insert pins through the dress and zipper fabric right along the zipper teeth. This will ensure that the 2 sides of the dress opening meet when the dress is zipped and the zipper will be hidden. Tip: If you do not want to pin the zipper to the opening, then you can also use sewer’s tape to keep it in place while you sew. This is a good option if you are working with a delicate fabric since pins may damage the fabric.
Backstitch 1 in (2.5 cm) at the beginning of the zipper. Position the top edge of 1 side of the zipper and dress fabric under the presser foot so that the needle will be right next to the zipper teeth. Lower the presser foot to hold the fabric in place. Sew forward by about 1 in (2.5 cm), and then press on the reverse lever to backstitch to the beginning again. Use a zipper foot if you have one. This will make it slightly easier to sew along the edge of the zipper. However, if you don't have one, you can use a normal foot to install a regular zipper. You'll need a zipper foot if you want to learn to sew an invisible zipper.
Release the lever and continue sewing to the bottom of the zipper. Continue to sew a straight stitch down the dress opening and zipper. Then, repeat the same process for the opposite side of the zipper. Cut the excess threads after you have finished sewing the zipper into place.

Hem the top edge of the dress, if needed. After the zipper is attached to the dress opening, you may still have some finishing touches left, such as hemming the top of the dress. Fold over the top edge of the dress so that the raw edges will be hidden on the inside of the dress. Insert pins through the fabric to secure it and then sew a straight stitch along the pinned edges to secure the hem. Make sure to remove the pins as you sew. Cut the excess threads after you finish hemming the dress.


Comments
0 comment