
Remove parts from the box. When you first acquire the 3D printer brand new, it will come with the enclosed printer mostly assembled, the top glass enclosure, the feeding tubes in the back, the control panel, the AMS system, 4 rolls of filament, a mat to print on, a glue stick, assembly tools, and maintenance parts. Lay out all of the pieces so they are visible and easy to find. Obtain the instruction manual.
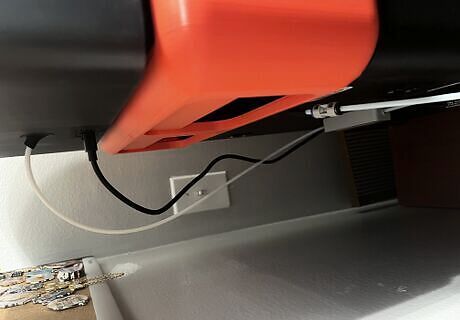
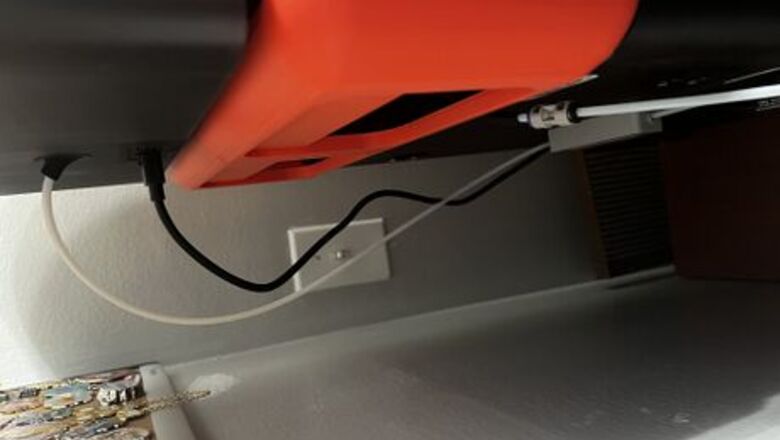
Put the 3D printer together. Read the instructions which follow a step by step process for each bolt and screw to be put together. Following the 3D printer set up, there is an AMS set up which is the part that holds the rolls of filament on the top. The AMS system will be mostly put together, there will only be a few pieces to attach to the system. Place the AMS system on top of the 3D printer for a more compact look. Connect the tubing and wiring from the AMS system to the 3D printer. This allows the AMS system to feed filament from 4 different rolls to the 3D printer. Attach the 3D printer to an electrical outlet. The control panel will turn on and give a number code of a QR code IMG_8027.jpeg
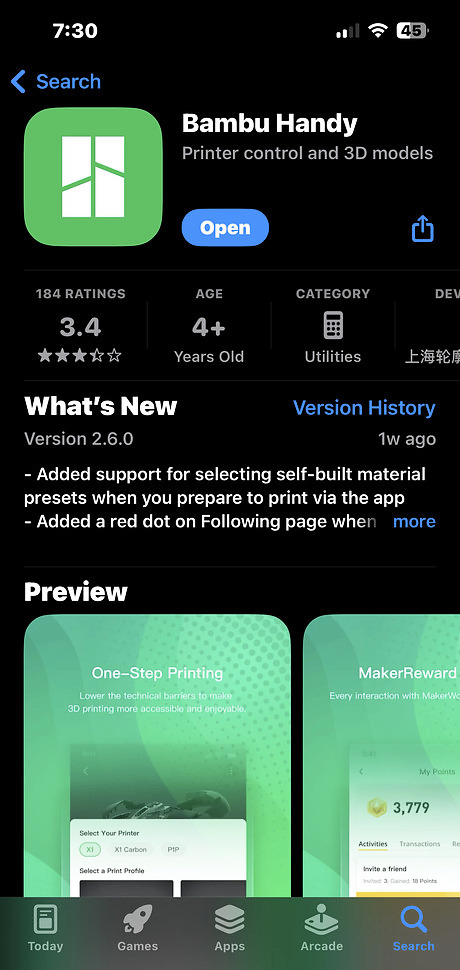
Download the App. After assembling the 3D printer and AMS system, the instructions will tell you to download the Bambu Handy app which is available for IOS and Android devices. Open the Bambu Handy app where you will create an account. After the account is made you are able to connect the 3D printer to your device using the code given on the 3D printer screen. Type in the number code or scan the QR code on your device from the control panel. This should be done in an area that has internet. IMG_8033.png
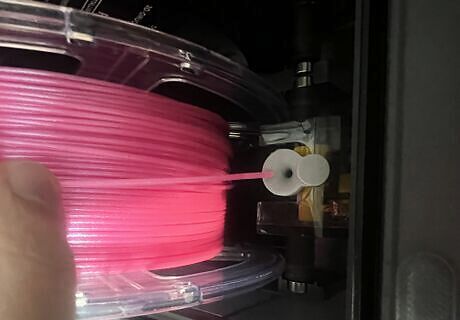
Insert the filament. Open the AMS system and locate the 4 placements for the filament rolls to be placed. After opening a roll of filament, place it vertically into one slot. Push back the gray button shown in the picture while feeding the filament into the hole the button is attached to. The AMS system will grab the filament and roll it back and forth to get a feel of how much filament is on the roll. Open the Bambu Handy app. IMG_8026.jpeg
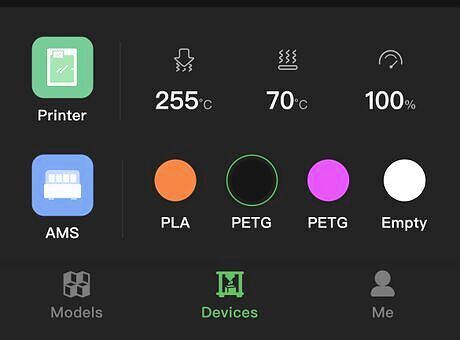
Connect the filament type to the app. In the Bambu Handy app there will be 3 sections on the bottom, click on the section that says “Devices.” From here there should be a printer device and an AMS device if your device is connected to the internet. Click on the AMS blue button. This will bring up 4 gray circles that say empty. Correspond the empty spot on the app with the slot the filament was placed in. Choose that empty spot where you placed the filament and choose the brand, type of plastic, and color of plastic. This will automatically set a temperature for the material to extrude at. Allow the machine to heat up and automatically go through the process it will go through. If there are any additional steps the app wants you to go through, follow them IMG_8036.jpeg

Insert the printing mat. When 3D printing a mat is laid down before extruding the plastic. This allows the printed object to easily be removed from the machine. The Bambu Lab P1S comes with a textured mat which reduces the chance of the printed object from moving while it is being printed. If the object moves the entire print is messed up and it will have to be redone. Placing a light layer of adhesive will also help the printed object from moving. Most people prefer spray adhesive but the machine comes with a glue stick. Replace the adhesive before every print to allow a firm stick of the print to the mat. Clean that mat under hot soapy water every 5-8 prints to remove any adhesive residue to allow the texture on the mat to help hold the print in place. IMG_8029.jpeg

Choose a simple design. It is important to choose a simple design for the first print to see how the machine is working. A common first print is a little boat named Benchy. In the app there are options for a gradually faster print to see at which speed the machine prints the best at. Choose design to print. When you press on the design a green button will appear at the bottom that says “Prepare to Print”, click on it. Choose the correct printer at the top and click “Print”. Choose the type of filament you want to print with and the number of copies to print. Once the options are chosen, press “Print Now”. IMG_8034.jpeg
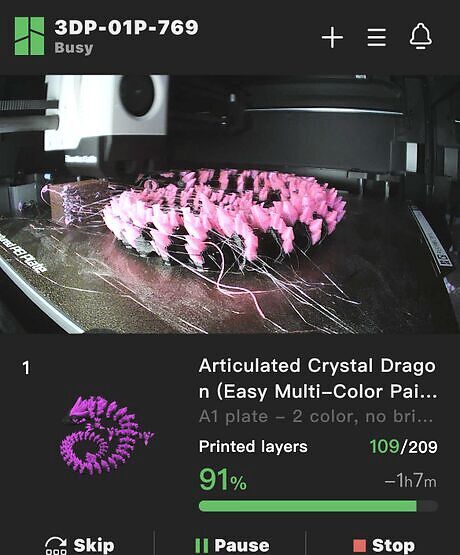
Print the product. After pressing the “Print Now” button the printer will begin making all kinds of noses and moving a ton. This is the machine self leveling itself. The 3D printer will soon star extruding plastic soon after the leveling is done. Watch the print for a few layers to make sure the product is sticking to the mat. Most of the time there will not be any issues especially if the mat is clean and has adhesive on it. Wait for the print to be done. Depending on the size of the print and the amount of colors used, a print can take anywhere from 10 minutes to 24+ hours. IMG_8037.jpeg
Remove the product. Once the print is done a notification will pop up on the app. From here you are able to open the door and remove the product. Lift up on the front tab of the mat. This pops the mat up to allow the mat to come out for easier removal of the product. Bend the mat slightly until you hear the product release from the mat. Once the product is released it should be easy to take it off. Replace the mat.


Comments
0 comment