
Designing the Poster
Choose a program to use. There are many different computer programs that can be used to create a poster. Some programs might already be on your computer, but others you will have to purchase to use. There are also some free online programs you can download to create your poster. Programs to use include the following: Microsoft Power Point Adobe Illustrator Adobe Photoshop Adobe Indesign Apache OpenOffice Impress Linux LaTex

Find your focus. Your poster design should have one central message or idea that it conveys. This focus should appeal to your audience, so spend some time thinking about who you are trying to reach. All of the elements in your poster should reflect your main idea so that your message doesn’t get lost.
Make the layout flow. Your poster should have a layout that is easy on the eyes and makes sense. There should be a point of focus on your poster which is where the viewer’s eye looks first. This could be a picture or a large font. Your design should be balanced. Try using a grid when you design to make sure items are centered when you want them to be. If you want your point of focus to be off center, having negative space on the other side will keep it balanced. Create a path for the viewer to follow. Use lines, color, font weight, and font size to make your poster flow.
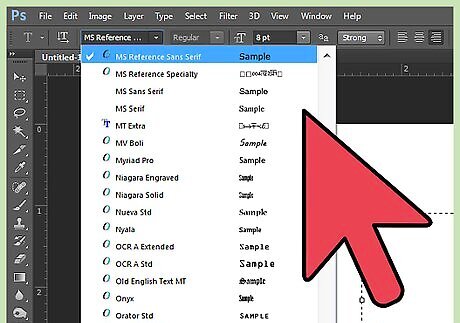
Pick great fonts. Font choice is one of the most important aspects of creating an effective poster. Your main message needs to be able to be seen from far away, so pick a font that will be clear and easy to read. Different fonts can create different emotions and feelings in viewers, so consider what your focus is to find a font that matches the idea you are trying to convey. Try using two different fonts that compliment or contrast each other to create a unique design. For example, use two modern fonts, two script fonts, or a serif font with a sans-serif font

Make it easy to read from a distance. Your poster should be easy to read from at least 5 feet (7.5 meters) away. Make sure your graphics and fonts are large enough to be effective.
Formating to Print
Set the Dpi. Dpi stands for dots per inch and refers to the amount of spacing between the cyan, magenta, and yellow dots on a printed document. The higher the dpi, the higher the resolution, and the better quality the print will be. The typical dpi for posters is 300 dpi. Look to your software’s user manual to find out how to change the dpi. Many user manuals are available to read free online.
Choose the size. The size of your poster is important to effectively be seen by your audience. When choosing the size to print, you should consider where you will be hanging the poster. Posters in a small office can be a bit smaller than posters intended to be hung in a window for an advertisement. Standard poster sizes in inches are 11x17, 18x24, and 24x36.
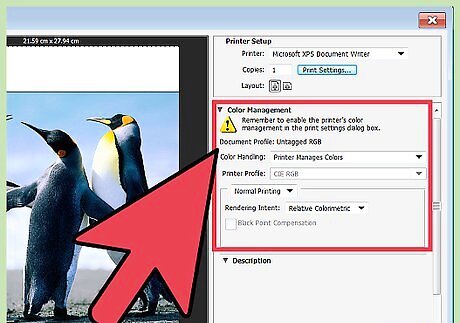
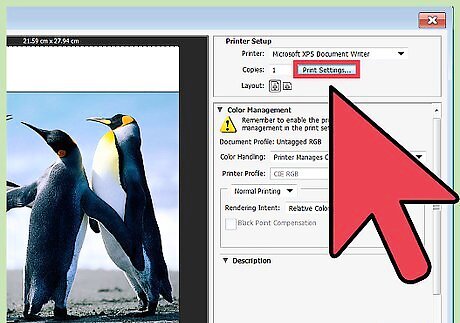
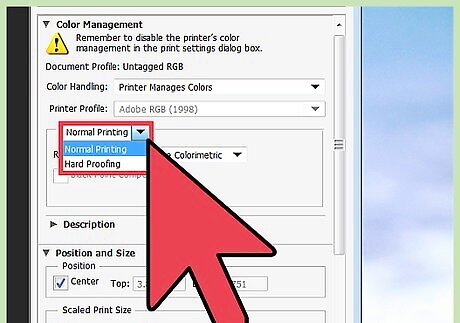
Format the color. Color can be formatted in RGB or CMYK. It is important to format your document in CMYK for your poster to be printed how you intended it to look. Designing in CMYK will give you a more accurate representation of how your poster will look when it is printed. Changing the settings from RGB to CMYK takes a few simple steps: Click “Color Mode” or “Mode” Use the drop down menu to set it to CMYK

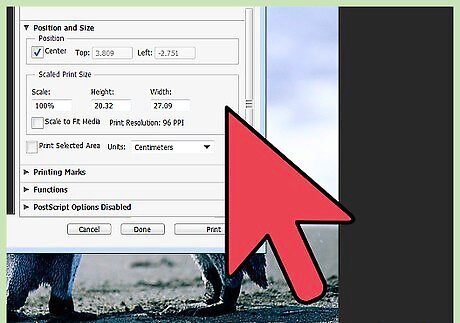
Set the bleed. The bleed refers to the background color that extends beyond where the artwork will be trimmed. It is important to have some bleed on your document so that you don’t end up with a white border on the edge of your artwork. On some programs, you can set the bleed when you make a new document. There will be a setting that says “document bleed” where you can put in a specific size of the bleed. You can also set the bleed when you print or export into a pdf. In the marks and bleed section, set the bleed marks to the size you want. Typical bleed size is 3mm, but it can be larger. Check with your printer to find out what size bleed they would like.

Format the trim or crop marks. The trim or crop marks are lines that show the printer where the bleed ends and where the actual edge of the document is. This is also the mark that indicates where the document should be trimmed, so it is important to have. To create crop marks, find the “marks and bleeds” tab when printing to a pdf. Check the “crop marks box” or the “printer’s marks box”. Some programs automatically create crop marks when printing to a PDF.
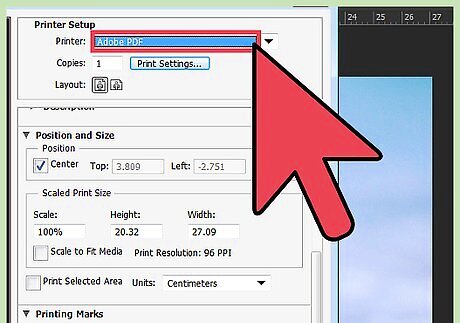
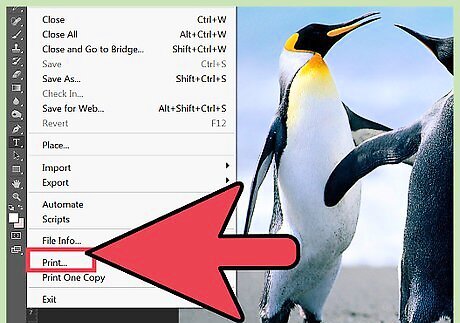
Create a PDF. Most printers will want to have your poster in a pdf to print it. There are 3 ways to make a PDF of your poster design. Print to PDF by clicking “file>print” and choosing pdf. Export to PDF by clicking “file>export” and choosing pdf. Save as a PDF by clicking “save as” and then choosing pdf. When you create a PDF of your poster it is also the time to set the bleed size, crop marks, and color format.
Printing the Poster
Decide what paper to use. There are a few things to consider when choosing what paper to use for your poster. The weight of the paper and whether or not it is coated (glossy) are the two important things you need to decide. Posters are typically printed on paper with a greater weight like 24# or 28#. The bigger the poster, the thicker the paper should be. Coated paper works best for posters. Typically a silk or gloss coated paper is used on posters to make them resist dirt and smudges. A thicker coated paper will make brighter and more saturated colors pop.

Choose where to print. Different printers will have different expertise so you need to do some research before sending your poster to print. You want a printer that will work with you and be willing to answer all of the questions you might have. Ask people for recommendations for a good printer to use. Make sure they will print on the paper you want. Ask what their turnaround time is to make sure you can get your poster when you need it.
Deliver your PDF to the printer. Find out from the company that will be printing your poster how they would like you to get the pdf to them. If you prefer a certain method, you can ask them if they will let you use it. Most printers can accommodate different delivery methods. Email the PDF as an attachment. Upload the PDF to the company’s website. Save the PDF on a zip drive or CD to bring to the store in person.
Request a proof. It is extremely important to request a proof from your printer. This will ensure your poster will be printed looking just as you expect it to. You will be able to check the bleed and crop marks to see that they are correct. Most proofs will be a digital file sent to you. Sometimes you can request a paper proof for an additional charge. Some printers will let you check the poster as it is being printed. This is known as a “press pass” or a “pass on press”. You can ask if this is allowed, however because of time constraints many printers don’t practice this anymore.


Comments
0 comment