
Using a Composting Bin
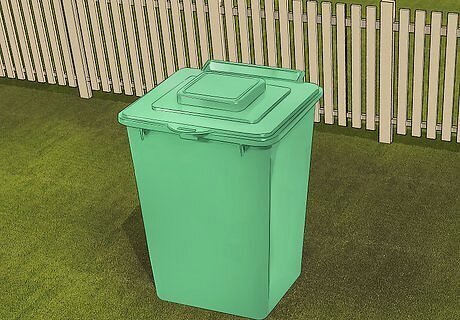
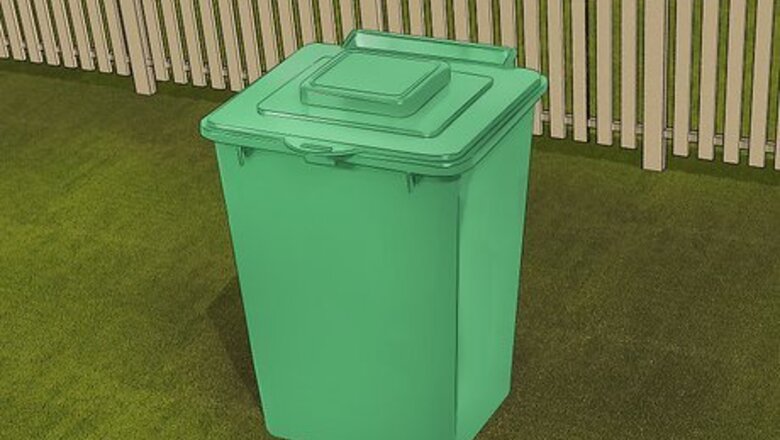
Obtain a simple compost bin. Composting bins are used to collect and store compost ingredients in a secure and sanitary way. Bins can be purchased from a hardware store or online. Bins range in design, size, features, and cost, depending on your personal needs. Opt for a model with thick, secure walls that will prevent rodents or other small animals from gaining access to your compost materials. Check with your local government office - some have programs that will give or sell you composting bins.
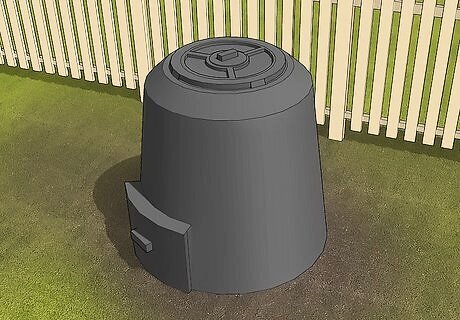
Use a stationary compost bin. Stationery compost bins are enclosed on all sides, have top access, and are open at the bottom, to be placed directly on the soil. Start by adding a few inches of dry, "brown" compost materials, which may include wood chips and shredded newspaper. Place a layer of "green" compost materials on top (e.g., vegetable peelings, grass clippings) and alternate layers of the two types of materials. Don't use any meat, bones, oils, or weeds in your compost. Use a pitchfork or other garden tools to rotate the compost materials every week or two to add oxygen and help the composting process. Water the compost regularly so it stays moist. The process should take a few months and should leave you with a dark, crumbly product that looks and smells like fresh soil.

Buy a compost tumbler. Compost tumblers require less effort than stationary bins and produce compost much more quickly. Add your "brown" and "green" compost materials to the bin and turn it two to four times a week, giving it several good turns each time. Your compost should be ready in approximately a month, depending on the overall volume. To speed up the process, place your compost tumbler in a sunny spot. Regularly water the compost so it stays moist.
Making a Pile for Composting
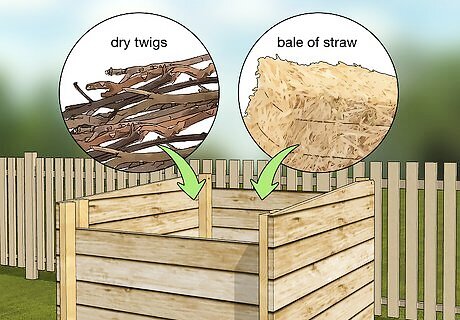
Build a base for the compost pile. For a more direct composting option, start building on bare soil to allow organisms like worms to aerate the compost. Collect dry twigs from your yard or buy a bale of straw from your local garden center. Lay out twigs or straw to make a base (a few inches thick) to allow for drainage and air flow. As a rule of thumb, a good compost pile should be about 50% kitchen scraps or “greens,” and 50% straw, cardboard, leaves, and other materials high in carbon.
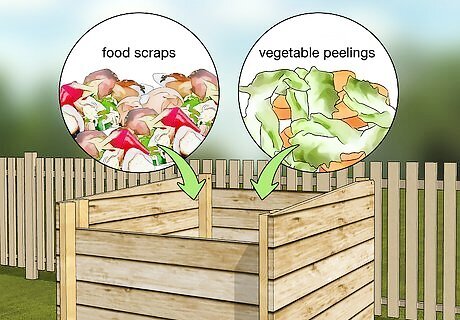
Add layers of wet compost materials. To build your compost pile, layer moist ingredients like food scraps or vegetable peelings on top of your dry base. Be sure not to add any meat, bones, oils, or weeds. Alternate two or three layers of wet and dry compost materials.
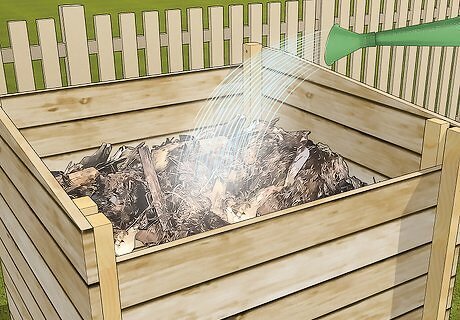
Water the compost pile. Water the compost pile as needed to keep it moist. As a general rule, the materials should be damp and not overly wet. If you live in a rainy climate, cover your compost area with a tarp or plastic sheeting to prevent it from becoming waterlogged.
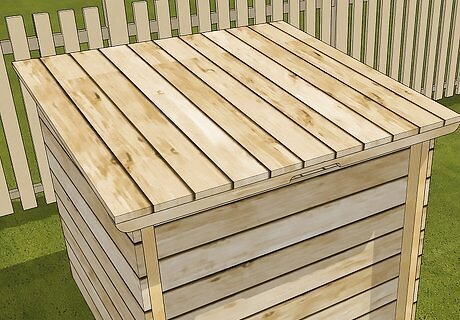
Cover the compost pile. Covering your compost pile is necessary to retain the moisture and heat need for the composting process. Use plastic sheeting, pieces of wood, or any other suitable covering you have on hand to cover the area. If necessary, weigh down the edges of the covering with large rocks or bricks. If you are concerned about the pile being unsightly, fence in the small area that it occupies in your yard.
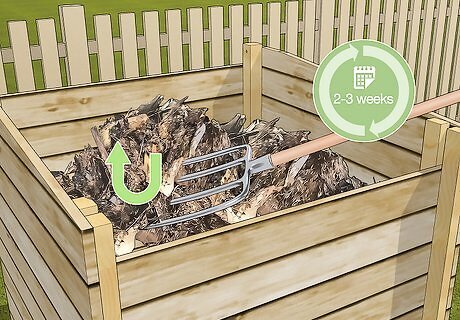
Turn the compost. Every two or three weeks, use a pitchfork to turn the compost. Uncover the pile and use the pitchfork to dig up materials at the bottom and bring them to the top. Turning the compost will add oxygen to the mix, speeding up the process. If you don’t have a pitchfork, use a shovel to turn the compost. Wait at least 60-90 days for the compost to breakdown and cure before using it in for any gardening purposes.
Digging a Composting Trench
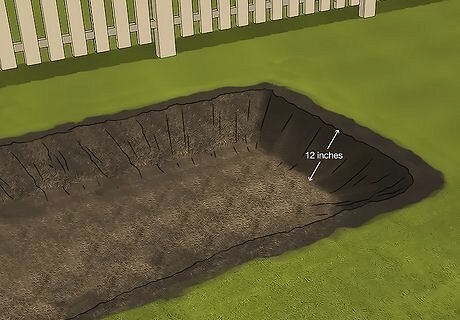
Dig a trench. To prepare garden compost without unsightly bins or piles, use a shovel to dig a trench in your garden approximately 12 inches (approximately 30 cm) deep. The compost will add nutrients and moisture to your soil, improving the quality of your plants. Choose an area that will get sunlight but not interfere with the rest of your garden. Trenches can be placed between plants, along shrub borders, or virtually anywhere else in the garden.
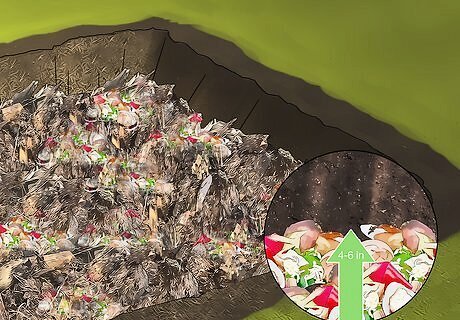
Fill it with kitchen scraps. Add approximately four to six inches (approximately 10-15 cm)of kitchen scraps to the bottom of the trench. Avoid adding bread products, meat, bones, dairy, rice, oils, or weeds. Opt to include fruit and vegetable scraps, and other ingredients such as: Egg shells, which will add calcium to the soil and deter snails and slugs with their sharp edges. Coffee grounds, which are rich in nitrogen and attract worms.
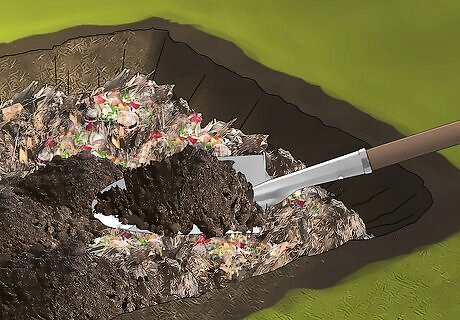
Cover the compost materials with soil. Once you've added your composting materials, use a shovel to fill in the trench with soil. The composting process will occur without any additional work from you. It should take a period of a month to a year, depending on the volume and specific compost materials.
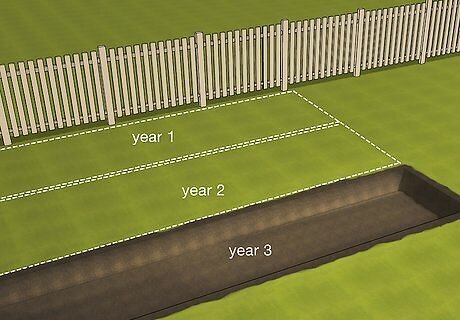
Move the trenches around each year. Composting trenches should be moved to different locations in your garden every year. This will allow you to fertilize the entirety of your garden while continuing to grow new plants or flowers. Plan to have designated walking areas, plant areas, and trench areas that you can navigate around comfortably.


Comments
0 comment