
Note: If you were looking for decorative plaiting, see this entry.
Creating a Basic Plait
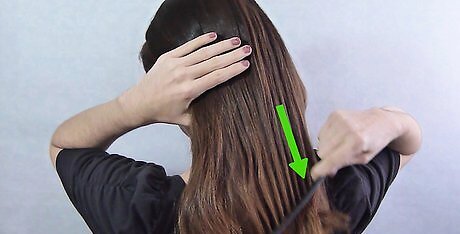
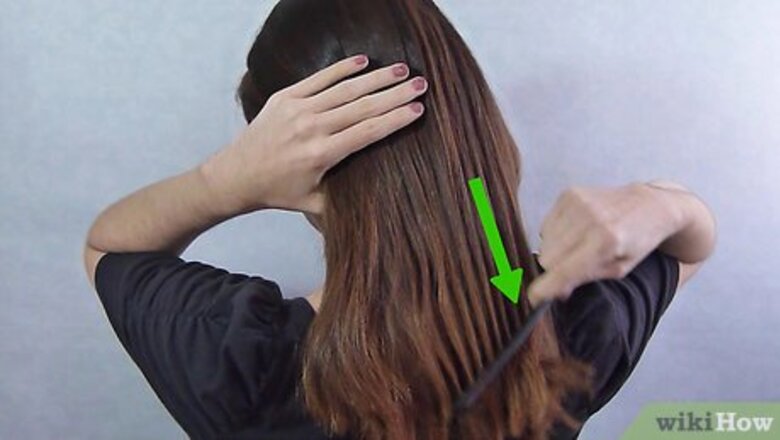
Brush out all of the hair. Your hair will need to be smooth and without knots so brush or comb it out to remove all the tangles. It might also help to use some dry shampoo on your hair as you brush it to remove any excess oil from your hair, since this can make your hair slippery when you are braiding it.
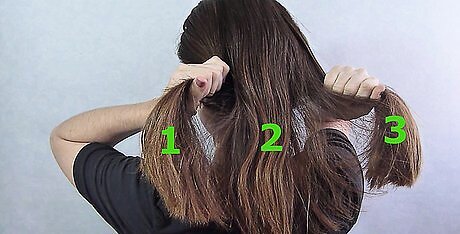
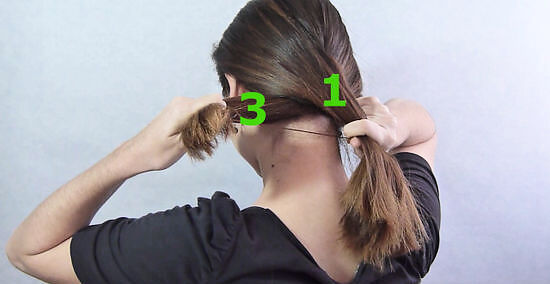
Divide the hair. You can part your hair if you’d like and gather the hair so that the braid will fall in a specific area, such as the back or side of your head. Take all of your hair and divide it into 3 equal-sized sections: left, middle and right.
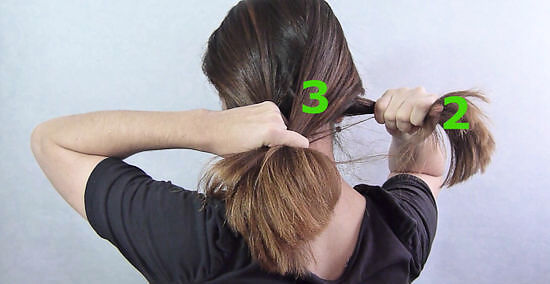
Cross the right section. Carefully holding all three strands, cross the right section over the top of the middle section. Now it should look like the right section is the middle section and the middle section is the right section.
Cross the left section. Next, cross the left section over the new middle section. They should now be switched, as they were with the previous section.
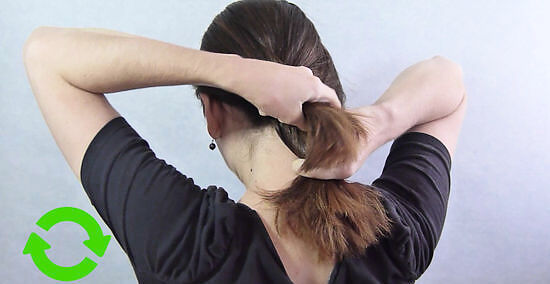
Repeat the process. Alternate the right and left sections over the center, repeating until you get to the ends of your hair.
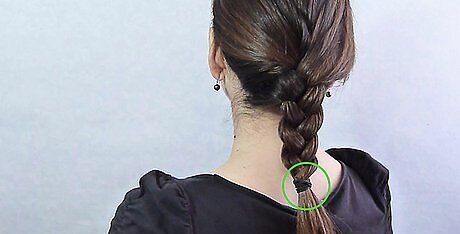
Tie off the hair. Using a hair band, ribbon, clip or other styling choice, tie the hair off at the end, where the hairs become too short to fit in the plait.
Doing a French Plait

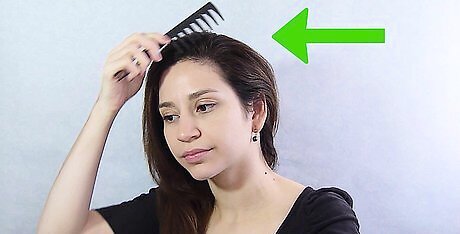
Brush out all of the hair. Have smooth hair for this hairstyle, so brush it out before you start. You might also want to spray on a bit of dry shampoo to remove any excess oils from your hair while you brush it.
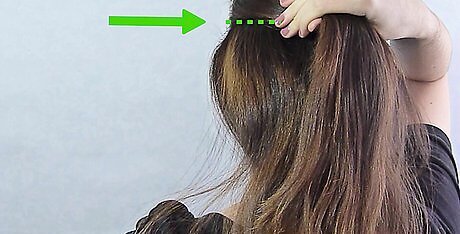
Separate the top section of your hair. Using your hands or a hair pick, separate the top section of your hair from the top of the front hairline.
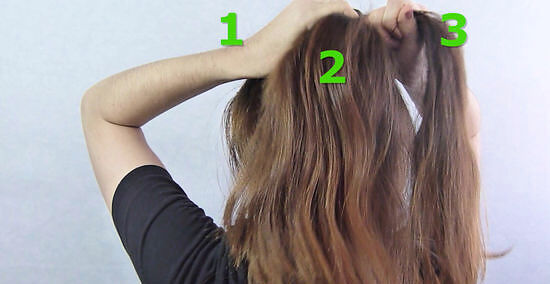
Divide the hair into 3 even sections. Each section should be about 1 to 2 inches (2.5 to 5.1 cm). Make the sections as even as possible.

Cross over the left and right sections. Start by crossing the left section over the center and then cross the right section over the new center section. Continue to alternate crossing the right section and left section over the center section, but pick up a small amount of new hair from beneath each of the side sections before each new crossover. Keep doing this until you have incorporated all of the hair into the braid.
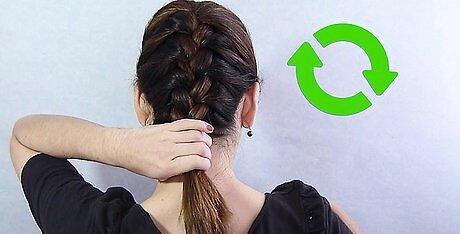
Continue with a 3-strand braid to the ends. After all of the hair has been incorporated, finish the braid by continuing with a regular 3-strand braid all the way to the ends of the hair.
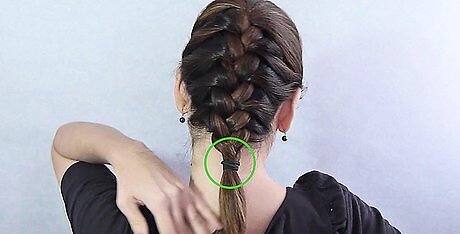
Tie off the hair. Using a hair band, ribbon, clip or other styling choice, tie the hair off at the end, where the hairs become too short to fit in the plait.
Creating a Plaited Headband
Start with smooth tangle-free hair. Brush or comb all of your hair well. You might also want to use some dry shampoo to remove excess oils and add a bit of texture.
Separate the hair to plait. Using a hair pick or pencil, separate the hair you will use to make the headband. Pull out a 1 to 2 in (2.5 to 5.1 cm) wide section of hair from the area that is just behind your ear.
Plait as normal. Hold the section straight out to the side of your head and begin braiding it loosely as a regular 3-strand braid. Keep braiding all the way to the end of the section and then use an elastic band to secure the end of the braid. Don’t make the braid too tight or it might be hard to get it to lay flat against your head.
Secure the braid over the top of your head like a headband. Wrap the braid up and over the top of your head and then bring it down behind your other ear. Pin the braid behind your ear with a couple of bobby pins to secure it. If desired, you can create 2 braids (1 on each side) and cross them over each other once on top of your head.


Comments
0 comment