
Getting the Refrigerator Ready for Painting
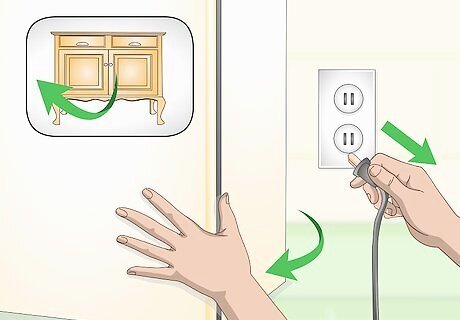
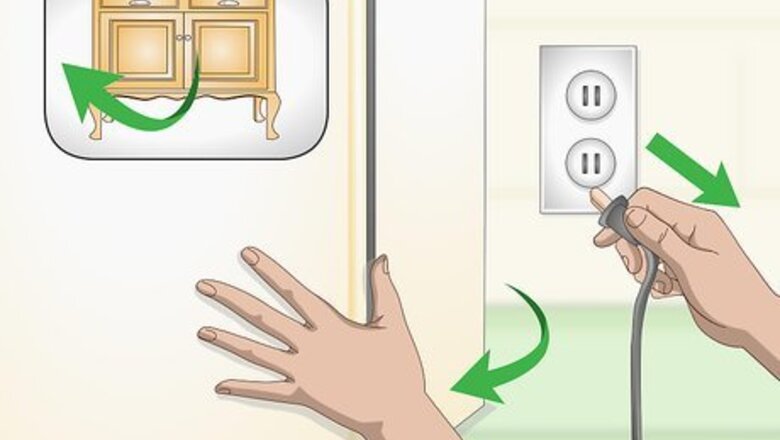
Unplug the fridge and move it away from the wall and other furniture. You’ll need enough room to be able to get to the sides and the top of the fridge. Moving it away from counters or other appliances also protects those pieces from getting paint on them. Never paint a fridge or clean it with liquids while it's plugged into an electrical outlet. It could electrocute you. Have a friend help you if the refrigerator is too heavy to move by yourself. Empty the food in the refrigerator and the freezer into a cooler or backup fridge. Otherwise, since the refrigerator will be unplugged, the food will go bad.
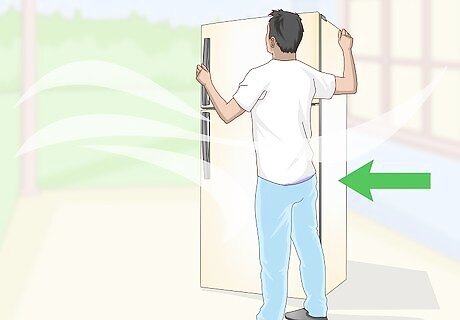
Move the refrigerator to a well-ventilated area if possible. Both standard paint and spray paint give off dangerous fumes, so don’t paint in a closed-in space. Your best option is outside, like in the backyard or on a deck. If you’re spraying inside, like in a workshop or the kitchen, open all of the windows and turn on the fans to help air out the room. Wearing a mask will also prevent you from inhaling all of the fumes. You'll likely need a friend or family member to help you relocate the fridge. Use a dolly to wheel it to wherever you're going to spray it.
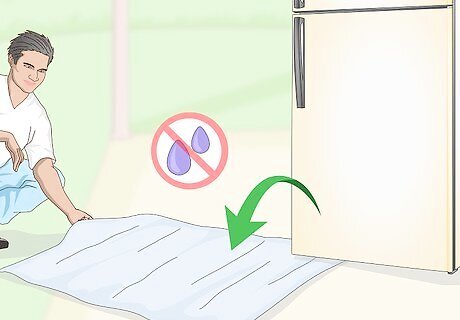
Put a drop cloth under the refrigerator if you’re worried about drips. Painting can be a messy task, and you don't want to ruin your floors, grass, or decking. Lay down a drop cloth as protection against stains. You can buy drop cloths at a paint store or a hardware store. If you don’t have a drop cloth, lay out a tarp, trash bags, or an old sheet instead. Be careful trying to lift the fridge. Ask someone to help you, or lift one corner at a time by yourself and slide the drop cloth underneath.

Clean the exterior of the fridge with soap and warm water. Any dust or grime left on the outside of the refrigerator will mess up the paint and prevent it from going on smoothly. Use a damp cloth or microfiber towel to wipe the front, sides, and top. Let the fridge air dry. Don’t brush it with a towel because that could leave lint behind, which makes the paint look bumpy. Use an air compressor to dust any nooks and crannies, like the crack between the door and the fridge. This will also remove food particles. A mixture of 1 part white vinegar and 1 part water will work if you don’t have soap or want a natural alternative.
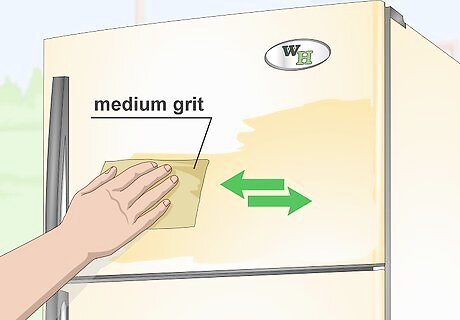
Sand the fridge. Use medium-grit sandpaper to remove the gloss. This will help the paint adhere to the refrigerator’s surface better. Scrub gently but firmly with medium-grit sandpaper, like 180-grit, which strips away the varnish without damaging the refrigerator itself. If your fridge is already painted, you don’t need to take off all of the paint. You only need to sand off the glossy finish. You can wipe the refrigerator down with a damp cloth after sanding if there’s a lot of dust buildup.

Cover any areas you don’t want to be painted with painter’s tape. This includes door handles, hinges, or rubber seals. Press the tape firmly around the spots you want to protect so that paint can’t seep underneath. Use a spoon or your fingernail to smooth down the tape as securely as possible. You can also remove the handles or hinges with a screwdriver or wrench if you don’t want to risk getting paint on them. Set them somewhere safe where you won't lose them.
Painting the Refrigerator with a Roller
Apply a direct to metal primer and paint. The coat of primer will help seal and smooth the surface before you paint. You can also use a two-in-one paint and primer in the colour of your choice. Not only does it save you from having to prime the fridge separately, but it also tends to be a thicker paint. That helps avoid splatters and drips, as well as provides more coverage.Paint a Refrigerator Step 7.jpg Apply 1 to 2 coats of primer with a foam roller, letting each coat dry for 4 to 6 hours. How to Choose a Paint Color and Design If you want a customizable fridge, opt for chalkboard paint. You can write your grocery list, the menu for the week, or silly doodles in chalk, then erase them and start over. For a vintage look, paint the entire fridge in a retro pastel colour like pale pink or robin’s egg blue. If you’d like a funky pattern, use painter’s tape to tape off sections in a design. For example, make a colour-blocked fridge by taping a diagonal line across the front and spraying the top half in one colour and the bottom half in a contrasting colour. For a smudge-free fridge, avoid paint with a flat finish, which tends to show every fingerprint. Look for satin or gloss instead.

Stir the paint and pour it into a tray. Use a wooden paint stick or a spoon to mix the paint immediately before using it. Then carefully fill the deep end of the paint tray. Refill the tray as needed as you paint. If you don’t stir the paint, it will be runny and cause drips in your coats.
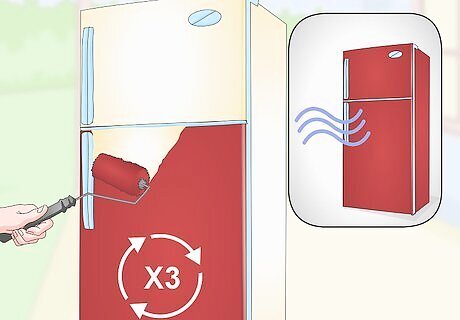
Paint 3 thin coats with a foam roller, letting the paint dry between coats. Use slow, even strokes to roll the paint onto the surface of the refrigerator. Multiple thin layers is better than 1 super thick layer, which is more prone to chipping or dripping. Saturate the roller completely by rolling it in the paint tray. This helps the paint go on smoothly without streaks. It should take each coat about 4 to 6 hours before you can paint the next one. If you don’t let the paint dry completely before applying the next coat, you’ll just smear and ruin the previous coat. Don’t forget to paint the top of the fridge! It's best to start with the top so you don't smudge the sides while trying to reach it.

Use a small, angled brush to paint hard-to-reach areas. Your roller, no matter how small it is, won’t be able to get in around the handle or hinges, for example. An angled brush is perfect for painting trim or smaller spaces, like the edge of the door. A small watercolour brush will work if you don’t have an angled brush.

Let the paint dry for at least 24 hours before plugging the fridge back in. Don’t try to return the fridge to its original spot if the paint is not totally dry. Otherwise, you could mess up some of your hard work or get paint on a nearby counter or piece of furniture. Check the instructions on the paint can if you aren’t sure how long to let it dry. Clean up any mistakes, like paint that got somewhere it wasn’t supposed to, with a cloth or Q-tip dipped in rubbing alcohol. Scrub the area to remove the paint. Roll on a layer of polycrylic sealant after your paint is dry if you want extra protection. Use a foam roller to apply 1 coat of the sealant, then let it dry for 72 hours.
Spraying the Refrigerator

Cover the entire surface with an oil-based spray primer. Primer will help the spray paint stick to the refrigerator. Hold the can about 8 inches (20 cm) away from the fridge as you spray, moving the can back and forth constantly to avoid spraying too heavily in one area. An oil-based primer will help prevent rust, too. Shake the primer can for 1 minute before you start spraying.
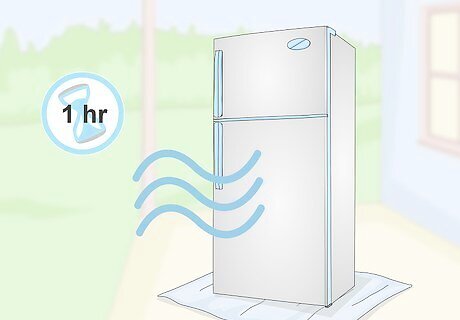
Let the primer dry for at least 1 hour. Check the instructions on your can to see how long the drying time is for that specific type of paint. It can vary from 30 minutes to 3 hours based on the manufacturer. Leaving the primer to dry overnight will ensure it’s totally dry before you start painting.

Choose 1 or 2 paint colours based on the colour scheme of your kitchen. Since spray paint is hard to control in a small space, tiny patterns or multicoloured designs are difficult to do. Stick to a solid colour or 2 complementary colours so your paint job looks professional instead of sloppy. For example, if your colour scheme is navy, baby blue, and cream, paint the top half baby blue and the bottom half navy. Neutrals like white, black, gray, or chrome are always good options for a subtler effect. Avoid eggshell or matte finishes that show fingerprints and smudges.

Spray the paint in thin coats, letting each one dry completely. Instead of spraying one thick coat, spray multiple lighter layers to prevent dripping. It’s also best to hold the can about 8 inches (20 cm) away from the refrigerator while you spray, just like you did for the primer. Allow each coat to dry before you apply the next coat. Shake the paint can for at least 1 minute before you start spraying to thicken it up. If you notice any drips once a coat has dried, use a piece of fine, 150 to 220 grit sandpaper to lightly sand it off. Spray paint should dry enough in 1 to 2 hours for you to apply a new coat. Wear latex gloves while spraying if you want to avoid staining your hands with the paint. Spray Paint FAQs What causes my paint to look speckled?Those pesky “freckles” tend to pop up when you’re painting in a spot that’s too cold or too humid. Why do I keep getting drips when I spray?You’re most likely spraying too close to the surface, applying coats that are too heavy, or not waiting for 1 coat to dry before spraying the next one. Also, some spray paints are simply thinner and runnier than others. Does my spray paint need to be sealed?Nope! But spraying a sealant over your paint does help protect it from everyday wear and tear.

Let the paint dry for 24 hours before moving the fridge back. If you try to take the fridge back inside when it’s not totally dry, you could smudge or chip the paint. It will dry best in a warm, dry spot. Paint takes longer to dry in high humidity or cool temperatures. If you want to prolong the life of your paint, you can spray a protective sealant over it once the paint is dry. Apply 1 coat of sealant and let it dry for at least 72 hours. A spray enamel sealant will prevent the refrigerator from rusting.


Comments
0 comment