
Measuring for Your Length
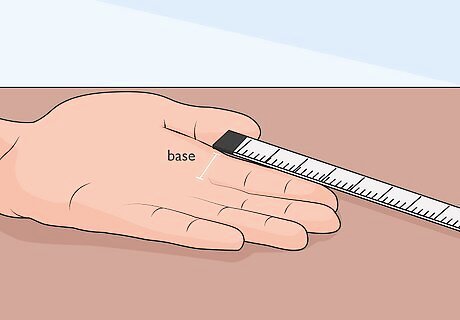
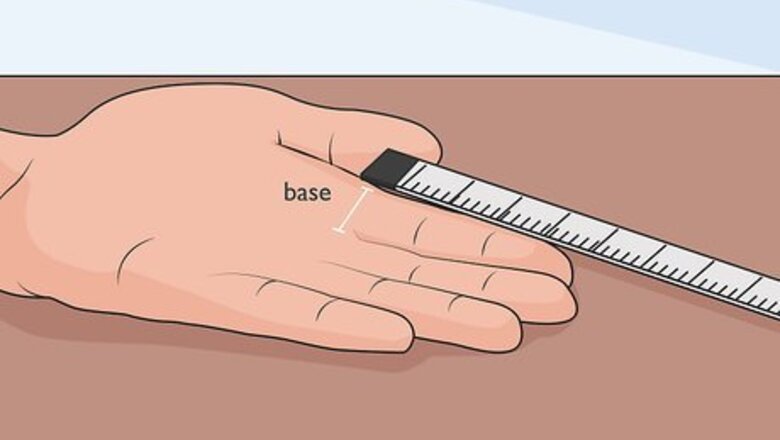
Place the end of a tape measure ⁄2 in (1.3 cm) below the base of your finger. Put the hand with your bent or injured finger flat on a table with your palm facing up. Place the tip of the tape measure at the top crease on your palm—the crease that starts from between your index and middle finger and runs almost horizontally to the outside edge of your palm. Hold the tape measure so that the slack end is hanging down towards your fingertips. It's best to use a flexible plastic tape measure, but you can also use a ruler or metal tape measure. If you look up a palmistry chart, you might recognize this crease as your "heart line." You can use an LMB splint on your index, middle, ring, or pinky fingers. If your thumb is injured, you’ll need a different kind of splint.
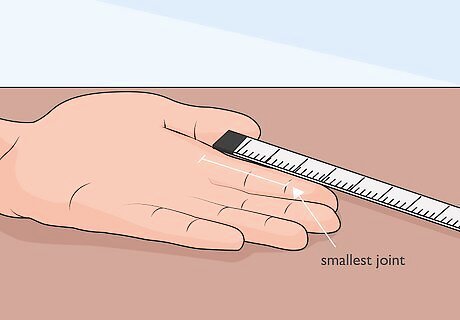
Record the distance to the smallest joint on your finger. Keep your hand palm-up on a flat surface and hold your fingers out as straight as you can. Stretch out the tape measure to the tip of your finger. Take note of the value in inches next to the last joint just below the tip of your finger. For most people, this value ranges between 2.25 inches (5.7 cm) and 4 inches (10 cm). This can be tricky, so you may need a buddy to help you. If not, try holding the tip of the tape measure in place (at the base of your finger) with your thumb.
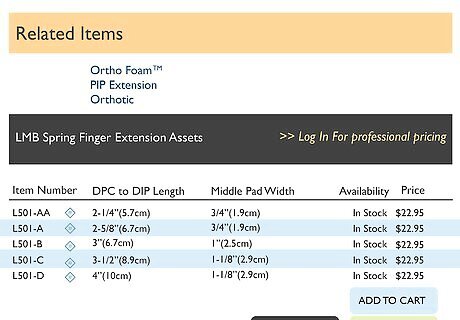
Choose the size you need from 5 different options. If you're buying the splint on your own without the help of a doctor, shop online or go to a medical supply store. If the measurement from your palm crease to your littlest finger joint doesn’t match up with one of the sizes, round up to the nearest size. The different sizes range from A to D, with an extra AA size for people with shorter fingers like children or adolescents. Size AA: 2.25 inches (5.7 cm) Size A: 2.6 inches (6.6 cm) Size B: 3 inches (7.6 cm) Size C: 3.5 inches (8.9 cm) Size D: 4 inches (10 cm)
Wearing the Splint
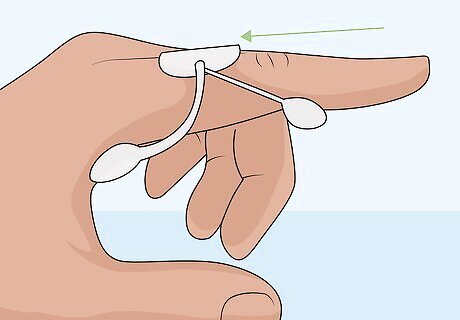
Slide the splint onto your finger like you would a ring. Hold the splint by the two bottom pads at the end of the wires. Slide it on your finger so that it goes over the 2 pads on either end and under the center pad. Once you have it on, the pads should make a triangular shape when you look at the splint from the side. If your particular splint has a small hook-and-loop fastener wrapping to hold it in place, be sure to put your finger through that loop. The hook-and-loop fastener strap should wrap around the base of your finger.
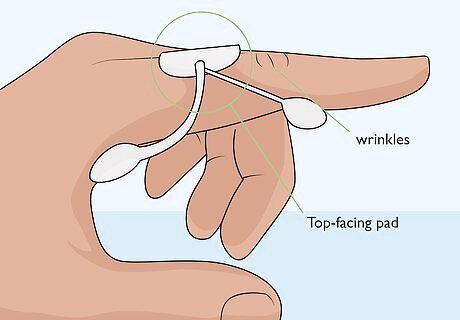
Adjust the top-facing pad so it sits just below your middle joint. Look at your hand with your palm facing down to check that the pad on top sits right below the joint in the middle of your finger. You should be able to see a few of the wrinkles of your middle joint poking out just above the pad. If you can’t see these little wrinkles, move it down a little. It’s important not to have the top pad right on top of your joint because it won’t allow the splint to stretch your finger as much as it should. If you look at your finger from the side, the pad closest to your palm should be just below and to the side of your 1st knuckle. The pad closest to the tip of your finger should be just below and to the side of the smallest joint on your finger. This little offset is going to help the splint work its magic so your finger can heal up sooner. If your splint has a hook-and-loop fastener wrapping to hold it in place, wrap it so it’s not too tight and not too loose.
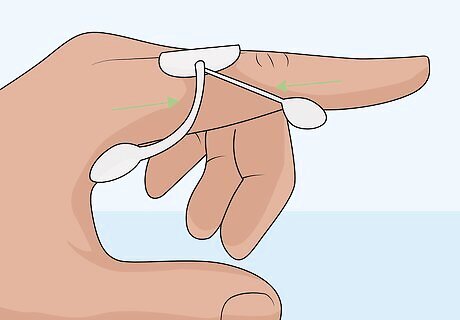
Squeeze the legs of the splint together to make the splint fit looser. If the splint is painful to wear, resize it so it’s a little looser. Take it off and hold the top pad between your index and thumb in one hand. Place your thumb and index finger of your other hand on the 2 legs and squeeze them together until they're almost touching. Loosening the fit means the splint won't stretch out your finger joints as much. It's a good option if you only have a minor deformity (like a slight “claw finger”) that you're trying to straighten out. Ask your doctor about how tight your splint needs to be before you loosen it up on your own. Wearing it tight may not feel so comfy at first, but you’ll get used to it soon enough.

Stretch the legs apart to make the splint tighter. If you don’t feel a slight stretch in your finger when you have the splint on, make it tighter so it's more effective. Take off the splint and hold it so that both of your thumbs are on the top of the center pad. Use your other fingers to grab the pads on the 2 legs and stretch them apart. This will give your finger a more intense stretch. It shouldn’t hurt, but you should definitely notice it. Don’t try to make it super tight in an effort to heal or straighten your finger faster—gradual changes are more effective when it comes to fixing a “claw” finger or healing a broken bone. The splint is pretty sturdy, but don't overstretch it or twist it in an awkward way because it can get bent out of shape.
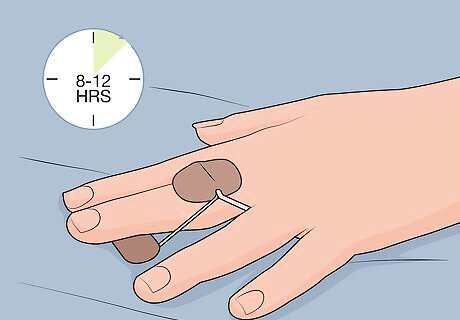
Wear the splint for 8-12 hours per day for 4 months to see a difference. It may be annoying to wear it, but keep it on for most of the day so your finger can acclimate to the stretch and eventually take on a normal shape. Take it off when you wash your hands, shower, swim, or exercise. You can take it off to sleep at night, but remember to put it on in the morning once you’ve showered and dressed. After 4 months, you may be able to notice an 18-degree difference in how far you can extend your finger. Don’t get the splint wet because the friction and moisture could leave you with a rash on your finger.
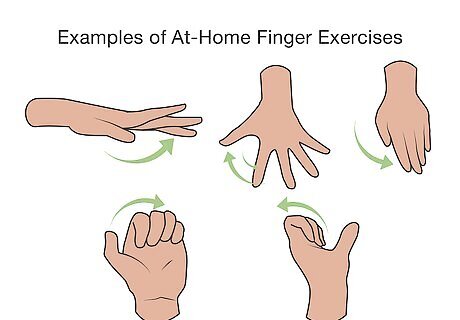
Follow your doctor's instructions about stretches and home therapy. If you saw a doctor about your bent or injured finger, refer to any home care instructions they gave you and do them every day to speed up the recovery process. If they didn’t give you any specific instructions but said to start stretching it, try doing these simple finger exercises 3 to 4 times a day: Use your unaffected hand to gently straighten the bent finger. Hold it for 10 seconds. Lay your hand on a flat surface with your palm facing down and raise 1 finger at a time for 5 seconds. Do this 10 times so you’ve engaged all 10 fingers or twice on each finger of your injured hand. Lay your hand flat with your palm facing down and move each finger side to side like a windshield wiper 10 times. Keep your knuckles straight while you try to bend the top 2 joints of your finger downward as if you're going to make a fist. Do this 10 times on the affected hand.


Comments
0 comment