views
Making the Body

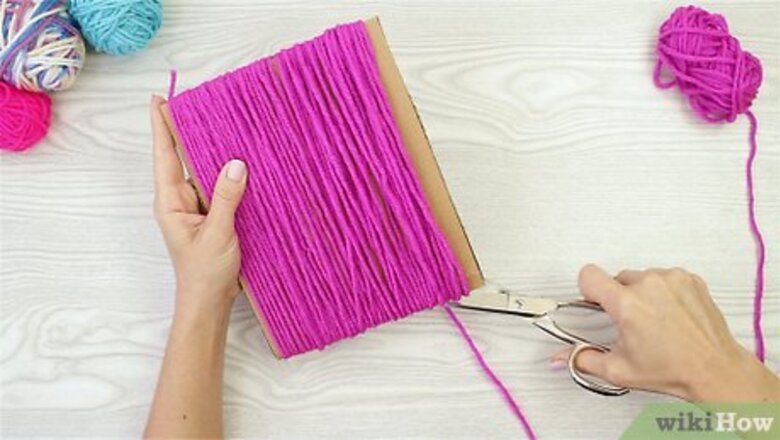
Cut your cardboard and wrap the yarn around the cardboard 10 times for every 1 inch (2.5 cm). For example, if your cardboard is 6 inches (15 cm) long, you would wrap the yarn around it 70 times. Begin and finish wrapping along the bottom edge of the cardboard, and be careful not to pull the yarn. Once you have finished wrapping the yarn, cut it. Cut a piece of cardboard to the height you want the doll to be. Your doll can be whatever size you want it to be, but something around 7 inches (18 cm) would be ideal. Your yarn can be whatever color you want your doll to be. Wrap the yarn tight enough so that it does not slide off, but not so tight that it stretches. A single wrap finishes and starts at the bottom edge of the cardboard.
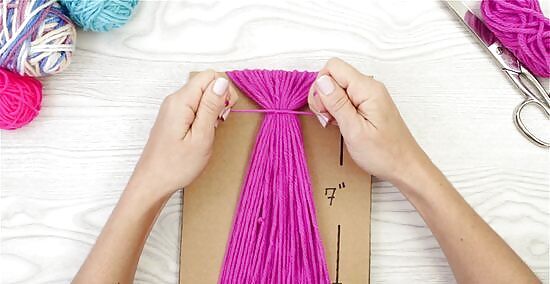
Tie a short piece of yarn around the top edge of the wrapped yarn. Cut a piece of yarn that's around 4 inches (10 cm) long. Slide it under the wrapped yarn along the top edge of the cardboard. Tie the ends of the string together into a tight, double-knot. Use the same color of yarn as you did for the rest of the doll. Tie the short yarn tightly enough so that it gathers the wrapped yarn. This will eventually make the head of your doll.

Slide the wrapped yarn off of the cardboard. You should have a band made out of looped yarn that is tied together at one end. Keep track of where the tied part is. This will be the top of your doll. Do not cut apart the bottom edge of the wrapped yarn just yet.

Tie a short piece of yarn around the wrapped yarn for the neck. Cut another 4 in (10 cm) piece of yarn. Place it behind your yarn bundle, a few inches/centimeters from the top. Wrap both ends around the bundle about 2 to 3 times, then tie them together into a right, double-knot. How far down you make the neck depends on the height and thickness of your doll; you need to tie it far enough down to make a round head. If you are making a 7 in (18 cm) doll, tie the neck about 1 inch (2.5 cm) from the top of the doll. Snip off the excess yarn from the neck, or tie it into a bow.
Creating the Arms

Wrap more yarn around the cardboard for the arms. This time, wrap the yarn half as many times as you did the first time. For example, if you wrapped the yarn 70 times for the body, wrap it 35 times for the arm. This will be enough to make 1 set of arms. If you forgot how many times you wrapped the yarn the first time, wrap it 5 times for every 1 inch (2.5 cm) of cardboard. Like with the body, start and finish wrapping along the bottom edge of the cardboard. Cut the yarn once you finish wrapping it. You can use the same color of yarn as you did for the body, or you can use a different color.
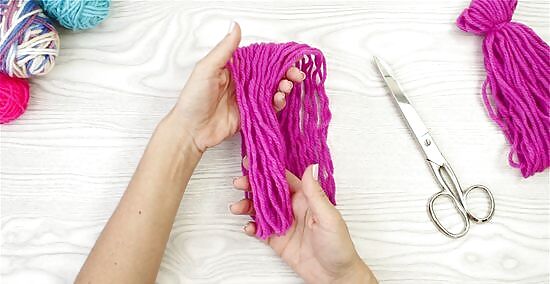
Cut the wrapped yarn along the bottom edge. Slide a pair of scissors along the bottom edge of the cardboard, then cut the yarn. Pull the yarn off of the cardboard, making sure to keep all of the pieces together.

Tie a piece of yarn around the bundle, 1 inch (2.5 cm) from the top. Cut another 4 in (10 cm) piece of yarn. Wrap it 2 to 3 times around your yarn bundle, about 1 inch (2.5 cm) from the top. Tie the ends of the yarn into a tight, double-knot. Use the same color of yarn as you did for the arms. Cut the ends of yarn off after you knot them, or tie them into a bow. If your doll is taller than 7 inches (18 cm), tie the yarn 2 inches (5.1 cm) from the top instead.
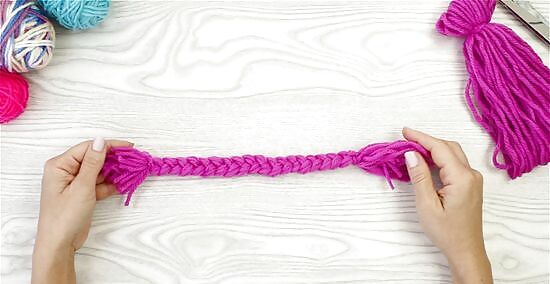
Braid the yarn, then tie it off 1 inch (2.5 cm) from the bottom. Divide your yarn bundle into 3 even sections. Cross the left and right sections over the middle section to braid it. Stop when the braid is the same height as your doll, then tie the braid with another short piece of yarn. Trim the rest of the yarn down to 1 inch (2.5 cm). For smaller hands, cut both ends of the braid down to ⁄2 inch (1.3 cm). If you are making a bigger doll, tie the yarn 2 inches (5.1 cm) from the bottom.
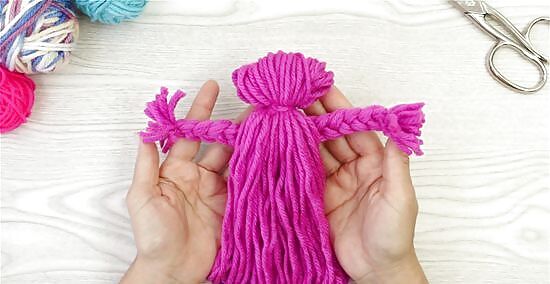
Slide the braid into the doll body, just below the neck. Open up the doll body, right under the neck. Slide the braid into the loop, then push it up against the neck of the doll. Make sure that the braid is centered, with an equal amount sticking out to either side of the doll. Each end of the braid will make 1 arm. If the braid is not centered, then the arms won't be even.
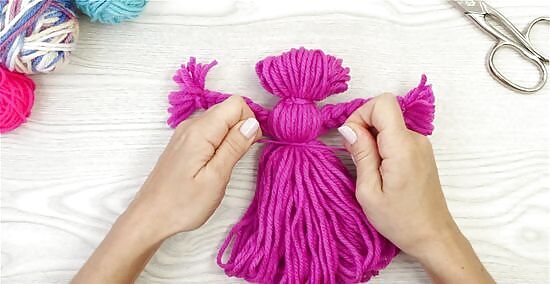
Tie a piece of yarn around the doll's waist, right under the arms. Cut a long piece of yarn that's the same color as the body. Wrap it around the doll's waist a few times, just below the arms. Tie it off into a tight, double-knot. Cut the ends off, or tie them into a bow. Make sure that the arms are nice and snug against the neck, otherwise they will fall out. If you are worried about the arms falling out, stitch them in place from the back of the doll with a yarn needle.
Adding Skirts, Legs, and Details
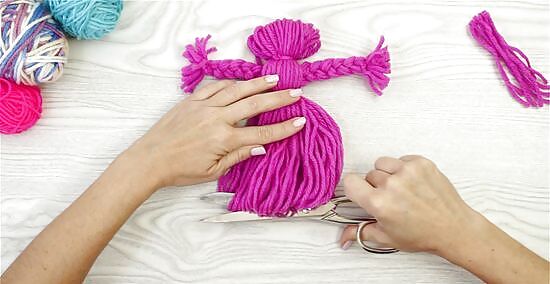
Cut open the bottom loops of the body. When you wrapped the yarn around the cardboard and took it off, the top and bottom parts were looped, just like when making a pompom. The top looped part is the head, but the bottom looped part is still intact. You should cut those loops apart now. If the loops are uneven after you cut them, you should trim them until they are even.
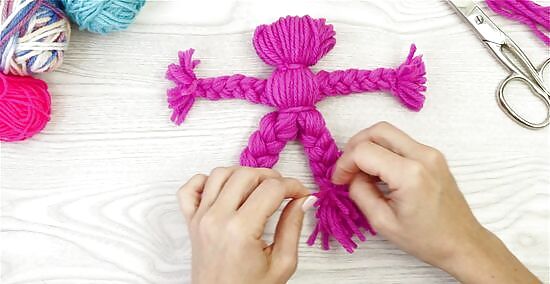
Make 2 braids at the bottom of the doll to turn it into a boy. Split the cut yarn into 2 sections. Braid each section separately so that you have 2 braided legs. Tie the braids off with short pieces of yarn, about 1 to 2 inches (2.5 to 5.1 cm) from the ends. For a simpler boy doll, skip the braiding, and just tie the legs off at the bottom. After you tied the short piece of yarn, snip the excess off, or tie it into bows. If you are making a smaller doll, trim the feet down to ⁄2 inch (1.3 cm).
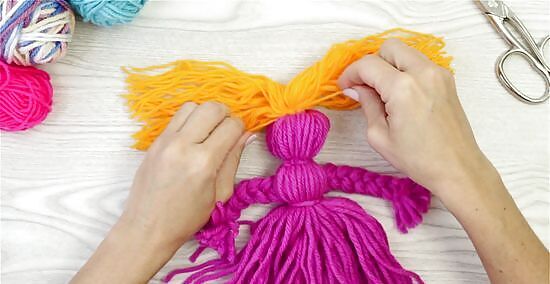
Cut a bundle of yarn, then tie it to the head for hair. Wrap yarn around a piece of cardboard that's the length you want the hair to be. Tie the top loops together with a short piece of yarn, then cut apart the bottom loops. Use the short piece of yarn to tie the hair to the top of the doll's head. You can make the hair any color you want. This is similar to how you made the body of the doll. Coat the back of the doll's head with glue, then press the yarn hair against it. This will make it lay nicer.

Style the hair, if desired. You can leave your doll's hair as-is for a simple doll, or you can style it further to give your doll more character. For example, you could: Cut the front of the hair shorter to make bangs. Braid the hair, then tie it with a pretty bow. You could even do 2 braids. Unravel the yarn into separate strands to make curly or wavy hair.
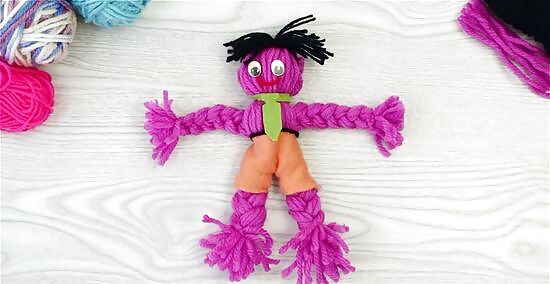
Make clothes for the doll out of felt or cotton fabric, if desired. You can skip this step if you want to keep your doll simple. If you want to play with your doll, however, why not make some clothes for him or her? Here are some ideas to get you started: Turn a boy doll into a girl by sewing it a fancy dress. Give a boy doll a vest or a tie. Make a simple apron for a girl doll to go over her yarn skirt. Sew a mini tutu for your doll, then add it to its waist.
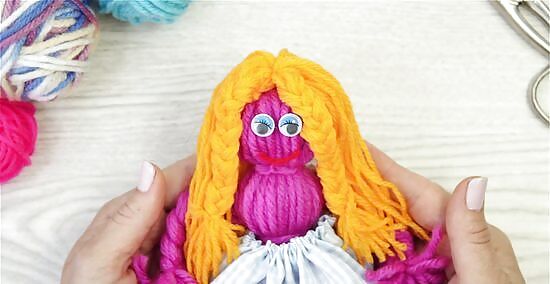
Add a face using buttons or embroidery floss if you want a fancier doll. You don't have to do this last part at all if you don't want to, but it will give your doll more character. You can get as detailed as you want here, and the options are endless. Here are some ideas to get you started: Use embroidery floss to stitch on a mouth and a pair of knotted eyes. Sew on a pair of button eyes for a rag-doll look. Glue on buttons or googly eyes for a simple doll. Fabric glue or hot glue will work the best.




Comments
0 comment