

Using a Paper Towel Tube

Cut open an empty paper towel tube from top-to-bottom. Find an empty paper towel tube and remove any bits of paper that may still be clinging to it. Cut a straight slit going from top-to-bottom with scissors so that you can open the tube into a flat sheet. If you want a smaller pencil case, you can use an empty toilet paper tube instead. You will only be able to keep small items in it, like erasers or crayons, however.
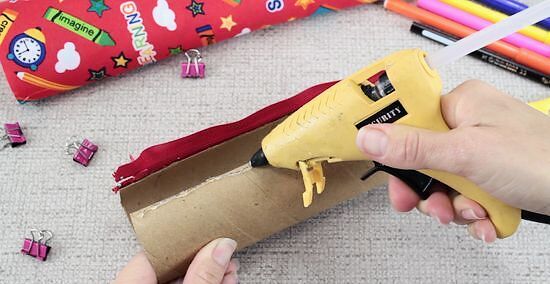
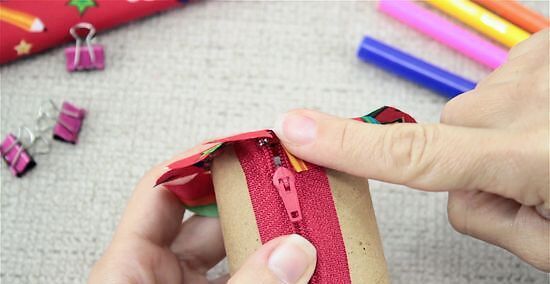
Hot glue a 10 to 11 in (25 to 28 cm) non-separating zipper to the opening. Coat the left cut edge of the paper towel tube with hot glue. Press the left side of a 10 to 11 in (25 to 28 cm) non-separating zipper into the glue. Repeat the process for the right cut edge and the right side of the zipper. Choose a zipper color that matches or contrasts with your fabric. The zipper tape should be touching the cardboard, and the zipper teeth should be between the cut edges. You want to be able to open and close the tube with the zipper. If the zipper is too long, cut it from the top, then cover the cut ends with hot glue so that the zipper head doesn't slide off.
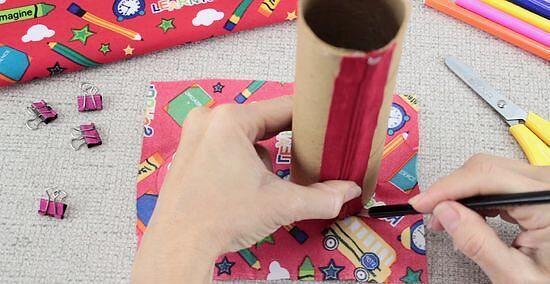
Trace the ends of the paper towel tube onto your desired fabric. Place your fabric face-down on a flat surface, then stand your paper towel tube on top. Trace around your tube with a pen or pencil, then repeat the process for the other end of the tube. Leave at least 1 inch (2.5 cm) between the circles so that you can add the seams later. Canvas fabric will work the best, but you can use cotton too. You can use solid-colored or patterned fabric. If you use light-colored cotton fabric, be aware that the paper towel tube may show through it.
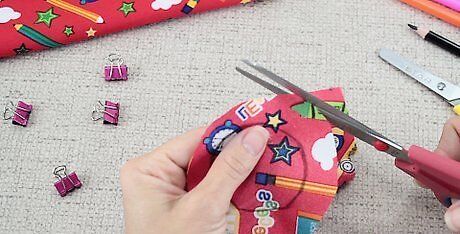
Cut the circles out with ⁄2 in (1.3 cm) seam allowances. This simply means that you cut the circles with a ⁄2 in (1.3 cm) wide border all around. If you need to, sketch a new cutting line around the circles first, then cut the circles out. You won't be sewing the case, but you still need the seam allowances in order to glue the circles down.
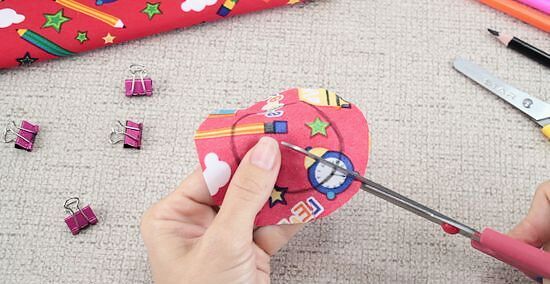
Cut ⁄2 in (1.3 cm) deep slits into the circles' edges. The slits should be about ⁄2 inch (1.3 cm) apart and about ⁄2 inch (1.3 cm) deep. They are important, because they will make it easier to glue the circles onto the tube. They will also help reduce bulk. Don't cut past the original circle lines that you drew, otherwise you will end up with holes in your case.
Hot glue the circles onto the ends of the tube. Coat the top rim of your tube with hot glue, then press it against the back of your first circle; make sure to align it with the pen or pencil marks. Next, coat the top edge of the tube with more hot glue, then press the circle's slit seams into the glue. Repeat this step for the other end of the tube with the other circle. Use a low-temp hot glue gun for this step. This way, the glue won't burn you through the fabric. Make sure that the front (right side) of the fabric is facing out, and the back (wrong side) is facing into the tube.
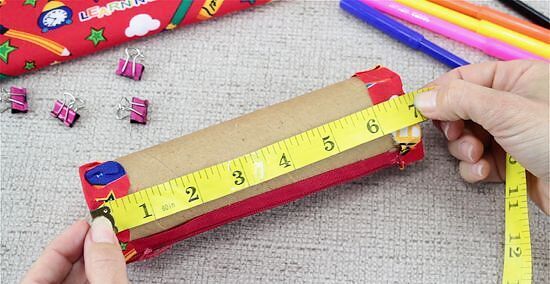
Cut a fabric rectangle that's 1 inch (2.5 cm) bigger than the tube. Measure the length and circumference of your paper towel tube first, then add 1 inch (2.5 cm) to each measurement. Draw the rectangle on your fabric, then cut it out. Use the same type of fabric as you did for the ends of the tube. You can use a different color and pattern, however. If you want to, you can even make the rectangle a little wider than your tube’s circumference; this will give you more room for error later on.
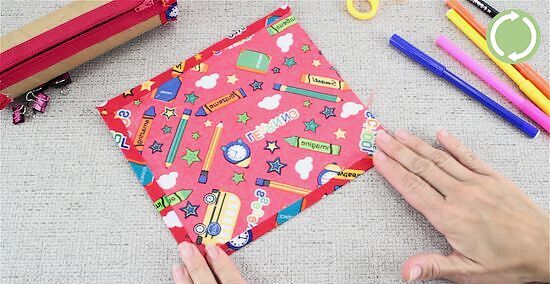
Fold and hot glue the edges of the fabric by ⁄2 inch (1.3 cm). Turn the fabric so that the back (wrong side) is facing you. Fold the narrow side edges down by ⁄2 inch (1.3 cm), then hot glue them down. Repeat the process for the long edges as well. if you want, you can iron the edges first in order to have crisper seams. Do this before you hot glue them. Consider leaving 1 of the long edges unfolded and unglued. This way, you can adjust it when you wrap the fabric around the tube.
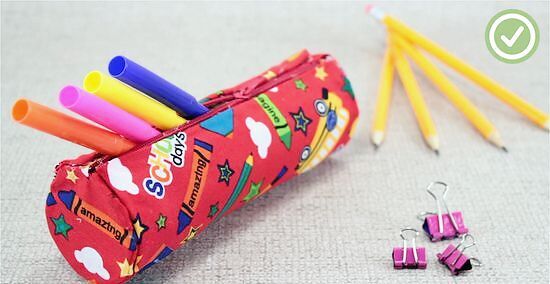
Wrap and hot glue the fabric around the tube. Hot glue 1 of the folded, long edges to the zipper tape. Coat the side edges of the fabric with hot glue, then wrap it around the tube. When you get to the other side of the zipper tape, coat the other folded long edge of the fabric with more hot glue, then press it down. Make sure that the back (wrong side) of the fabric is facing the tube when you glue it down. The narrow side edges of the fabric should be aligned with the top and bottom edges of the tube. If you left the other long edge unfolded, be sure to fold it before you glue it down. You may need to fold it more than ⁄2 inch (1.3 cm) to ensure a good fit.
Using Ziploc Bags and Duct Tape
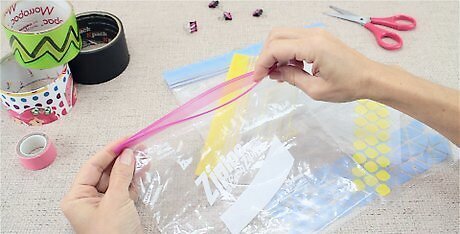
Get a 1-quart (0.95 L) Ziploc bag. There are lots of different types of Ziploc bags, but the type that work the best for pencil cases are the 1-quart (0.95 L) bags made from thicker plastic. It would be even better if the bag has a slider on the top. This will make it more zipper-like and easier to use. Avoid using a regular, sandwich-sized bag, as it may not be big enough for your pens and pencils.
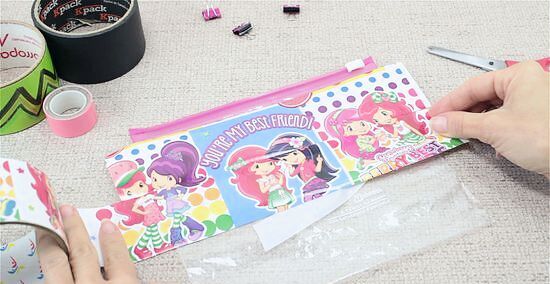
Lay 2 strips of duct tape across the front of the bag. Cut 2 strips of duct tape that are 2 inches (5.1 cm) longer than your bag. Lay the first strip horizontally across the front of the bag, just below the zipper part. Place the second just below the first strip. For a more durable bag, overlap the strips by about ⁄8 to ⁄2 inch (0.32 to 1.27 cm). Make sure that the strips are centered. You want to have about 1 inch (2.5 cm) of duct tape hanging off of the side edges. The duct tape can be solid-colored or patterned.
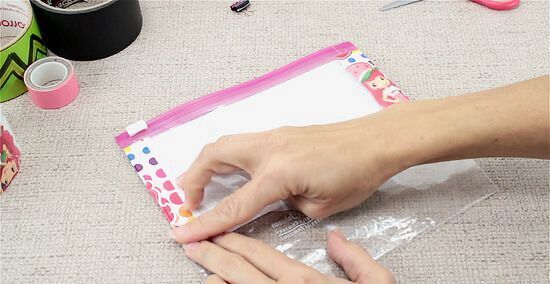
Fold the excess duct tape over onto the back of the bag. Flip the bag over first and smooth out any ripples. Fold the excess duct tape over onto the back of the bag. Do the left side first, then the right. Do not cut the excess duct tape off. You want it to wrap around the side seams on the bag. This will make it stronger.
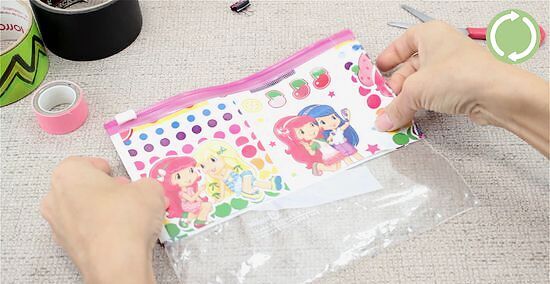
Repeat the process for the back of the bag. Take your next 2 strips of duct tape and lay them across the back of the bag. Flip the bag over to the front, and fold the excess tape down. If you overlapped the tape for the front of the bag, you should overlap it by the same amount on the back too.
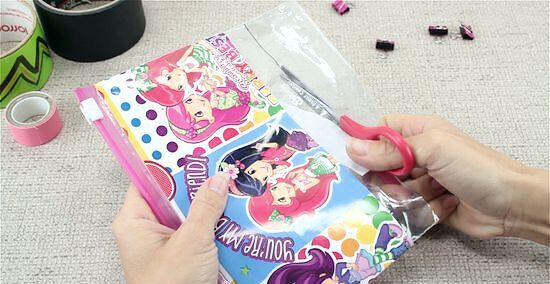
Cut the bottom of the bag until it is 1 inch (2.5 cm) below the tape. Use a ruler and a permanent marker going across the bag, 1 inch (2.5 cm) below the bottom edge of the last strip of tape. Cut along this line, then discard the bottom portion. It does not have to be exactly 1 inch (2.5 cm). It can be a little less than 1 inch (2.5 cm), but it shouldn’t be more.
Lay a strip of duct tape across the bottom edge and fold it onto the back. Cut a strip of duct tape that's the same width as your bag. Lay it across the bottom of your bag, so that the bottom edge is hanging off by about 1 inch (2.5 cm). Flip the bag over, and fold the excess onto the back. This will seal the bottom. If you see any gaps, lay a strip of duct tape across the front and back of the bag, aligning the bottom edges. If there is any excess duct tape hanging over the side edges, cut it off.
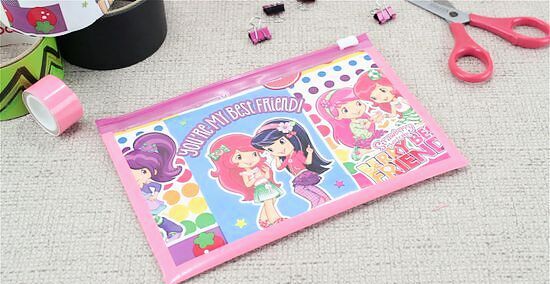
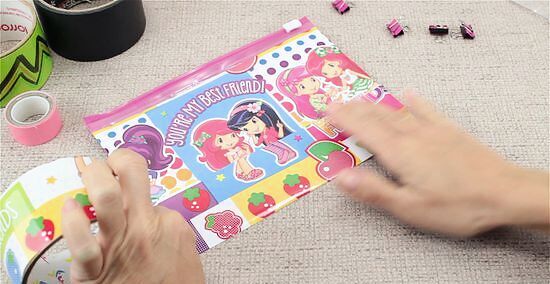
Decorate the bottom and side edges with contrasting duct tape. Cut 2 strips of duct tape that match the height of your bag, and fold them over both of the side edges. Next, repeat the process for the bottom edge of the bag. This will make the side seams stronger and give you a nice, 1 in (2.5 cm) border all around. If you used patterned duct tape for the body of the bag, consider using a solid color for the trim. If you used solid-colored duct tape for the body, you can use a contrasting color for the trim, or a nice pattern instead. For a fancier bag, you can decorate it with shapes cut from duct tape.
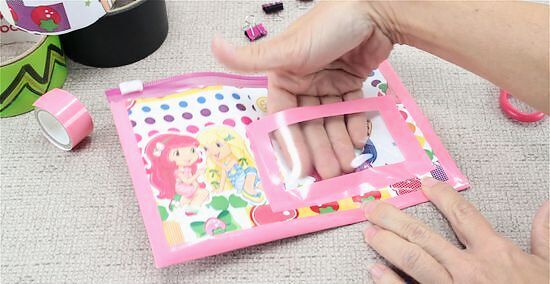
Add an ID-card holder with extra plastic and duct tape, if desired. Cut a rectangle from a plastic bag. Cut a 1 in (2.5 cm) wide strip of duct tape, and fold it over 1 of the long edges. This will give you a nice time and make it more durable. Next, cut ⁄2 in (1.3 cm) wide strips of duct tape, and use them to secure the remaining 3 edges of the rectangle to the front of your bag. Make the rectangle about 1 to 2 inches (2.5 to 5.1 cm) longer and wider than your ID card. Cut the rectangle from another plastic Ziploc bag. Don't use a solid-colored trash bag or grocery bag.
Punch holes along the bottom edge if you want to add it to a binder. A 3-hole punch for binders will work the best for this. Otherwise, place a sheet of binder paper on top of your pouch. Align the bottom edge of your bag with the edge of the binder paper. Use a permanent marker to mark the holes, then punch the holes out with a hole puncher. If your pencil case is too short to fit all 3 holes, make just 2 holes.
Sewing a Pencil Case
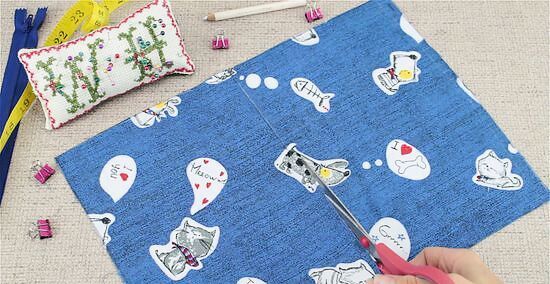
Cut four 10 by 6 ⁄2 in (25 by 17 cm) rectangles out of fabric. You will use 2 of these rectangles for the outside of the pencil case, and the other 2 for the lining. You can use the same color of fabric for all 4 pieces, or you can use different colors for the outside and lining. For example, you can cut 2 dark blue pieces for the outside and 2 light blue pieces for the inside. You can also use patterned or solid-colored fabric. Canvas fabric will work great, because it is nice and durable, but you can use cotton too.
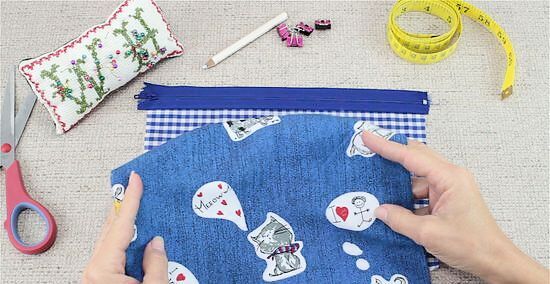
Pin a 10 in (25 cm) zipper between the first outer and lining pieces. Take 1 of your outer fabric pieces, and set it face-up on the table. Place a 10 in (25 cm) zipper face down on top of the fabric, aligning it with 1 of the 10 in (25 cm) edges. Finally, place the lining fabric face-down on top of the zipper. Secure the long edges with sewing pins. The zipper can be the same color as your fabric, or it can be a contrasting color. Use a dress or garment zipper, not a separating zipper. You will end up with the zipper sandwiched between 2 pieces of fabric. The right sides of the fabric should be facing in, and the wrong sides should be facing out.
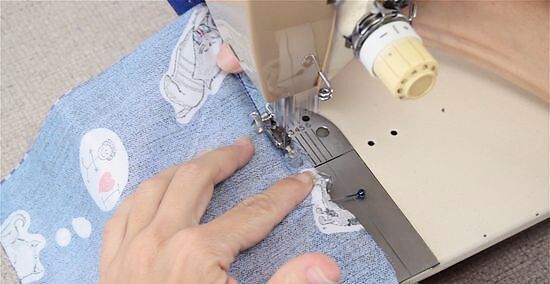
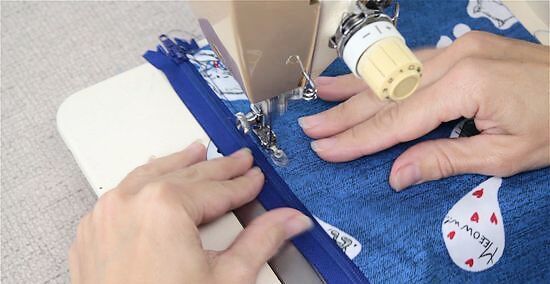
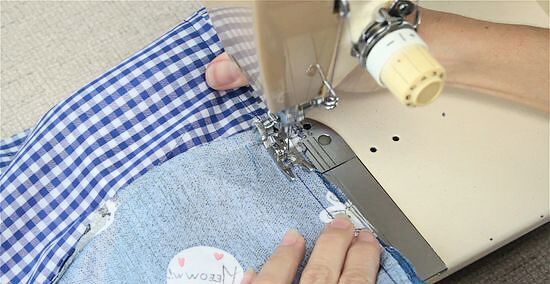
Sew along the top edge using a sewing machine and a zipper foot. Use a straight stitch on your sewing machine and remove the pins as you sew. Be sure to backstitch when you start and finish sewing. You can match the thread color to either the outer fabric, lining, or zipper tape. If you do not have a zipper foot, sew halfway across the edge, stop, move the zipper to the other end of the tape, and finish sewing. A backstitch is where you reverse the sewing machine for a few stitches. It prevents the thread from unraveling.
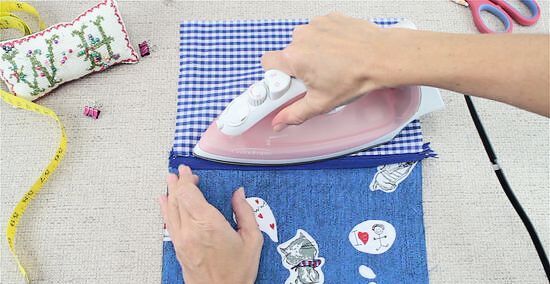
Fold the fabric away from the zipper and press it with an iron. At this point, the fabric is laying across the zipper, covering it. Pull both pieces of fabric away from the zipper so that you can see the right sides. Press the folded edges of the fabric with an iron on both sides. Use a heat setting suitable for the fabric that you are working with. In most cases, this will be the "cotton" setting. Fold the fabric enough so that it lines up with the stitching.
Topstitch the fabric for a nicer finish, if desired. Match the thread color to the fabric and the bobbin color to the lining. Sew as close to the folded edge of the fabric as possible. A ⁄8 in (0.32 cm) seam allowance should be plenty. This will also help prevent the fabric from bunching up and accidentally getting caught in the zipper.
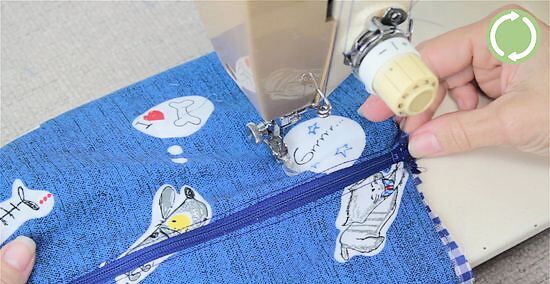
Repeat the process for the other side of the zipper. Again, sandwich the zipper tape between the outer and lining fabric. Secure everything with sewing pins, then sew across the long edge. Remove the pins, fold the fabric away from the zipper, then press the folded edges with an iron.
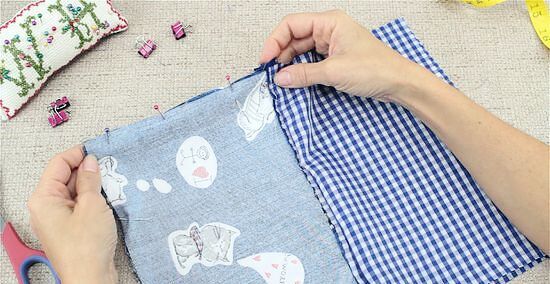
Open the zipper and pin the pieces with the right sides facing in. Take the 2 outer pieces, and press them together so that the right sides are facing in and the wrong sides are facing out. Secure the long and short edges with sewing pins, then repeat the process with the lining. Fold your seam allowance and zipper tape against the lining fabric. Leave the zipper open halfway. This is very important, otherwise you won't be able to turn the bag right-side-out all the way.
Sew the bag, leaving a 3 in (7.6 cm) gap at the bottom of the lining. Sew around the lining first, using a ⁄2 in (1.3 cm) seam allowance, starting and finishing at the zipper. Next, sew around the lining. Start at the zipper and finish at the bottom for the left and right side. Leave a 3 in (7.6 cm) gap along the bottom edge of the lining. Remember to backstitch when you start and finish sewing, and the remove the pins. Change the thread and bobbin color as needed in order to match it to the outer and lining fabric. The 3 in (7.6 cm) gap is important, because you'll need it in order to turn the bag right-side-out.
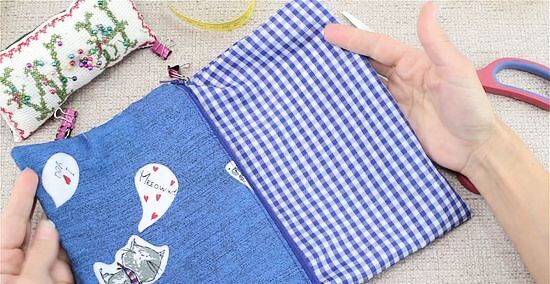
Snip the corners, then turn the bag right-side out through the gap. Cut the corners as close as possible to the stitching without actually cutting through it. Next, turn the bag right-side-out through the 3 in (7.6 cm) gap in the bottom of the lining. You will be left with a bag that is 1 color to 1 side of the zipper and a second color to the other side.
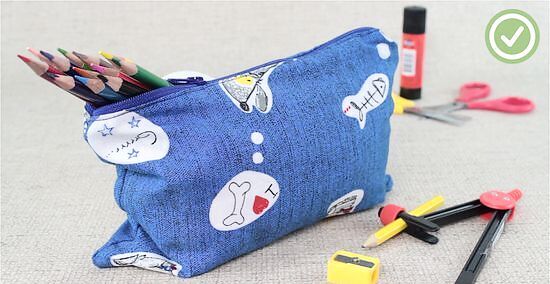
Hand-sew the gap shut, then tuck the lining into the bag. Use a needle and thread to sew the gap shut using a ladder stitch. Next, tuck the lining into the outer fabric; you may have to open the zipper further in other to do this. When you are done, you'll have a pencil case that's 1 color on the outside and a different color on the inside. If you need to, use a pencil, chopstick, or knitting needle to push the corners out further. This will make them nice and crisp.


Comments
0 comment