
Developing Your Idea
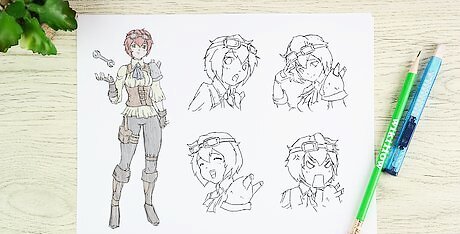
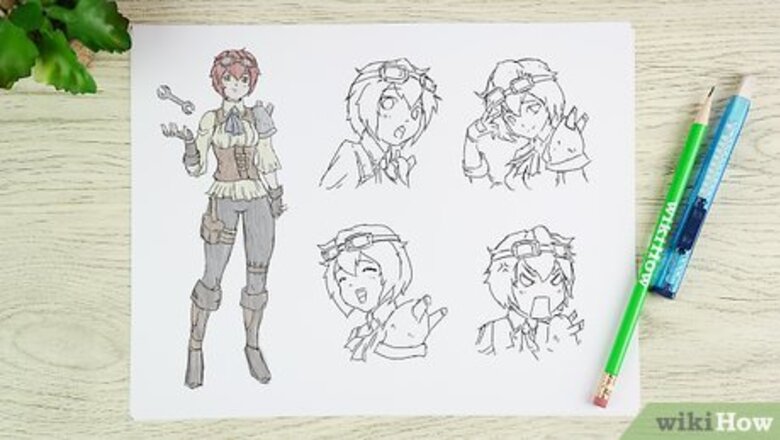
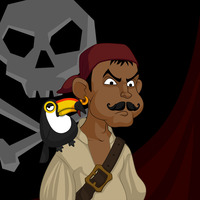
Design some memorable characters and create initial sketches. Start by thinking about who your main character is going to be. Either start by sketching out an interesting character with a distinct visual style and decide what they’re like after you’ve drawn them, or pick 2-3 distinct personality traits and sketch a character that fits what you imagine based on their personality. There’s no real wrong way to invent a character, so let your imagination run wild! Characters can be animals, historical figures, or entirely invented from thin air. Make your personality traits as specific as possible will make it easier to jump-start an idea for a plot if you don’t have one. “Willing to do anything to help their family” is better than “loyal,” for example. You can certainly start with the plot first and develop your characters later. The characters and plot are equally important, so the order isn’t necessarily important. Just start with your best idea and work from there. To write compelling descriptions of people or their characters, watch people. There are several ways to observe people, how they interact, and note their manners and habits. These little elements make for great character descriptions. You can sit at a park or a public place like a cafe and observe people. Or watch TV and see how characters are depicted on the screen.
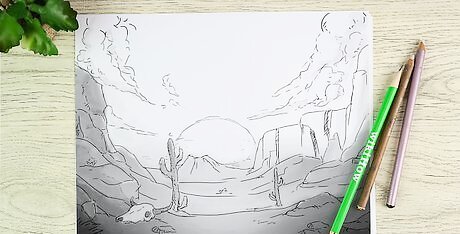
Select a setting for your story to take place. Setting refers to the time and place where a story happens. If your story is going to be about a cowboy, for example, your setting might be “the wild west, a long time ago” or “Kansas, 1880.” Pick a setting that makes sense for your story and you can draw. The setting can be real or imaginary. If it doesn’t matter to you and you want to focus on the characters, make it something that will be easy to draw, like the desert. If you’re making a really simple comic, you can simply leave your background blank and have no clearly-defined setting for your story. This is a particularly acceptable choice for comedic comics, emphasizing the writing.
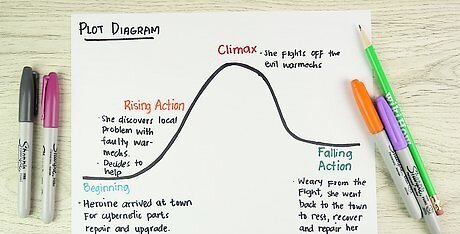
Create an outline for your plot and identify a conflict. What is your main character going to do and what is the main conflict of your story? Take a blank piece of paper and jot down a few ideas based on what you want your comic to be about. Put your conflict into the simplest terms possible to create a basic outline for what your story is going to explore. Conflict refers to the 2 people or ideas that are fighting against one another in your story. This can be as simple as superhero vs. villain or as abstract as freedom vs. order. Comedic comics don’t necessarily require conflict, but they sure help anchor the story in something concrete! Your comic doesn’t have to have a resolution if you want to turn your comic into a series.

Compose your script and proofread it carefully to avoid mistakes. Since a lot of comic storytelling is visual, focus on writing strong, punchy dialogue that communicates each character’s attitude. Give different characters different vocabularies and speech patterns to make them distinct. Once you’ve written your script, proofread it 2-3 times to check your spelling and word choice. Speech bubbles in comics are pretty small. Try to keep most of your dialogue as short as possible. A single speech or line of dialogue may require multiple panels if it’s really long. Make notes about what your illustrations might look like on the side of each page as you’re proofreading. This will make it easier to figure out what you want to draw. Share your script with a friend, parent, or teacher to see if they have any suggestions on how to improve your writing. Most comic book scripts are written like movie scripts. Simply put the characters name at the beginning of a line and write their dialogue out. Give each piece of dialogue a separate line to make it easy to read. Make notes about setting, tone, or theme in between your dialogue.

Determine how many panels you’re going to need to depict your action. First, take a red pencil and read through your script. Draw a line at each point where you think you want to start a new page based on how fast you want your story to progress or how many lines of dialogue you’ve passed (16-20 lines of dialogue is usually the maximum for a page). Once you have your pages separated, use a different color pencil to split your pages up into distinct panels. For particularly momentous or emotional moments, consider giving the moment a larger panel, or even its own page.Tip: You must have an even number of pages unless you want to put a credits page at the end. You can also put a page filled with publication information at the front. If you have an odd number of pages, you’ll end up with a blank page that may confuse your reader. More than 6-8 panels on a single page is going to be too much for most readers to process. More than 3 speech bubbles in a single panel is going to be too much dialogue to fit in one illustration. An individual page usually has 1-3 key actions take place. These actions could be a piece of important dialogue, a character going from one location to another, or a character interacting with another character. Avoid overloading your pages with too many events to give your readers time to process what’s happening. You can always revise the order of your panels or number of pages. Don’t worry about it if you change your mind when you’re proofreading!
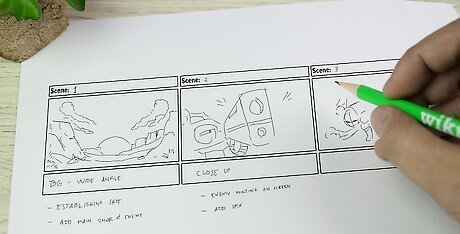
Draw thumbnails to create a storyboard. Once you know how many pages you need, grab a blank sheet of paper for each individual page that you’ve marked out. Draw a rough draft of the individual panels on that page and create simple sketches of what you’re going to include in the final product. These pages can be stick figures and basic drawings if you’d like—it’s more about understanding the flow and layout of your comic. You can find pre-generated templates with different panel configurations online at sites. You can also choose to draw the panels out yourself or sketch where you’ll put them in your digital program. Use a variety of layouts so that your individual pages don’t get repetitive. For example, if every page has 9 panels that are arranged in the same way, your reader is going to get bored. Try to make the last panel on each page a unique, interesting, or powerful moment right as tension or conflict is rising. This is called the “cliffhanger” method and will keep your reader hooked on finding out what happens on the next page.
Creating Your Panels
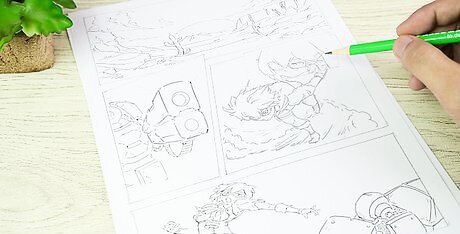
Sketch out your panels in pencil to get a rough idea for the action. If you’re working on paper, jumping right to pen and ink can be disastrous. Start by drawing tentative outlines for your characters and action with a pencil. You can add backgrounds later, so focus on framing your characters in each panel. Use a variety of compositions to keep the visual information fresh and interesting on each page. For example, you can draw the character’s face close up in one panel, filling the entire panel. In the next panel, you can draw them standing on the left side of the panel, leaving plenty of room for background information. Don’t draw your characters floating in the middle of every panel to keep things fresh. Pay attention to how characters are framed differently in movie shots. You’ll notice that characters aren’t always filmed right in the middle of the screen. Comics take a lot of visual cues from movies, so use film shots as inspiration for your images. In order to focus on composition first, draw your rough sketches out before you start inking or adding details. You can use a simple style and make your characters basic if you want to emphasize the story and can’t draw well! There’s no rule that says comic books have to be extremely detailed.
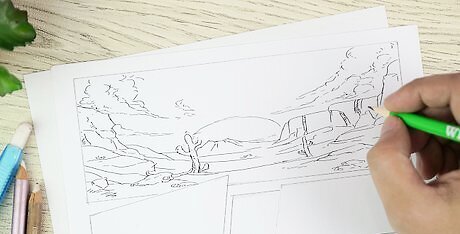
Start with an establishing shot at the beginning to reveal your setting. An establishing shot refers to an image in film or comics that shows the reader where the action is taking place. This can be a simple drawing of a city’s skyline or a detailed depiction of a clearing in the woods. Make your first 1-3 images drawings of your setting so that readers know where the action is taking place.Tip: You may notice that comics usually start with 1-2 bigger panels showing the environment. This is a good way to hook your reader and give them a clear first impression of the setting’s attitude, style, and look. Use a separate establishing shot for each new location. It’s normal for a single comic to take place in 4-5 different locations. A common technique is to “zoom in” on the action. For example, you might start by drawing a city’s skyline in the first panel. The second panel could depict the street where the story takes place. The third panel might show a single window where we see the character sitting down at a desk. This is a good way to establish where your character is without using written words.
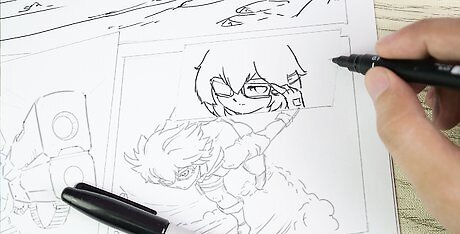
Add detail and ink your characters, leaving space for the speech bubbles. Once you’ve got the layout finished and you’ve sketched what’s happening in each panel, start adding details. Use your pencil or tablet to sketch out more visual information and erase or remove guide lines before inking your characters in black ink lines. Add your textures, facial features, and key details to give your images some definition. Add detail to all of your panels in chronological order if you want a consistent drawing style. If you aren’t worried about it though, you can certainly ink and color your panels individually.
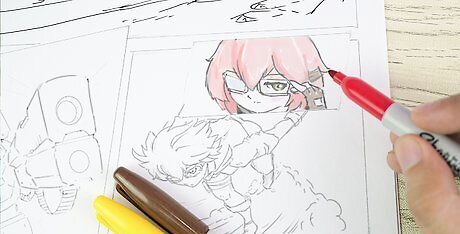
Color your characters in and compose your background textures. Once you’ve finished inking your characters, add color to make them pop off of the page. Draw your backgrounds out and use a variety of drawing techniques to compose your backgrounds. Even if your action is taking place in a city, you don’t need to draw a detailed landscape in every panel. In fact, this would result in over-crowded frames that contain too much visual information! If you’re working digitally, watercolor brushes can make abstract backgrounds pop and keep the focus on the action. If you’re hand-drawing your comics, use cross-hatching, which is a variety of perpendicular lines, to create cool abstract backgrounds. Once you’ve given the reader an establishing shot to indicate where the action is taking place, your readers will assume the characters are still in that location in the subsequent panels. You don’t need to keep reminding them with detailed backgrounds. Hand-drawn comics can be made with markers, colored pencils, or a combination of the two. It’s really up to you!
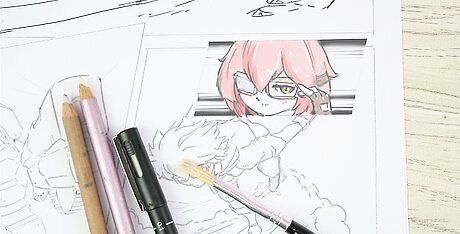
Touch up the illustrations and add minor textures and elements. Add minor details or textures to the images once most of your panels are fleshed out. Use a smaller marker to give characters facial hair, sweat drips, or unique features. Go through each panel and ask yourself, “Does this image work on its own as an individual piece of art?” If the answer is no, you should probably keep working on the image and add more details until it looks like a complete piece. If you’re going for a simple comic, there’s nothing wrong with emphasizing the story over the images. Feel free to stop when you’re happy with each panel.
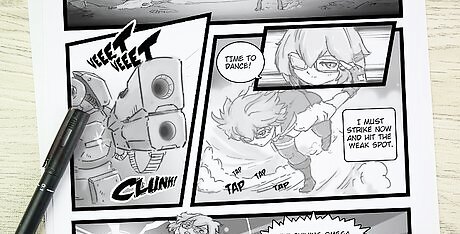
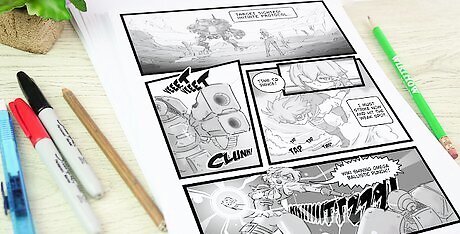
Finish your comic by adding your dialogue. Add your dialogue to the speech bubbles by adding them digitally or writing them out. If you’re writing them by hand, use a ruler and pencil to draw horizontal lines to write your dialogue out evenly. If you’re adding your dialogue digitally, download a free comic book font that readers will recognize to reduce the odds that your dialogue doesn’t fit the comic book aesthetic. Common comic book fonts include Komika, Adam Warren’s pro font, and Badaboom. These are universally-recognizable fonts that people will immediately be familiar with. Using a non-traditional font can make your comics feel unprofessional. Download free comic book fonts online at https://www.dafont.com/. If you’re hand drawing your letters, make sure that you space your letters out equally and keep your style uniform to avoid an inconsistent look. If a character yells or you want to add a sound effect, like “Boom!” or “Ugh!” feel free to put it outside of a speech bubble in a different font.
Choosing a Medium
Create a comic on paper if you want an original piece of work to photocopy. If you want to keep it old school, feel free to create your comic on paper by hand. While you can use standard printer paper, there are sketchbooks designed for comic books where each page is larger to make it easier to draw details. Some of them are designed to be folded in half for easy photocopying. If you make an original comic on paper, you can photocopy it to reproduce it. You can even get it bound into a book at the printer. If you’re using paper that folds in half, each single sheet will have 2 separate pages on it. For example, if your comic is 32 pages, your first page will have page 1 on the left side and page 32 on the right. The next sheet will have page 2 on the left, and page 31 on the right. This is why the thumbnails are so important! Each sheet will be 4 pages if you’re using the front and back of the paper. When you bind the book, you’ll place your sheets on top of one another and staple them in the center so the pages are in sequential order.
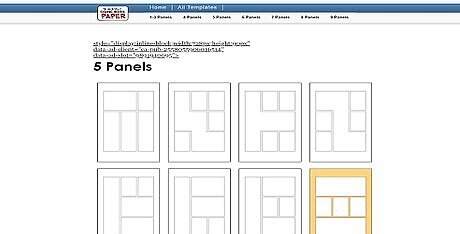
Work from a template or blank comic to make things easy. There are plenty of online templates that can be printed out and draw directly on. This method will ensure that you don’t need to worry about sizing your panels. Like creating a comic book from scratch, this method will make it easy to reproduce your comic since you’ll simply need to get your pages photocopied at a printer.Tip: You can buy blank comic books that are already bound, but if you screw something up you’ll have to start over from the beginning. These books are also near-impossible to reproduce without distorting the images near the spine of the book. It’s a great choice if you’re making a comic for a school project or something like that though! You can find a ton of free templates online at http://comicbookpaper.com/.
Use an online program to create simple digital comics. There are several free resources available online to make rudimentary comics, although most of them don’t offer the kind of creative control that most illustrators want. If you’re making a short comic or working on a school project though, they can make comic creation quite easy. Pixton, Strip Generator, and Make Beliefs can all be used to render simple comics in your online browsable comics can be found at https://www.pixton.com/. Pixton uses pre-rendered characters that you can place yourself to give them original dialogue. Make Beliefs is an easy-to-use site that can be found at https://www.makebeliefscomix.com/Comix/. It also uses pre-rendered characters though, and you can only have a total of 18 panels. You can import images and draw your own characters in Strip Generator, but the customization options can be kind of tough to make the most out of if you aren’t great at digital illustration.
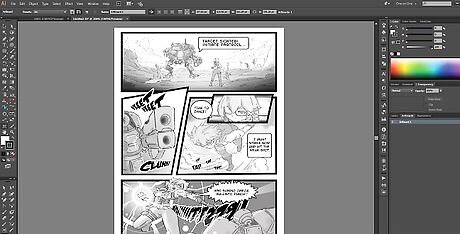
Work entirely in Illustrator for a professional-looking comic book. Most professional comic illustrators work entirely in a digital program like Adobe Illustrator, ArtRage, Affinity, or Procreate. Using this strategy, you can draw each panel individually and then import the images and resize them to fit the panels in a new project. This method is much more time-consuming, but it ensures total creative control and you’ll be able to undo mistakes, rearrange panels digitally, and make major changes without running the risk of ruining your original art. If you’re interested in self-publishing, you can import your templates into Blurb and pay to get your comics printed professionally. Visit Blurb at https://www.blurb.com/comic-books. Most professional illustrators use a drawing pad that plugs into your computer. These look like big screens that you draw on with a stylus. This is the most efficient way to draw digitally.


Comments
0 comment