
Trimming the Bottom
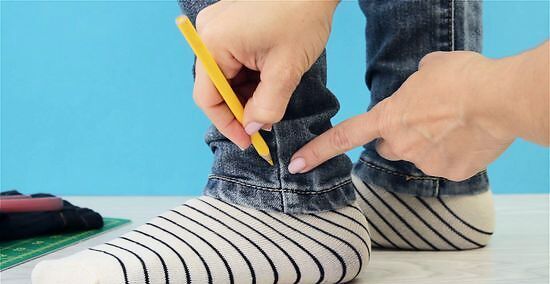
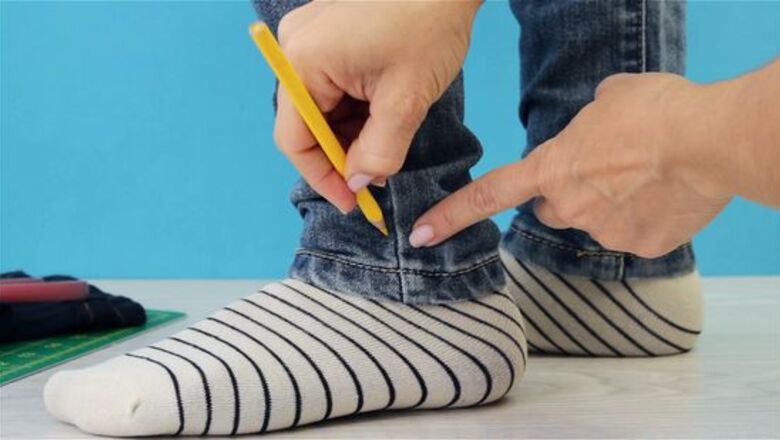
Mark the jeggings where you'd like the hem to fall. Try on the jeggings to see where you want the hemline. If you want to fray the bottom close to where the hem is already at, just mark directly above the existing hemline. For cropped jeggings, mark 1 to 2 inches (2.5 to 5.1 cm) above the ankle. Then, mark the opposite leg at the same point so they're even. Just make a little mark with a pencil, pen, or fabric chalk.

Trace a straight cutting line along your mark. Turn the jeggings inside out and lay them flat. Then, take a ruler and lay it across the jeggings so it lines up with the mark you made. Trace across the edge of the ruler with a pencil, fabric chalk, or pen. Don't worry—you won't see this line once the hem is frayed. It's just a guideline for you.
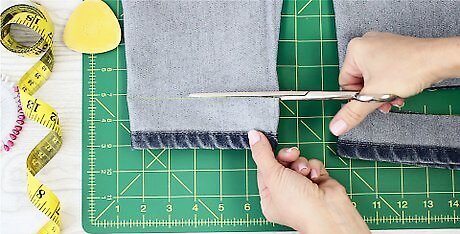
Cut through the jeggings along the bottom line with a pair of scissors. Make sure you're cutting through both layers of each of the pant legs as you cut across the guidelines that you made. You can discard the leftover fabric. If you've got them, use fabric scissors. These are really sharp and will cut through the jeggings easily.
Distressing the Hem

Rub the cut hem with your fingers for subtle fraying. If you want your jeggings to look like they're naturally fraying, scrunch the cut hem between your hands and rub it closely together until you get individual fibers poking out from the edge. Keep doing this around the entire edge of the jeggings. You can also tug at the individual fibers with your fingertips if you want more control over the fraying.

Cut slits into the hem and rub them for extra fraying. To get a frayed hem that stands out more, take your scissors and make 3 or 4 diagonal cuts across the bottom. Make each cut about ⁄4 inch (0.64 cm) long. Then, rub the hem together so those cuts fray, too. Experiment with this! You can add more cuts along the hem or make them longer so you get larger fraying.
Scrape against the bottom of the jeggings to make a distressed look. There are lots of tools you can use to accomplish this. Carefully drag a razor along the bottom hem if you want to make the jeggings look rough and worn. You can also rub sandpaper or a loofah along the hem to wear out the fabric and fray the edge. Use fine-grit sandpaper for a light frayed effect or coarse sandpaper for lots of fraying.
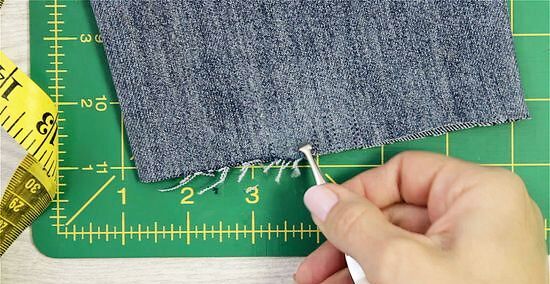
Pull out threads from the hem with a tweezer for a lightly frayed hem. If you're having a hard time pulling or rubbing the hem with your hands, pull on threads with tweezers. This is also really useful if you just want a few long threads to stand out. To pull out clusters of threads you can tease them out with a pin or the tip of a small pair of scissors.

Snip the hem with pinking shears for shaggy fringe. You've probably seen jeggings with a really fluffy, fuzzy hem. To get that look, take a pair of fabric pinking shears—these are scissors with sawtoothed edges—and make vertical snips along the entire hem. Then, dip the hem in water and wring it out to help it fray easier. Rub the hem back and forth between your fingers to tease the threads out. If you want a short fringe, keep the cuts between ⁄4 and ⁄2 inch (0.64 and 1.27 cm) long. For long, shaggy fringe, make your cuts at least 1 inch (2.5 cm) long.
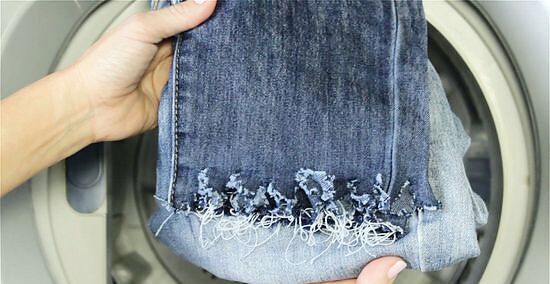
Wash and dry the jeggings once you've frayed the hem. Wash the jeggings according to the care label so the hem becomes light and fluffy. Then, you can toss them in the dryer or let them air dry. Again, always read the label so you know what heat setting to use. Some jeggings recommend air drying instead of machine drying so you don't accidentally shrink them.


Comments
0 comment