
A through J
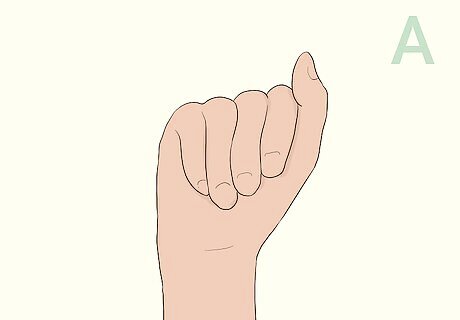
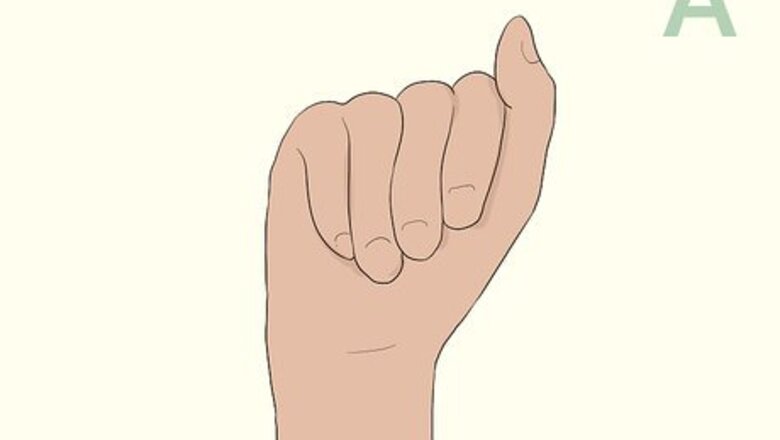
Make a fist with your thumb pointing up to form an “A.” Hold your hand in front of you with your palm facing forward. Close your fingers in a fist, but keep your thumb pressed against the side of your hand and pointing upwards. This is the letter “A.”
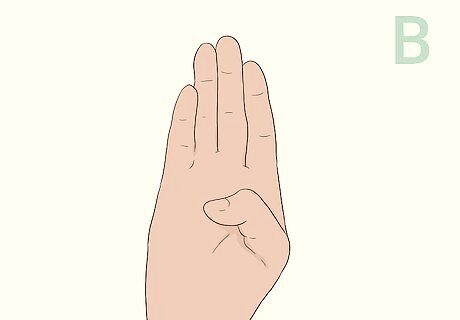
Hold your fingers together with your thumb across your palm for “B.” Extend your fingers so they are straight. Bring them in close to each other so they are touching on the sides. Then, fold your thumb across the front of your palm and hold it there. This is the letter “B.”
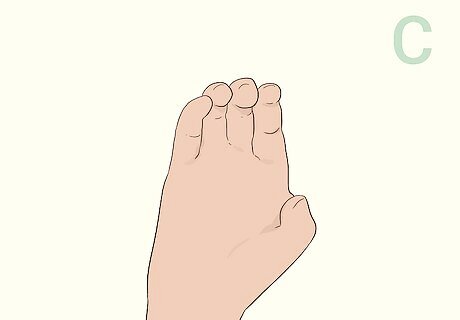
Curl your whole hand into the shape of a "C". Turn your right hand so that your palm is facing towards the left. Then, curl your fingers and thumb to form a half circle or backward “C.” Hold your hand still. This is the letter “C.”Tip: Turn your hand sideways when you're signing the letters "C", "G", "H", and "O".
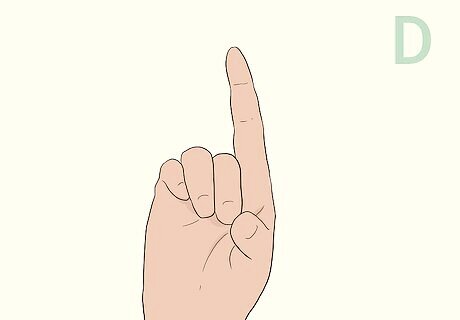
Touch your fingertips to your thumb and point to make a “D”. Touch the tip of your thumb to every finger except your index finger. Then, point your index finger straight up. Hold your hand still with your palm facing forward. This is the letter “D.”
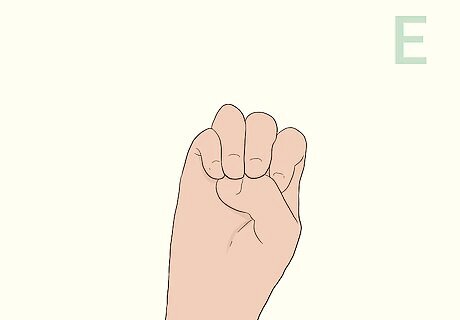
Form the letter “B” and curl your fingertips down to make an “E.” Bend all four fingers down to meet your thumb. Press the tips of your fingers against the side of your thumb. This is the letter “E.” Keep your thumb and fingertips close to your palm. Otherwise, it might look like an “O" or "C."
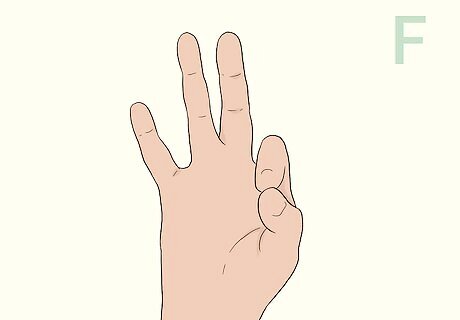
Press your index finger and thumb together with straight fingers for “F.” Keep your other 3 fingers straight. This is the letter “F.”
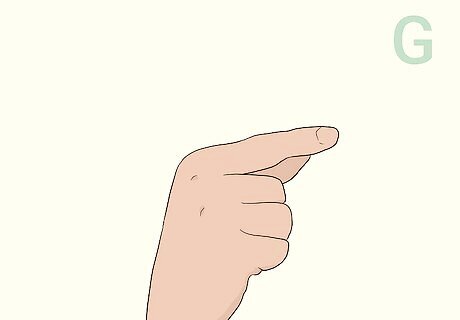
Point your index finger and turn your hand to the side to make a “G.” Gather your fingers in towards your palm to make a fist. Then, extend your index finger and rest your thumb against your middle finger. Keep your thumb about 0.5 in (1.3 cm) from your palm so that it is parallel to your index finger. Angle your hand so that your palm is facing you and your index finger is pointing to your left. This is the letter “G.”
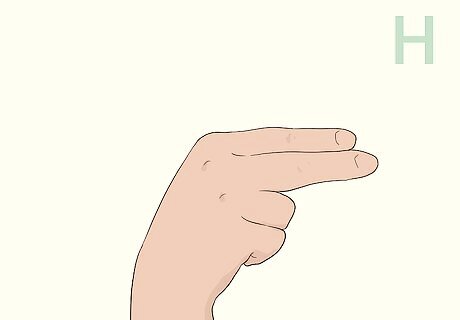
Stick out your middle and index fingers to form an “H.” Keep your hand in the same position as it was for the letter “G,” but extend your middle finger as well. Hold your middle finger so it’s right next to your index finger. Angle your hand so that your palm is facing you and your index and middle fingers are pointing to your left. This is the letter “H.”
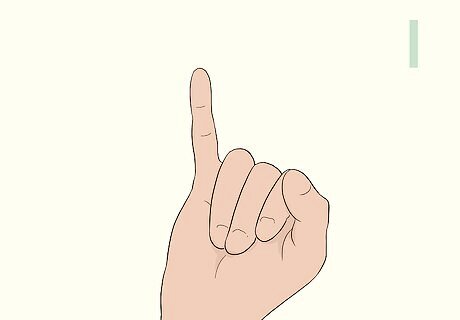
Point your pinkie straight up to make an “I.” Form a fist and poke your pinkie finger straight up. This is the letter “I.”
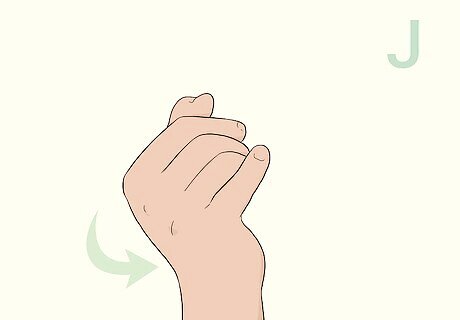
Use your pinkie to draw the shape of a "J". With your hand still in the position for the letter “I,” bring your finger down and then swoop it upwards in the shape of a letter “J.” Do this multiple times if you want to create multiple Js, or just once for one letter J. Keep your palm facing away from you as you do this.
K through Q
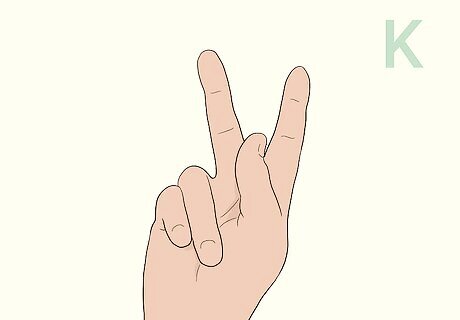
Point the index and middle fingers with a thumb between them for “K.” Press your ring finger and pinkie finger against your palm. Hold your index and middle finger so they are straight up but spread apart in the shape of a V. Then, press your thumb against your palm so that the tip of your thumb is between your index and middle finger near where they meet your hand. This is a “K.”
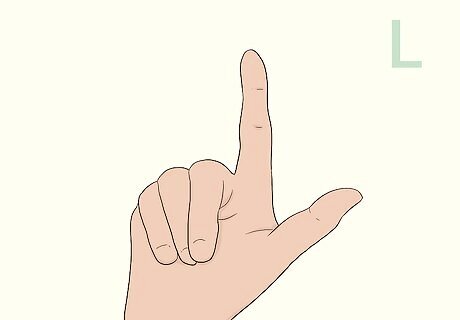
Form an L-shape with your thumb and index finger to make an “L.” Press your middle, ring, and pinkie fingers against your palm as you form an L-shape with your index finger and thumb. This is the letter “L.”
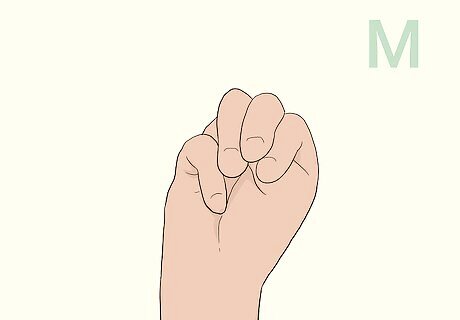
Hold an invisible ball and poke your thumb through for "M." Curl your fingers down towards your palm with your thumb between your index and middle finger. Hold your fingers like you’re wrapping them around a ball. Then, poke your thumb between your ring and pinky finger. This is how you make an “M.” Tip: On letters "M", "N", and "T", make the fingers on top of the thumb obviously higher than the others to make for easy interpreting.
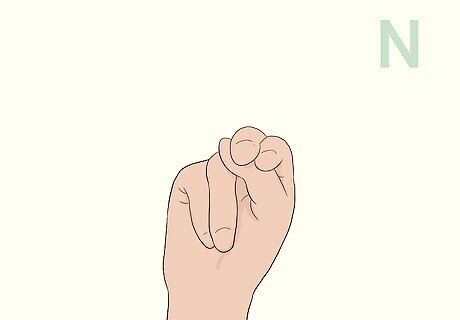
Poke your thumb between your middle and ring finger for “N.” Curl your fingers as if they’re holding a ball. Then, push the tip of your thumb between your middle and ring fingers. This is an “N.”
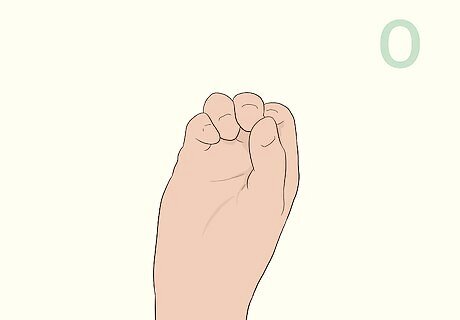
Make an "O" with your fingers and thumb. Press the tips of your fingers and thumb together. This is the letter “O.” Some people may turn their hand slightly to show the "O" formed by the fingers to differentiate it from "E".
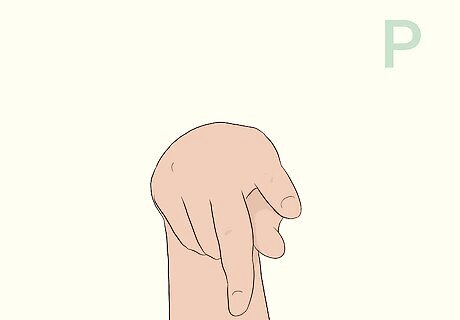
Press your thumb against your middle finger with index pointed for “P.” Press your ring finger and pinkie finger against your palm. Then, extend your index finger as if you're pointing at something. Extend your middle finger so it's pointing down and touch it with your thumb. This is the letter “P.”
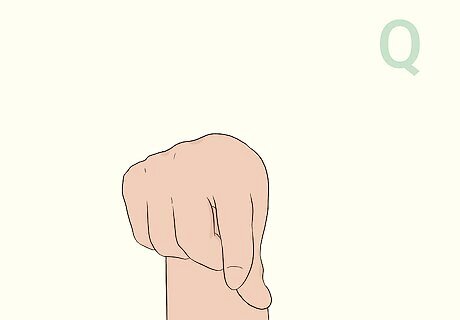
Make the sign for a “G” and then point down for a “Q.” Press your middle, ring, and pinkie fingers against your palm and point with your index finger. Then, rest your thumb on top of your middle finger so that it is about 0.5 in (1.3 cm) from your index finger. Then, point down with your hand in this position. This is the letter “Q.”
R through Z
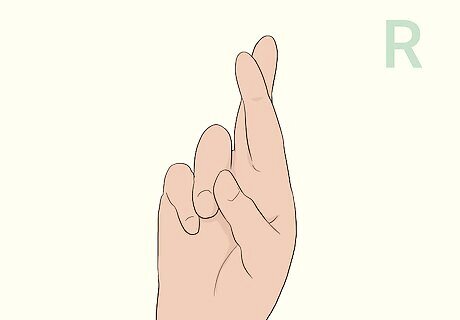
Cross your index finger over your middle finger for an “R.” Press your ring finger, pinkie, and thumb against your palm. Then, wrap your middle finger around the back of your index finger. Hold your hand still with your palm facing forward. This is the letter “R.”

Make a fist and put your thumb on top of your fingers for an “S.” This is often confused with "A" so pay careful attention to the thumb position. Press your fingers against your palm and wrap your thumb over them. This is the letter “S.”
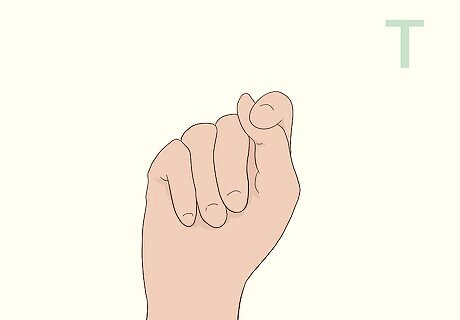
Form a fist with your thumb between the middle and index finger for “T.” Press your fingers against your palm. Then, push your thumb up between your index and middle finger. This is the letter “T.”
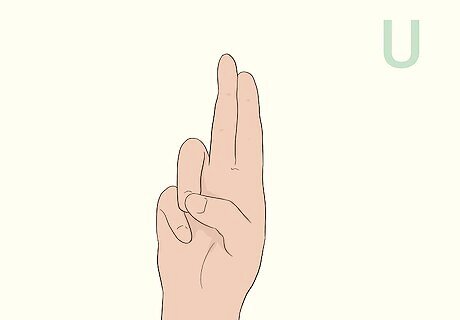
Point your middle and index fingers upwards together to make “U.” Press your thumb, ring finger, and pinkie finger against your palm. Then, point your middle and index finger straight up and hold them against each other. This is the letter “U.”
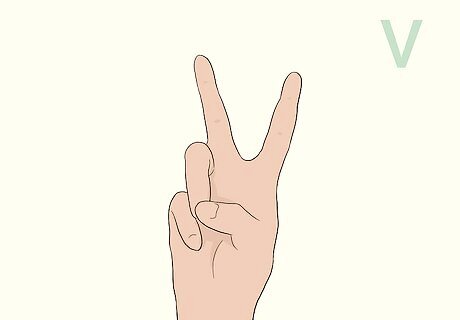
Make a "U" and separate your fingers for a “V.” With your hand in the “U” position, spread your fingers apart. This is the letter “V.” Make sure to keep your ring finger, pinkie, and thumb pressed against your palm.
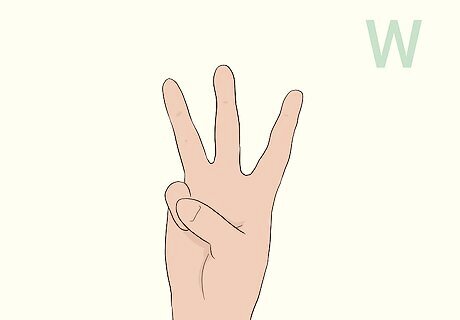
Hold up 3 fingers and spread them apart to form “W.” Press your pinkie finger to your palm using your thumb. Then, hold up your index, middle, and ring fingers and spread them apart so that they look like the letter “W.” This is a “W.”
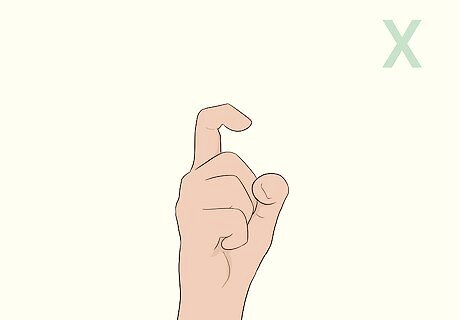
Make a fist, then raise and crook your index finger to make “X.” Press your thumb against your palm and then wrap your middle, ring, and pinkie fingers over it. Curl your index finger. This is the letter “X.”

Stick out your pinkie and thumb for a “Y.” Press your other fingers against your palm. This is the letter “Y.”
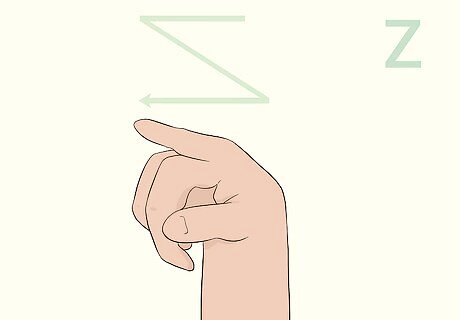
Write the letter “Z” in the air with your index finger. Form the letter "D", with your index finger out, and write a letter “Z” in the air.


Comments
0 comment