
Using a Mitre Box
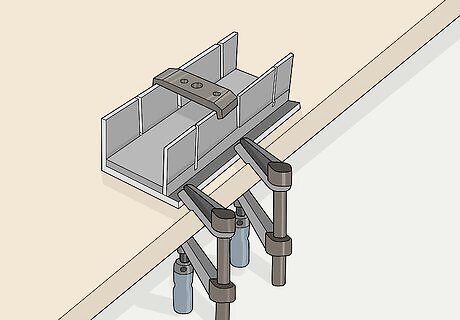
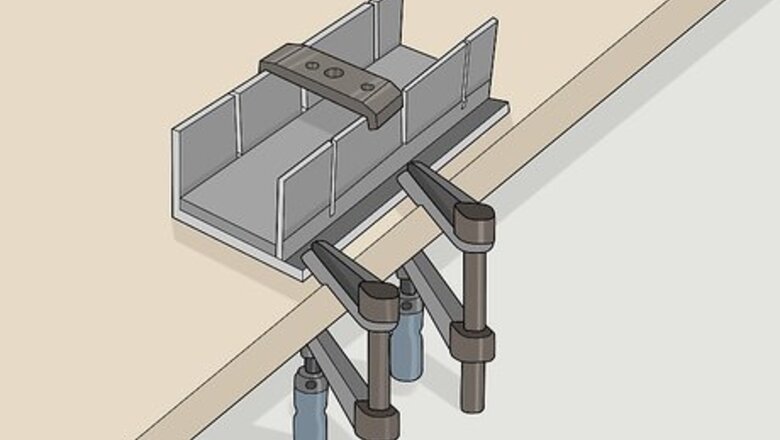
Secure a mitre box to your work surface with screws. Mitre boxes are U-shaped guides that have angled slots on top so you can line up a saw easily. Set the mitre box on your work surface so it sits flat and locate the screw holes on the front and back. Feed screws into the holes on the mitre box and secure them to the work surface using a screwdriver or drill. You can buy a mitre box from your local hardware store or online.Variation: If can’t screw directly into your work surface, place a piece of scrap wood underneath the mitre box and screw into it. Clamp the scrap wood to your work surface so it doesn’t move around.
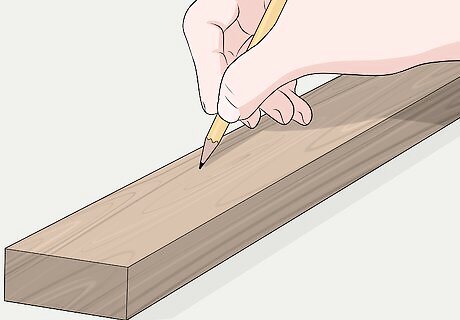
Mark the line you’re cutting on your piece of wood. Find the length of the longest side you need for your mitred board, and measure the length from the end of your piece of wood. Draw a line across the board so it lines up with your measurement. Align the bottom of a protractor along the long edge of the wood so the line you drew points to 90 degrees. Set a 45-degree angle on the protractor, and trace the angled line to the other side of the wood. Make sure the end of the angled line doesn’t extend further along the board than your initial measurement, or else the piece won’t be the proper size.
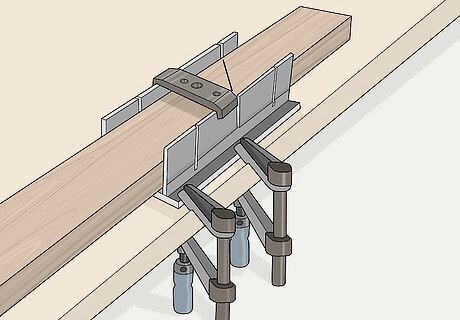
Position the piece of wood in the middle of the mitre box. Slide the piece of wood through the middle channel of the mitre box so the finished side faces down. Continue guiding the wood until the guide line you drew aligns with the slots on the mitre box that have the same angle. Hold the piece of wood securely against the front side and bottom of the mitre box with your nondominant hand. You can also clamp the piece of wood down with a C-clamp if you want to keep your hands free. Don’t keep the finished side of the wood face-up since it won’t leave as clean of a cut.
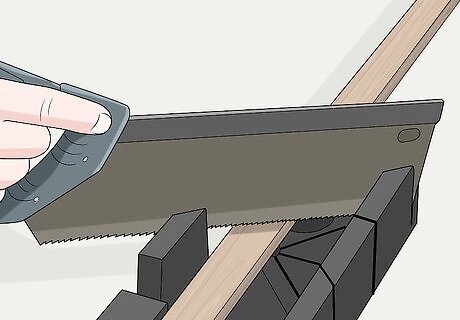
Line up a back saw with the slots matching the angle you want to cut. A back saw has a rigid top so it’s less likely to bend while you’re cutting. Position the side of the back saw closest to the handle in the slot at the front of your mitre box. Slowly lower the front end of the saw into the slot on the back side of the box that follows the same angle. You can buy a back saw from your local hardware store. You can also use a regular handsaw, but it may flex easier and make a crooked cut. Usually, mitre boxes have 2 slots that are 45-degree angles and 1 slot that cuts at a 90-degree angle.
Saw through the wood to cut your joint. Hold the piece of wood steady with your nondominant hand so it’s pressed firmly against the front and bottom of the box. Use long, slow strokes to ensure the saw doesn’t jump out of the slot or make a crooked cut. Continue cutting through the wood until you’ve broken through the other side. Remove the saw from the mitre box before you grab your wood pieces. Make sure your fingers aren’t in the way of the saw blade, or else you could seriously cut or injure yourself.

Mitre the end of another board so you can form the wood into a corner. Mitred joints consist of 2 different boards forming a corner, so you need to cut another board the same way. Measure the longest side you need for the second board and draw the angled line you’re cutting. Place the piece of wood in your mitre box and use the same slots you did before. Saw through the wood completely to make the second board for the mitre joint.
Cutting with an Electric Mitre Saw

Wear ear and eye protection while using an electric mitre saw. Electric mitre saws kick up wood scraps and sawdust while they’re running, so buy safety glasses that completely cover your eyes. Since saws can also make a lot of noise and damage your hearing after repeated uses, opt for earplugs or shop earmuffs to reduce the noise. Make sure to put on your equipment before you run the saw so you don’t hurt yourself. You can buy safety supplies from your local hardware store. Make sure you don’t have on any baggy clothes while you’re working since they could get caught in rotating machinery.
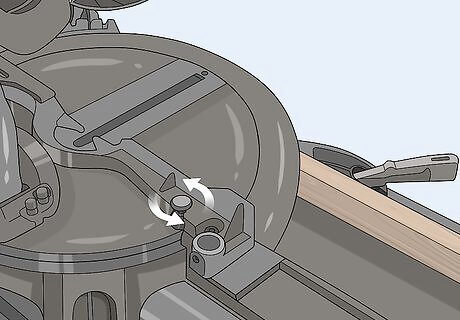
Adjust the angle of the saw to match the mitre joint you’re cutting. Locate the locking screw on the saw base and turn it counterclockwise to loosen it. Rotate the saw base to change the angle so the arrow points to what you need for your cut. While many mitred corners use a 45-degree angle, it may vary depending on what you’re making. When you have the angle of the saw set correctly, tighten the locking screw by turning it clockwise. You can buy mitre saws from hardware stores or online.Tip: Check with local home improvement or hardware stores to see if you can rent a mitre saw. That way, you don’t have to buy one if you’re only using it for a single project.
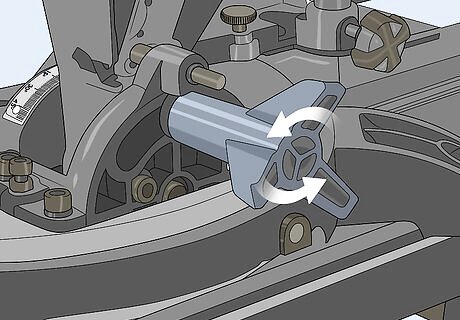
Set the bevel angle on the saw if needed. While the saw usually cuts straight into the wood, changing the bevel adjusts the angle of the blade. Locate the knob that controls the bevel and turn it counterclockwise to loosen it. Adjust the angle of the saw arm until the arrow points to the correct measurement. Tighten the knob by turning it clockwise to secure the bevel in place. You only need to set bevels if you’re cutting edges for trim or molding. Make sure you tighten the knob completely so the saw doesn’t move around while it’s running.
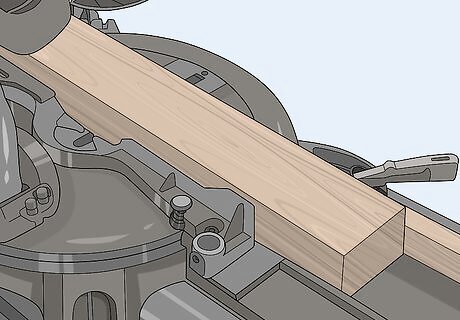
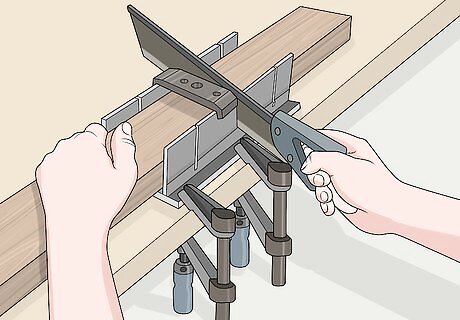
Clamp your piece of wood so it lines up with the saw blade. Slide the piece of wood you’re cutting against the back fence of the saw base. While you have the saw turned off, pull the handle down to see where the blade lines up with the wood. Continue adjusting the wood in the base until the section you’re cutting lines up with the blade. Secure C-clamps to the ends of the board so it doesn’t move around while you’re cutting it. Some mitre saws have laser guides so you can check if the wood lines up without pulling the blade down. You don’t need to clamp the board down if you don’t want to, but it makes it easier to cut.
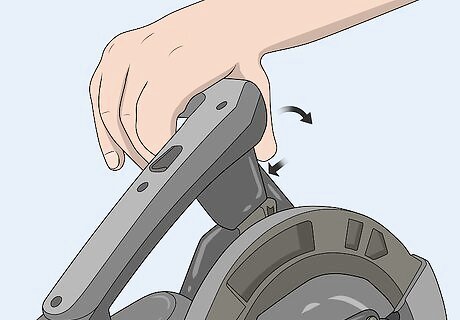
Pull the trigger and handle down to cut through your wood. Keep the board steady with your non-dominant hand. Turn on the mitre saw and press the trigger on the handle so the blade starts running. Let the blade come up to full speed before slowly pulling the handle straight down to lower the blade. Apply light pressure as you pull the blade down and cut into the wood. Don’t cross your arms while you’re using the saw since you could risk cutting yourself.
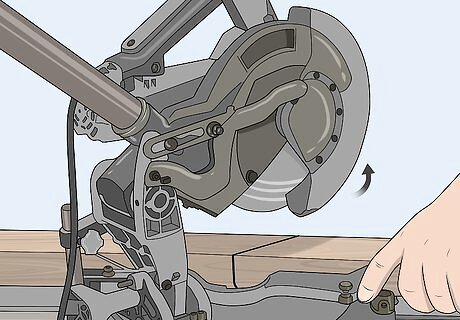
Raise the saw completely before collecting the wood pieces. After cutting completely through the wood, let go of the trigger and let the blade stop spinning. Raise the handle back up so the guard covers the saw blade completely. Unclamp your pieces of wood from the base of the saw so you can remove them. Don’t raise the saw blade while still running the blade since it could cause the wood to kick up.
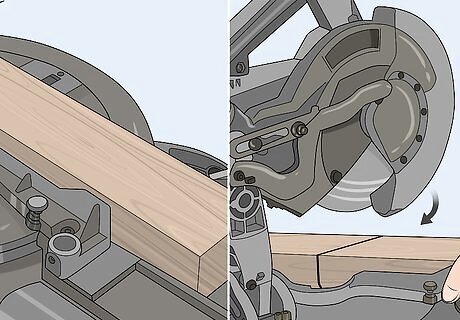
Repeat the process to cut the second board for your joint. Find the longest length you need your board and transfer the measurement onto the piece of wood. You will be able to use the same mitre and bevel angle as the last piece you cut for your second board. Line up the blade of the saw with the line you need to cut before starting the machine. Carefully saw through the board and let the blade stop spinning before you retrieve your wood.
Joining Mitred Corners
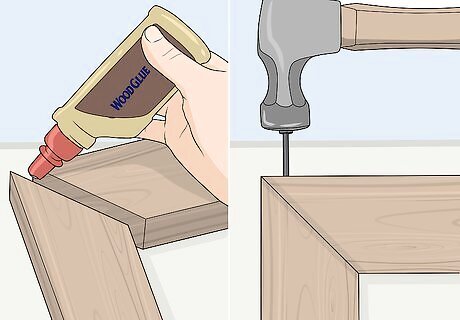
Use wood glue and nails for simple joinery. Spread wood glue over the cut sides of your mitre joints so they have a thin, even layer. Press the mitred corners together so they line up with one another and secure them together with a strap clamp to ensure the corners don’t shift. Allow the glue to set for 24 hours so they form a firm connection. After the glue dries, pound 1–2 wood nails into one of the board’s edges so it goes through the joint. The nails may be visible from the sides of the joints. Avoid using only wood glue since the boards could break apart more easily.

Drill pocket holes for screws if you want to hide the joint easier. Flip your boards over so the unfinished side faces up. Place a pocket hole guide box against the end of one of the mitred corners and use a drill to make at least 2 holes in one of the boards. Clamp the boards so they form a tight corner and feed wood screws into the holes you drilled. Use a screwdriver to turn the screws clockwise and secure the boards together. Avoid using pocket holes if you have wood that’s thinner than ⁄2 inch (1.3 cm) since the screws will break through the other side. You can also apply wood glue if you want the joint to be more permanent.

Add dowels to the ends of the boards if you don’t want to use hardware. Cut wooden dowels with a saw so they’re short enough to fit at a 45-degree angle between the boards. Drill 2 holes into the ends of the boards that are the same diameter as the dowels and are half as deep. Feed the dowels into one of the boards and pound them in tightly. Line up the dowels with the holes on the other mitred edge and press them together to form a tight corner. Dowels work well for pieces of wood that are thicker than ⁄4 inch (1.9 cm).Tip: Add wood glue before pressing the pieces together if you want to join them permanently. Dry-fit the pieces before using wood glue to ensure the corners line up before gluing them.


Comments
0 comment