

Installing SketchUp

Open the SketchUp website. Go to https://www.sketchup.com/ in your computer's web browser. In order to use SketchUp, you'll have to answer a few questions and create an account on the website.

Click Get SketchUp. It's a red button on the right side of the page.
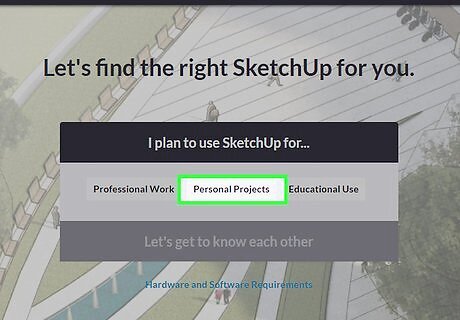
Click Personal Projects. This option is in the middle of the form.

Click create a Trimble ID. It's a link above the login button. Doing so will take you to the account creation page.
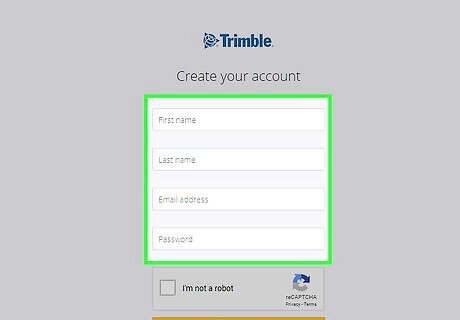
Enter your account information. Fill out the following text fields: First name — Enter your first name. Last name — Enter your last name. Email address — Enter a working email address to which you currently have access. Password — Enter a password for your account.
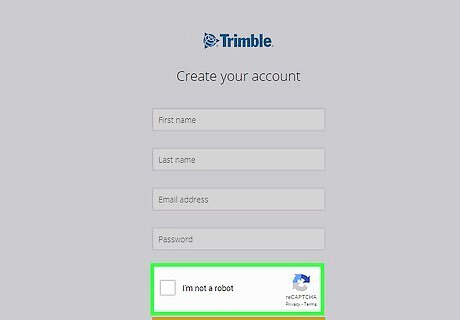
Check the "I'm not a robot" box or enter the captcha text. In the "Enter the above text" box, type in the text from the box above it. You can change the text by clicking the "Refresh" button to the right of it.
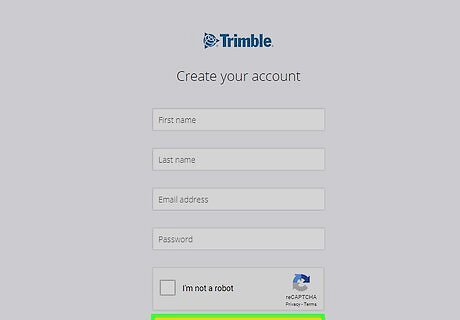
Click Create new account. It's a yellow button at the bottom of the page. Doing so creates your account and sends an activation email to the email address you listed.
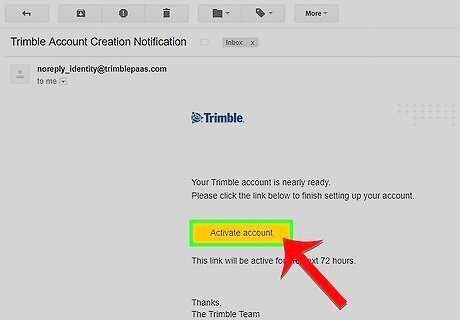
Activate your account. Open the email inbox for the address you used to create your account, then do the following: Look for a "Trimble Account Creation Notification" email (you may have to check the Spam folder, or look in one of your inbox's other folders). Open the "Trimble Account Creation Notification" email from the "noreply_identity" sender. Click Activate account in the email's body.
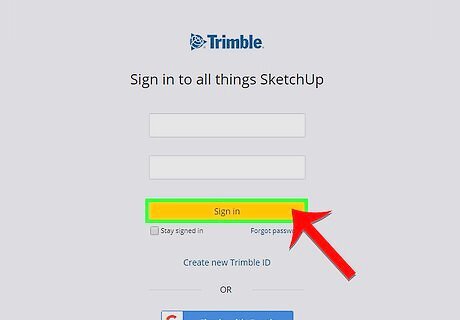
Log into your Trimble account. Click the here link on the redirect page, then enter your email address and password and click Sign in.
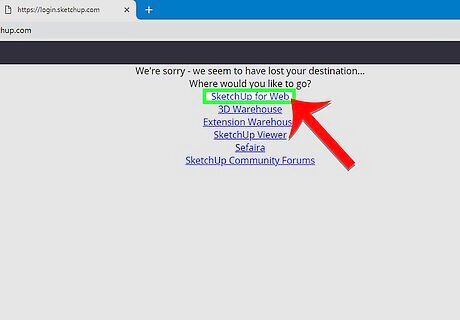
Click the SketchUp for Web link. It's near the top of the page. If you don't see this link, just go to https://www.sketchup.com/plans-and-pricing/sketchup-free in your computer's web browser.
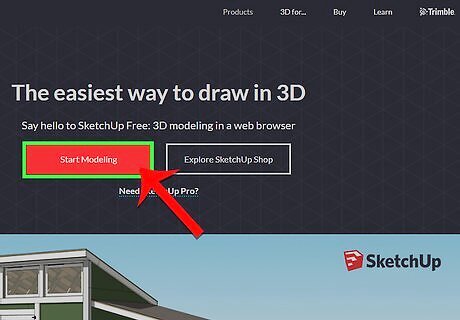
Click Start Modeling. It's a red button at the top of the page. Doing so will open SketchUp in your web browser, from which point you can begin using it as you please.
Learning SketchUp Basics
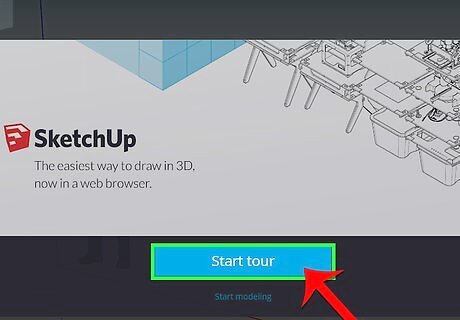
Consider taking the tour. To see SketchUp's latest features and suggested actions, click the blue Start tour button in the middle of the page, then follow the on-screen prompts. You can also skip the SketchUp tour by clicking the Start modeling link.
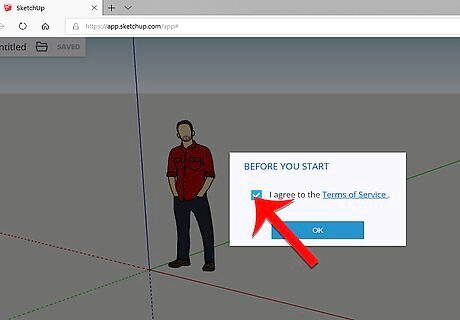
Complete the setup. Click OK when prompted about cookie use, then check the "I agree to the terms of service" box and click OK.
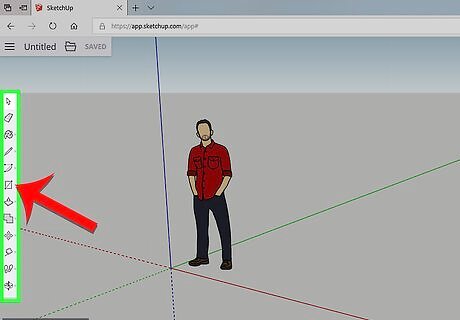
Review the tools and their uses. On the left side of the page, you'll see a vertical column of icons. These icons, from top to bottom, pertain to the following tools: Select — Allows you to highlight (or "select") an item. Erase — Allows you to remove a highlighted (selected) item. Paint Bucket — Allows you to fill an item's surface with a color of your choosing. Draw Lines — Allows you to click and drag to draw a straight line. Draw Arcs — Allows you to click and drag to draw an arc. Draw Shapes — Allows you to click and drag to draw a specific shape (e.g., a triangle). Modify Objects — Allows you to change the model's surface (e.g., extend the surface) by clicking and dragging. Move Objects — Allows you to move (via clicking and dragging) an item. Measure Tools — Allows you to measure an item using your preferred dimensions. Walk — Allows you to view your creation from eye level. Camera Controls — Allows you to change the camera's settings for different viewing.
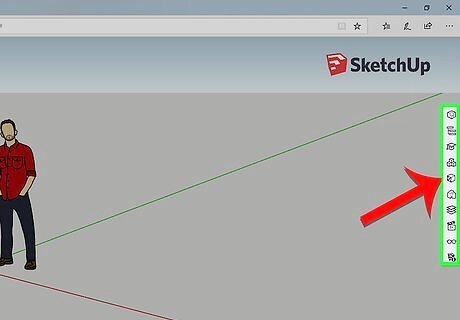
Know what the panels do. On the right side of the page, you should see another vertical column of icons. This is the "Panels" menu; from top to bottom, each icon relates to the following: Entity Info — Shows information about the currently selected object (or "entity"). Instructor — Gives you tips about using SketchUp. Components — Allows you to search for specific 3D model components. Materials — Lets you select different materials for painting your model. Styles — Shows different styles of modeling. Layers — Shows the different layers in your project. Scenes — Shows different scenes (e.g., variations) of your models. Display — Brings up settings for your project.

Check out the status bar. You'll find the status bar in the lower-left side of the screen. From left to right, the options here pertain to the following functions: Undo — Removes the last action. Redo — Reapplies the last action. Help — Opens a menu with advice for your currently selected item. Language — Allows you to change the on-screen language. Feedback and Status — Both of these options provide different pieces of information about selected items.
Scroll up or down to zoom in or out. This will allow you to shift your perspective somewhat, though you'll need to use the camera tool to rotate or pan right or left.

Find your project's current measurements. In the lower-right corner of the page, you'll see a set of dimensions pertaining to your currently selected area. This will help you ensure that your creations are precise when necessary.
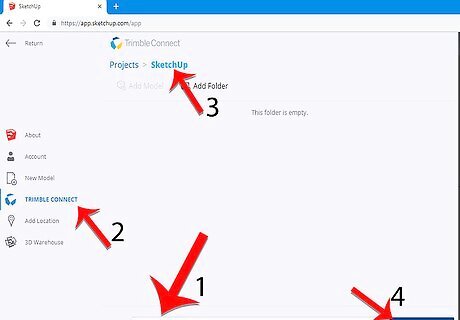
Save your project. If you want to save a copy of your file in SketchUp's cloud storage, you can do so at any time by doing the following: Click SAVE in the upper-left corner of the page. Enter a name for your project. Click the TRIMBLE CONNECT tab on the left side. Click the SketchUp folder. Click Save here in the lower-right corner of the window.
Creating a Structure

Consider importing a component. SketchUp has a huge library of different models which you can add to your project. To add an existing model, do the following: Click the "Components" tab, which resembles a three-box icon on the right side of the page. Type a keyword into the "Search 3D Warehouse" text box. For example, to bring up a list of houses, you would type in house. Click the magnifying glass-shaped "Search" icon. Select a structure, then wait for it to appear in SketchUp.

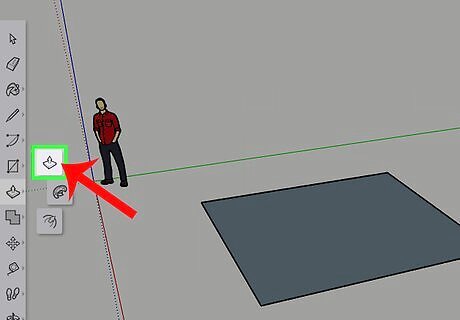
Draw the base for your structure. If you want to free-draw your structure's base, click the pencil icon on the left side of the page, click the pencil which appears in the pop-out menu, and click and drag to draw. Once you've connected all of the lines, you should see the inside of your structure's base turn blue. You can also free-draw by clicking the squiggly line instead of the pencil icon in the pop-out menu. If you want to make a circular base, select the arc tool instead.

Select the "Modify" tool. This tool resembles a box with an upward-facing arrow in it. Clicking it prompts a pop-out menu.
Click the "Push/Pull" icon. It's the box with an upward-facing arrow in the pop-out menu.
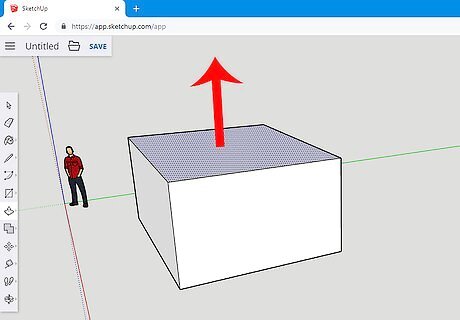
Click and drag a surface to extend it. This will allow you to raise the surface, thus creating a tower.
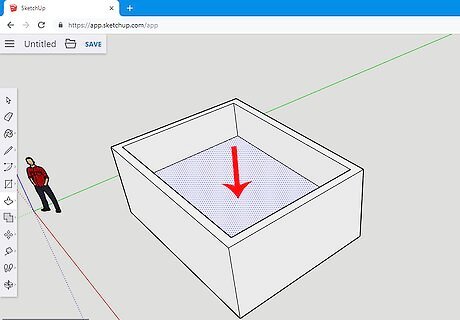
Add details to your structure. Using the pencil tool, draw in and modify structure details as needed. For example, if you wanted to use the structure base as a four-walled box, you might draw a slightly smaller box inside of the base and then use the "Modify" tool to lower the smaller box.

Paint your structure. You can add color to a structure face by clicking the paint bucket icon, clicking a color on the right side of the page, and clicking a face on the structure.

Save your project. Once you've finished adding the structures you want to create, you can save your SketchUp project on your account page.


Comments
0 comment