views
- Set a mechanical plug timer indoors or outdoors by pressing in the pins during the times you want your devices to turn on. Your lights will go on at the same time each day.
- Program a digital plug timer by setting the days and times you want your devices to receive power. You can set different times for each day of the week.
- Keep your devices powered on when they’re plugged into the timer.
Mechanical Timer with Pins
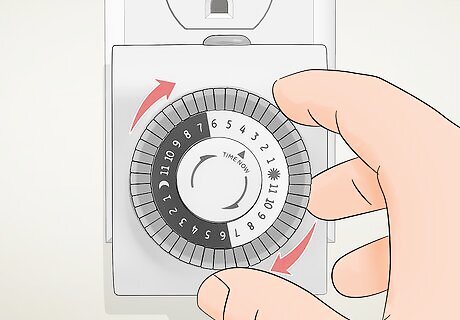
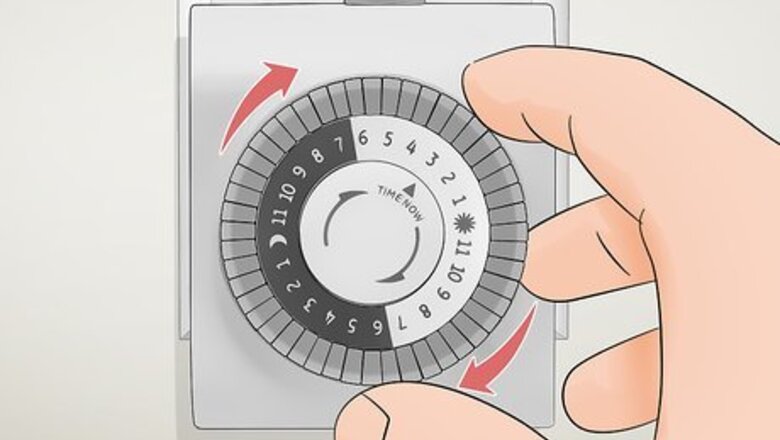
Turn the timer’s dial to the current time. Use mechanical pin timers indoors or outdoors. Look for the arrow on the front of the dial on your mechanical timer. Then, rotate the dial clockwise until the arrow points at the current time. Most timers are broken down into 30-minute intervals, so it’s okay if the time isn’t precise down to the minute as long as the arrow is generally near the right time. It might be easier to set your timer on the hour so you can point the arrow directly at one of the numbers. Most timers have light and dark markings over the numbers to distinguish between AM and PM hours. Other timers may list the hours in military time instead.
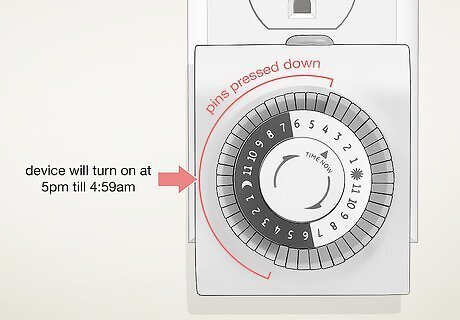
Push the timer pins in for the times you want the timer turned on. The small gray buttons around the outside of the dial are the timer pins. Start with all the pins pulled out as far as they can go. Find the times on the dial when you want your lights to turn on, and push down all of the pins within that range. Keep the pins pulled out for when you want your devices to power down. If there are 2 pins for every hour on the dial, then each pin represents 30 minutes. Some timers have 4 pins per hour, so each one represents 15 minutes. If your mechanical timer doesn’t have built-in pins, then it will have separate pins to insert. Push the pin into the slot on the dial’s inner circle when you want your devices to turn on, and add a pin to the outer circle when you want them to turn off.
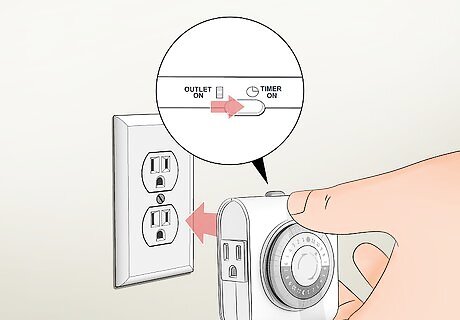
Flip the manual switch button to the "Timer” setting. Check the top or side of your outlet timer for a gray or white switch. If the switch is in the “On” or “Off” position, move it to the setting labeled “Timer” instead. That way, anything you plug into the timer will turn on during the intervals you set. You can always manually override the timer intervals by changing the switch to “On.” If you don’t want to keep your devices turned off even while the timer is running, then use the “Off” setting. When using your plug timer outdoors, plug it in so it’s at least 2 feet (0.61 m) above the ground to prevent it from getting wet and shorting out.
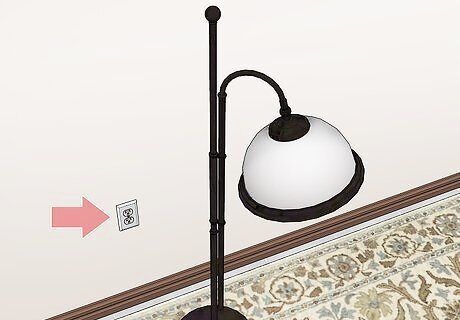
Find the outlet closest to your device. Look for the outlet that’s right next to the area where you’re plugging in your lamp. Just plug the timer directly into the outlet without any intermediate devices. Avoid using plug timers with extension cords or other adapters since they could overheat when your devices are running.
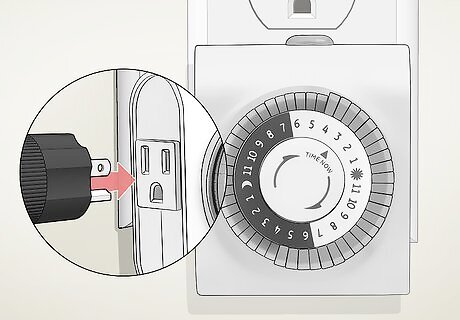
Connect your electrical device to the timer and turn it on. Plug your device into the outlet on the front or side of the timer. Switch the light or other device you plugged in to the "On" position so it automatically turns on when the timer reaches one of the intervals. To avoid fires, avoid connecting your timer to appliances like irons, heaters, and cooking appliances. Check the electrical rating on the plug timer and compare it to the device you’re plugging into. If the device requires more power than the timer can handle, then avoid plugging it in. To test if your timer has power, turn the manual switch to the “On” position. Your device will power up right away.
Digital Timer
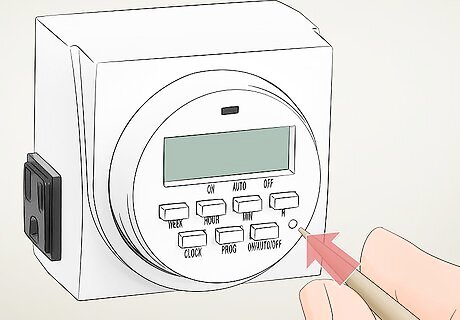
Press the “Reset” button to erase any previous settings. Locate the small “Reset” button on the front or right side of your digital plug timer. If it’s a normal button, just press it with your finger to clear all of the saved time intervals. If the button is small and hard to press, then try pressing it in with a toothpick instead. If you’re putting in a new digital timer fresh out of the box, you can skip this step since there aren’t any saved settings.
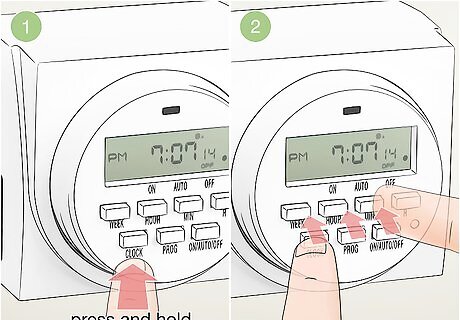
Set the clock to the current time. Start by pressing the "Clock" button on the front of the timer, and hold it down until the screen flashes. Use the "Hour" and “Minute” buttons, or the up and down arrows, to adjust the clock to the right time. Then, press the “Week” button until the timer reads the correct day of the week. Follow the directions that came with your specific model of plug timer since you may need to press or hold down different buttons to program the clock and time intervals. Double-check that you have AM or PM set correctly on your timer so it doesn’t come on at the wrong times. Digital timers have a small internal battery, so you don’t need to plug them in before you program them.
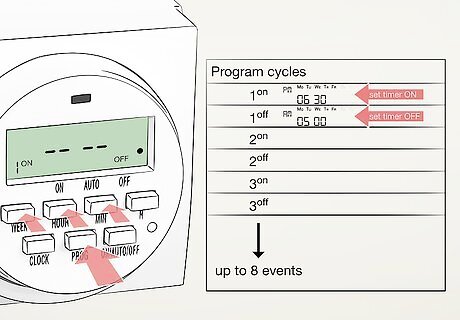
Set the times and days of the week you want your timer to turn on. You can usually program 8 different cycles for when your timer turns on, but it may vary between timer models. Follow the instructions that came with your timer. Generally to program a timer, you will: Start by pressing the “Timer” button so the display reads “1 ON” or something similar to start scheduling the first program. Press the “Week” button until all of the days you want the program to activate are lit up. You may find special settings labeled “Weekdays” or “Weekends” to only have the cycle active during those times. Use the arrows or the “Hour” and “Minute” buttons to set the time when your devices turn on. Press the “Timer” button again to set the days and times when you want your devices to turn off. If you want to add an additional program, press the “Timer” button after you finish entering the time range. The next program will appear so you can edit it.
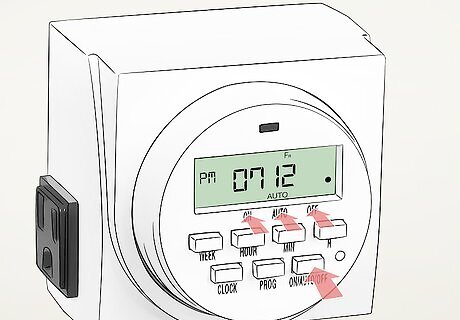
Set your timer to “On-Auto-Off” mode. Look for a button labeled “On-Auto-Off” below the display or on the side of your timer. Click the button on the display until it reads “On-Auto-Off” so your lights and devices only turn on during the specified intervals you just programmed. If you use the “On” setting, your devices will turn on automatically and won’t turn off on their own, just like if you plugged them in without a timer. If you put your timer on “Off” mode, then your devices won’t turn on automatically during the intervals.
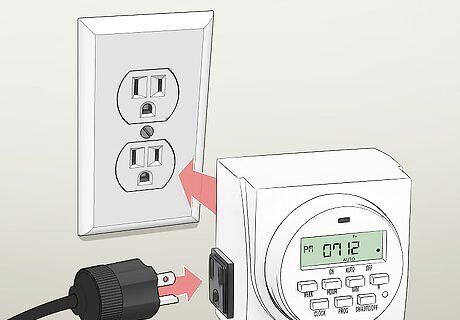
Plug in the timer and the devices you want it to power. Find an outlet near the lights or devices that you want to run during the times you set. Plug the timer into your wall first, and then connect your device to the outlet on the front or side of the timer. Turn on the device you plugged in so the timer can automatically power it up during the intervals you programmed. If you’re already in the middle of one of the time ranges you set for the timer to be on, your device will power up right away. If you want to test that your device is working, press the “On-Auto-Off” button until “On” lights up on the display and starts your device.
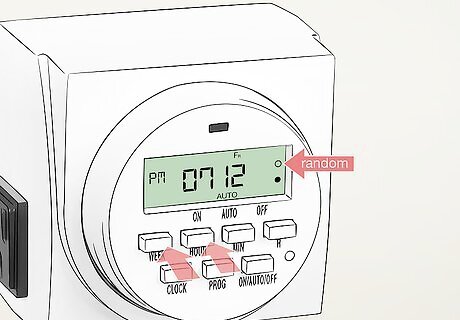
Alternatively, use “Random” for security to turn lights on at random times. If you want to make it look like someone is home while you’re out of your house, press and hold the “Random” button until it lights up on the display. Any lights plugged into the timer will turn on for random lengths of time during the day to fool burglars into thinking you’re at home and make your house more secure. Check the instructions on your timer if it doesn’t have a “Random” button. You may need to hold 2 buttons down at the same time to activate it.


Comments
0 comment