
Using a Hand Saw
Work on a solid workbench or table. Make sure that your table is secure and doesn’t wobble. If the workbench moves around while you’re cutting the wood, your cuts won’t be straight. Make sure that all the legs are even and that the table top is level.
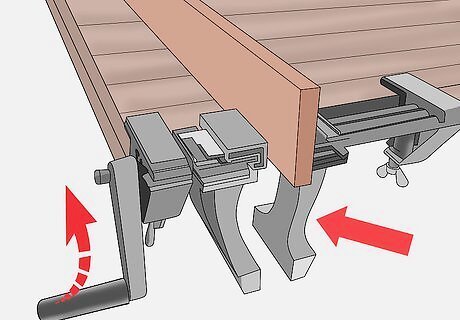
Secure the piece of wood to the table. Use clamps to hold the wood that you want to cut to your workbench. Clamps will hold the wood in place and prevent it from moving around while you saw.
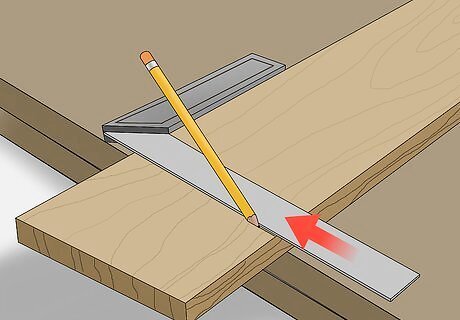
Draw a line where you want to cut. Use a straight edge from a yardstick or triangle to help you draw the line that will designate where you want to cut. Having a line to guide you will assist in sawing straight. You can also use the flat side of your saw to draw a straight line.
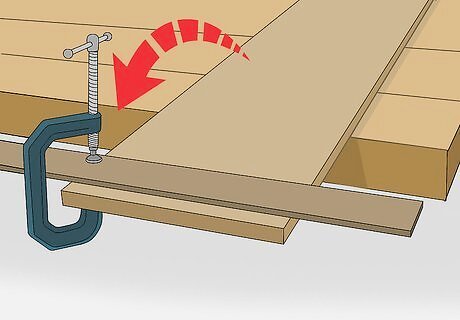
Clamp a straight board onto the wood. Use a piece of lumber or plywood with a straight edge and lay it over the piece of wood that you want to cut. Clamp the board so that the edge of the wood lines up with the line you drew. This is sometimes referred to as a jig.
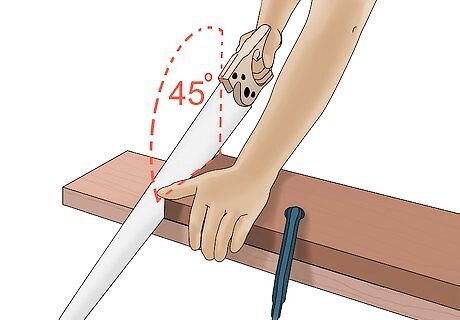
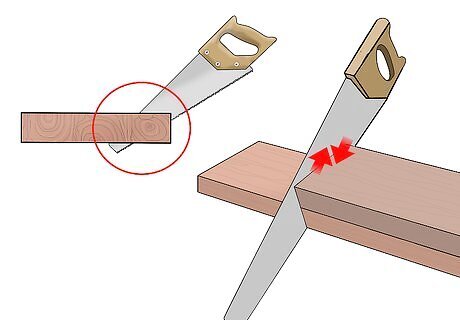
Put the saw blade on the line at a 45-degree angle. Grip the saw’s handle while keeping your index finger resting on the side of the saw so you have more control over it. Your wrist, elbow, and shoulder should be aligned with the blade. Brace yourself with your free hand, making sure to keep it away from the saw. Place the saw on the line, making sure that your jig is against the side of your saw.
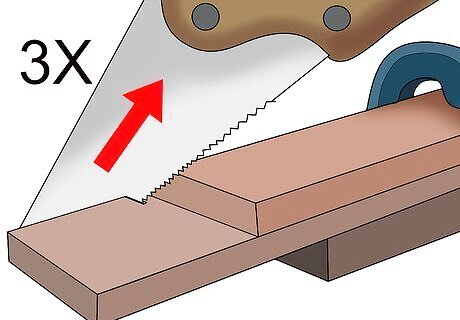
Make two upward strokes with the saw. Begin the cut by making two or three upward strokes until the saw starts cutting into the wood. Check for splitting or cracking at this point.
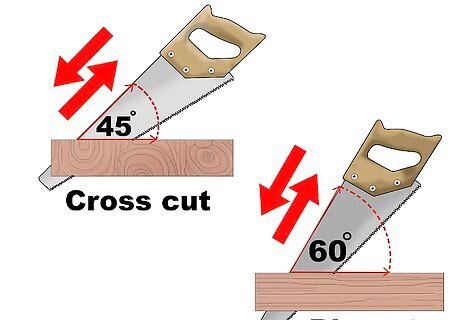
Work the saw back and forth to cut the wood. Continue moving your hand back and forth in full strokes and cut along the line that you created. If you are making a cross cut or a cut against the grain, cut the wood at a 45-degree angle. If you are making a rip cut or a cut with the grain, hold the saw at a 60-degree angle instead.
Shorten your strokes towards the end of the cut. As you approach the end of the line, shorten your strokes about halfway. This will prevent splintering or cracking towards the end of your cut.
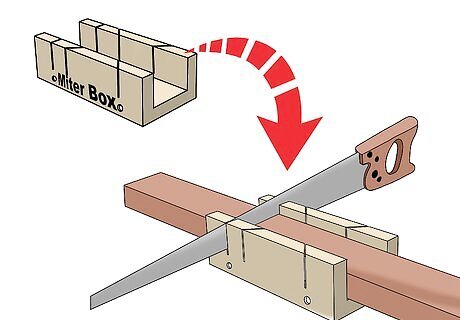
Use a miter box. A miter box is a tool that you can purchase online or at hardware stores. A miter box is made of a handsaw and a box that has differently angled slits. Clamp your piece of wood to the miter box before you start cutting. Then, put the saw in between the slits and use the box to keep your cuts straight. Most miter boxes will have slits that are at different angles in case you need to cut your wood on an angle.
Sawing Straight with a Table Saw
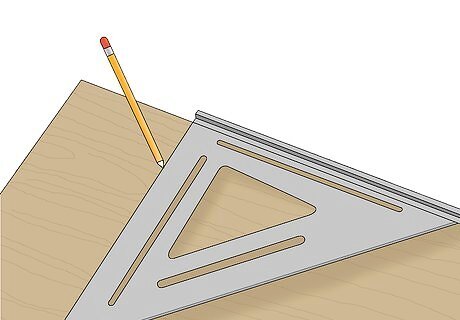
Make a straight line where you want to make your cut. Drawing a line with a pencil or pen before you cut will give you a visual cue on whether you are cutting straight. Use a straight edge from a triangle or yardstick to draw your line.
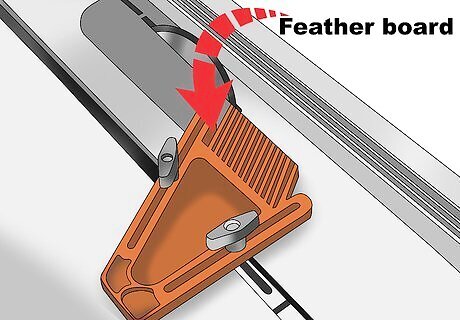
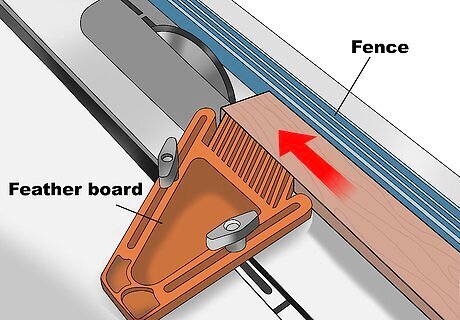
Use a feather board. You can purchase a feather board online or at a hardware store. Feather boards are used on the opposite side of your table saw’s fence. Clamp your feather board in place to make straight cuts. Feather boards have a series of wooden “fingers” that help prevent kickback from your table saw.
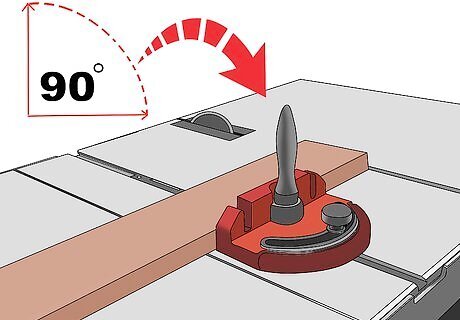
Square the miter gauge handle. The miter gauge runs perpendicular to the saw blade and must be at an exact 90-degree angle in order for your cuts to be straight. Hold a drafting triangle up against the miter gauge and make sure that the saw blade is resting on the other edge of the triangle. If it doesn’t alight perfectly, loosen the miter gauge handle and adjust it until the triangle can sit at a perfect 90-degree angle.
Align the board with the fence. Adjust the fence so that the blade lines up to where you want to cut your board. If you notice that the board doesn’t lie flat on the fence, the board is most likely bent or warped. Tighten the fence once it’s in the right position and prepare to cut the board.
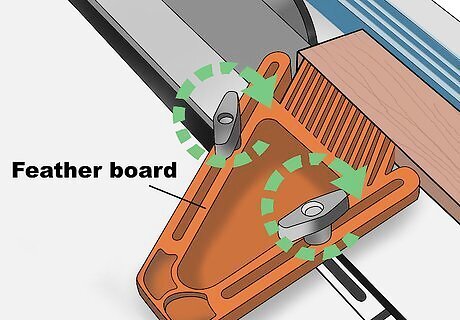
Clamp your feather board on the opposite side of the fence. Place the piece of wood that you want to cut against the fence. Then, push the feather board up against the other side of the wood and clamp it in place. Now you’ll have a guide on both sides of the wood when you feed it into the saw.
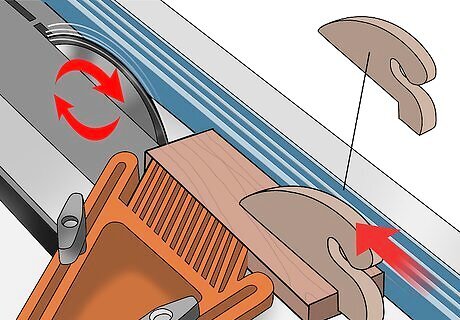
Feed the board into the blade slowly. Use a push stick to slowly push the board across the table saw. If you set everything up correctly, the piece of wood should be cut perfectly straight on the line that you drew earlier. Double check the wood to see if the saw made a straight cut.
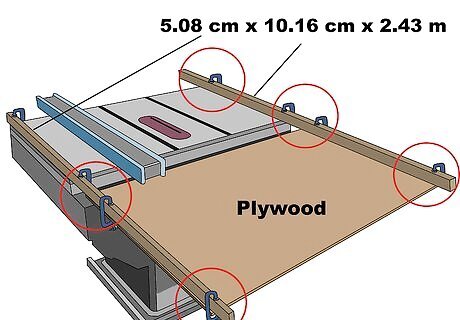
Set up an outfeed table. If you are sawing longer boards, they will need additional support if your table isn’t long enough. You can create your own outfeed table by clamping two 2x4-inch (5.08x10.16 cm) 8-foot long (2.43 m) boards on each side of the saw, so that they hang several feet over the edge of the table. Measure the distance between the boards and clamp a piece of plywood under them, where they are hanging off the table. This will extend the length of the table saw and allow you to make straighter cuts on longer boards.
Making a Saw Guide for a Circular Saw
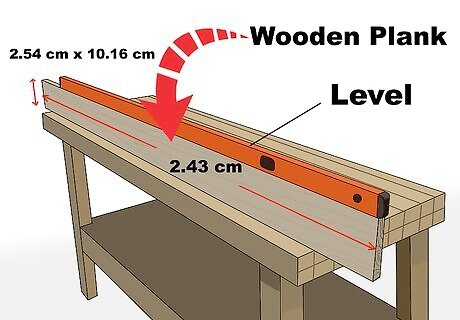
Get an 8 ft-long (2.43 m) 1x4 inch (2.54x10.16 cm) wooden plank. You can purchase a wooden plank from a hardware store or you can cut down an existing piece of wood. You’ll want to make sure that the edge of the plank is as straight as possible because it will dictate the straightness of your cuts. Use a level to make sure that the plank of wood is straight.
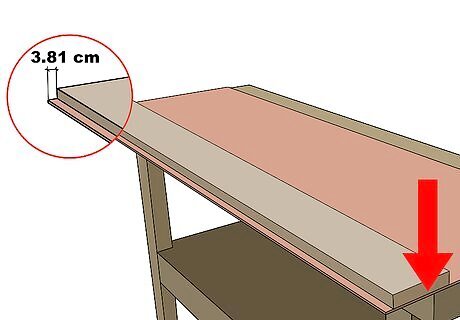
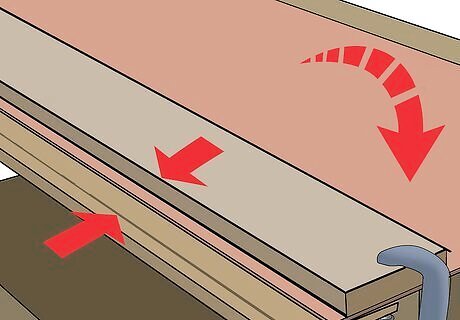
Line up the plank of wood with a 8 ft-long (2.43 m) strip of plywood. The plywood should be at least 2 feet (60.96 cm) wide. Hold the wooden plank so that it’s an inch and a half (3.81 cm) away from one edge of the plywood. Line up the bottom and top edges so that the plank of wood runs flush with the plywood.
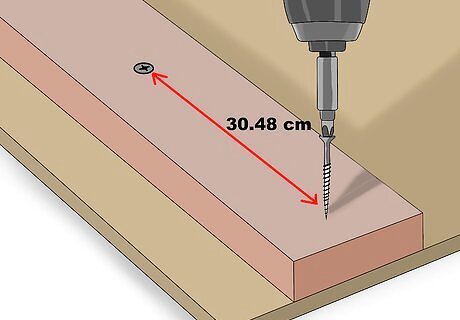
Nail or screw the plank of wood into the plywood. Attach the 1x4 inch (2.54x10.16 cm) wooden plank by driving screws into the top of the plank and into the plywood. Space each of the screws about 12 inches (30.48 cm) apart so that the 1x4 inch (2.54x10.16 cm) wooden plank is tightly secured.
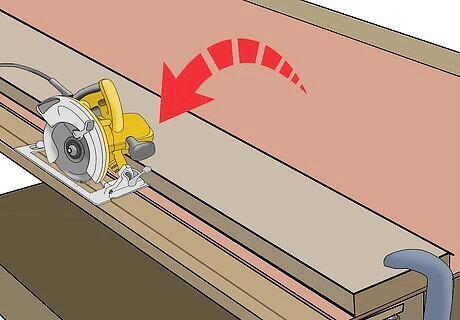
Line up your circular saw against the plank. Put the side of the circular saw’s shoe right up against the plank of the wood. Make sure that the shoe and the plank run flush. If you are using a circular saw use a fine-tooth blade.

Cut off the excess plywood. Press the trigger on the circular saw and use the plank of wood to guide you as you slowly saw all the way through the plywood. Cutting off the excess plywood will make it so that the plywood on the saw guide is the same width as your circular saw's shoe. Once you cut off the excess, your saw guide is completed. The plywood will now be the same width as your circular saw’s shoe.
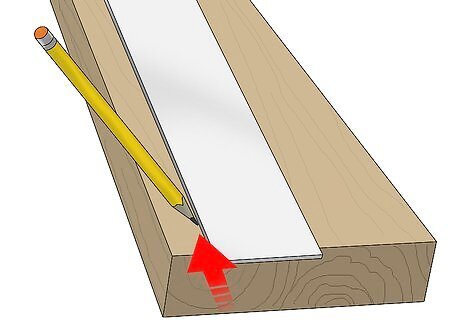
Draw a line on the piece of wood that you want to cut. Use a pencil and straightedge to draw a line where you want to cut.
Align the line and edge of the saw guide. Place the saw guide onto the wood so that the plank of wood on the guide is facing up. Line up the edge of the saw guide to the line that you just created. Once the drawn line is aligned with the edge of the guide, clamp it to the piece of wood you want to cut.
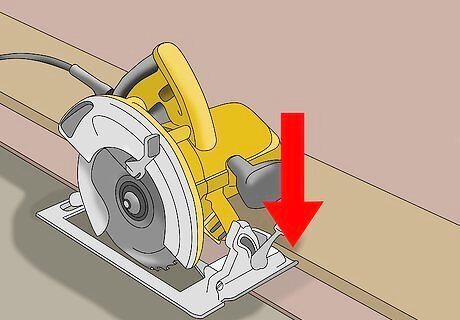
Line your circular saw against the saw guide. Take your circular saw and place it over the piece of wood, pressing the shoe against the plank on your saw guide. The plank of wood will guide your circular saw as you make the cut.
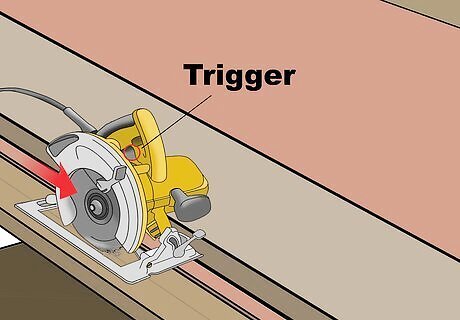
Press the trigger and slowly cut the piece of wood. Push the circular saw forward. As you cut down the piece of wood, the blade will be guided by the plank of wood attached to the plywood.


Comments
0 comment