
X
Research source
Read through this article to give your footstool a facelift today.
Removing Fabric and Reinforcing the Footstool
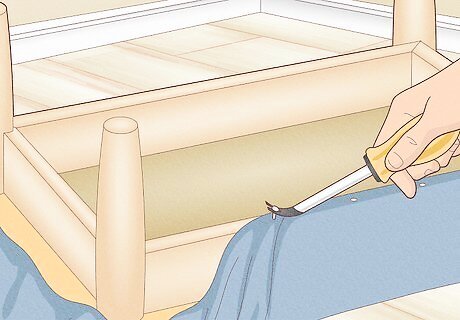
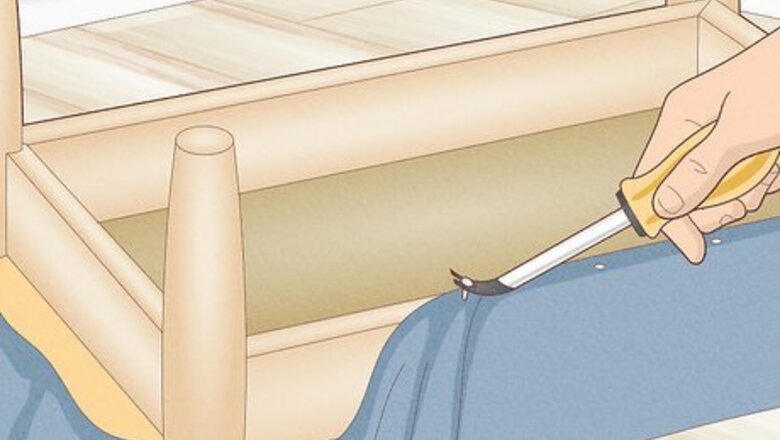
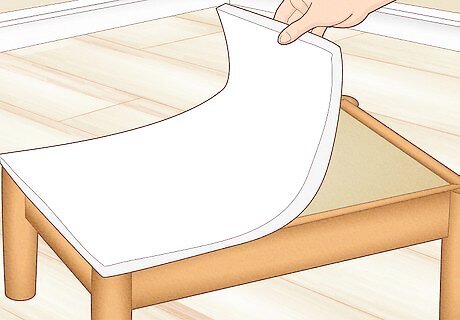
Remove the nails or staples with a nail remover or screwdriver. Older footstools may be upholstered with nails—if that’s the case, grab a tack nail remover and gently pry the nails up out of the footstool. If your footstool has staples in it, slide a flathead screwdriver underneath each staple to pop them out one by one. Most of the staples or nails will be on the side or underside of the footstool. If you can’t find them, flip the stool upside down to get started. If you’re having trouble pulling out staples or nails, use needle nose pliers to pry them the rest of the way out.
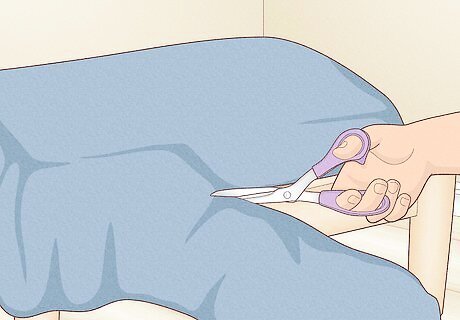
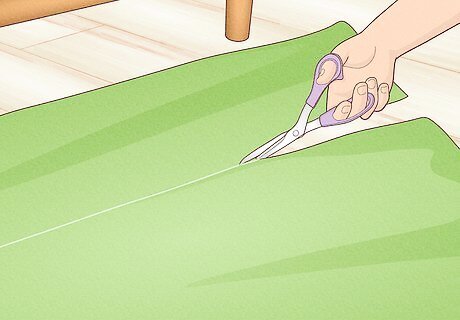
Slip or cut off the fabric and the padding. If the fabric or the padding is stuck to the base or the burlap, use scissors to cut it off. Some footstools will attach the padding with spray adhesive; if that’s the case, you can either leave it or you can gently tear it off with your hands. You can either save the padding inside to use it again, or you can discard it if it needs to be replaced. The padding inside of footstools is usually just foam. If the foam inside your footstool looks cracked or is crumbling, it’s time to replace it.

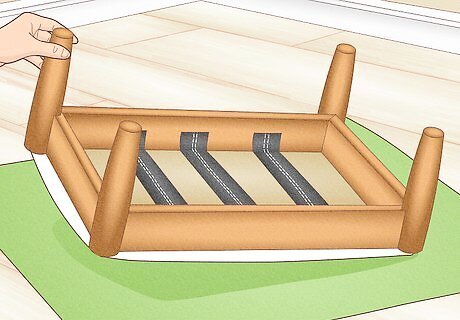
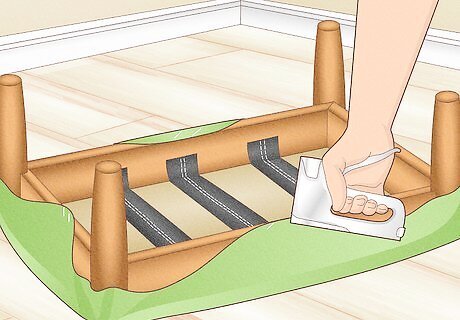
Add upholstery webbing to reinforce burlap footstools. Older footstools may have very little structure inside, and many are made with a wooden frame and burlap. If the burlap in your footstool feels like it is sagging, buy a roll of upholstery webbing and cut strips to fit the width of your footstool. Use a nail gun to attach the strips of webbing to the underside of the footstool to reinforce the burlap.
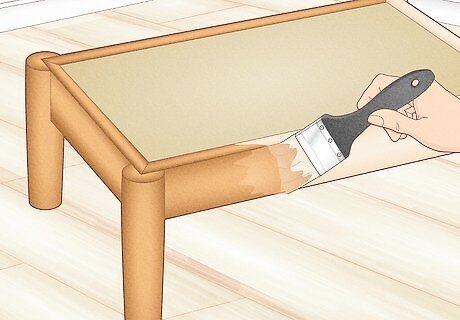
Paint or stain the wood if you’d like to. While it’s certainly not a requirement, now’s a great time to update the wood on your footstool if you want to! You can use paint to freshen it up with a new color, or simply use wood stain to darken the wood and give it a new shine. Paint your footstool white if you’re going for a modern look. Or, stick to rich, deep-colored wood stains if you want the classic, traditional look. If you are going to paint or stain your footstool, wait until it’s completely dry before moving onto the next step.
Replacing the Fabric
Place foam or your old padding onto the footstool. You can either use the old padding that was in your footstool, or you can cut a new 1 in (2.5 cm) thick piece of foam down to the size of your footstool. Set that on top and try to keep it in place as you work with your fabric.
Cut a rectangular piece of fabric about twice the size of the footstool. While there’s no exact measurement for a footstool fabric, in general, cut a piece of fabric that’s about twice the size of your footstool. That way, it will give you a bit of extra wiggle room, and you’ll have enough to staple down underneath the base of the footstool. Professional reupholsterers also use batting underneath their fabric for extra support. If you’d like to use batting, cut a piece as big as the fabric you’d like to use and line them up. Then, you can treat it like one piece of fabric. The fabric that you choose is up to you! In general, thick, cotton fabric does very well on footstools, and it’s easy for beginners to work with. Leather is another popular option for footstools; however, leather is stiff and can be harder to work with.
Spread the fabric out flat and flip the footstool over. It’s much easier to do your reupholstering if the footstool is upside down. Spread your fabric piece out flat on a table or countertop, then position your footstool in the center of it with the legs facing upward. If the fabric is only printed on 1 side, spread it out facedown.
Staple the center of each section underneath the footstool. Start on one side of the footstool and pull the fabric piece up over the side and onto the underside of the footstool. Use a staple gun to add 1 staple to the center of that section to keep the fabric in place. Then, staple the center of the other 3 sides of the foot stool, pulling the fabric taut the entire time. If you’re working with a circular footstool, divide the footstool into 4 sections and staple the center of each one.
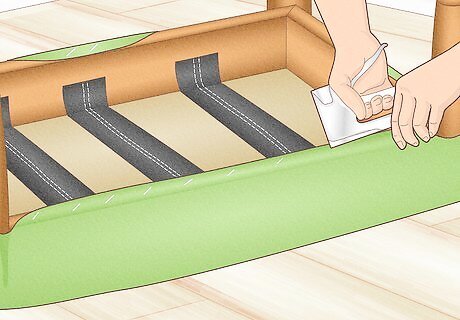
Staple the outside edges while pulling the fabric taut. Use a staple gun to attach the fabric to the rest of the sections, keeping the corners loose. Depending on the size of your footstool, you may need to use up to 8 staples per section. When in doubt, use more staples! Be sure to pull your fabric taut the entire time you staple. Otherwise, you could have loose, lumpy-looking fabric. If you’re working with a circular footstool, gently fold any excess fabric up underneath the footstool and staple it into place. You don’t have to worry about corners, so your footstool is good to go!

Fold the corners into a pleat, then add staples. For professional-looking corners, flip the footstool right side up and pick one corner to work with. Pull the fabric over to the left side of the corner, and smooth it out with your hands. Add a staple on the right side of the fabric to keep it in place. Then, fold the fabric over to the right side and add a staple on the left side. Finally, fold the fabric back over to the left and add a staple in the very center of the corner. If you have any excess fabric hanging down in the corners, trim it off with scissors. Corners can be tough, even for experienced upholsterers. Just make sure that the fabric stays smooth and taut, and your footstool will look amazing.


Comments
0 comment