views
X
Research source
These symbols and abbreviations are standardized by the American National Standards Institute (ASMI) and the American Society of Mechanical Engineers (ASME) in the US. In other countries, drafting standards are controlled by the International Standards Organization (ISO).[2]
X
Research source
Engineering drawings can be intimidating if you've never looked at one before, but in this article, we'll help you make sense of them.
Information Blocks
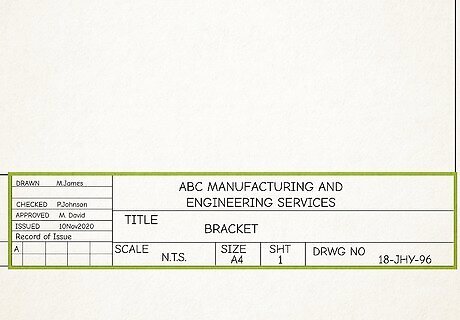
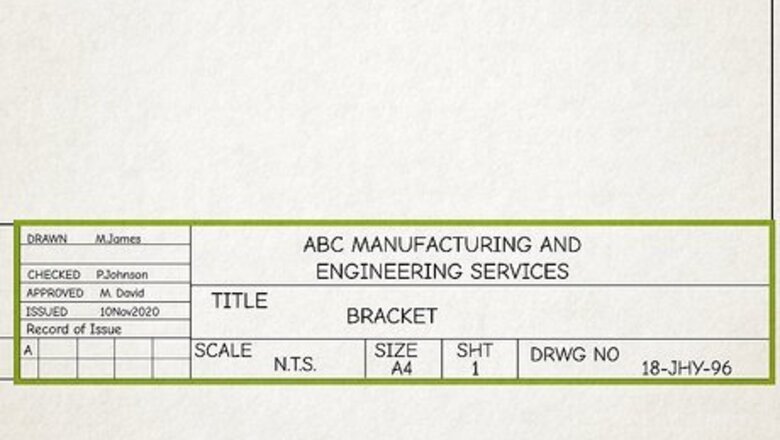
Check the title block for basic information about the drawing. The title block appears either at the top or bottom of an engineering drawing. Read this first to find out crucial information about the drawing, including: The name and contact information for the company producing or distributing the part The name and contact information for the engineer who created the drawing The name of the object or part, along with part numbers or other identifying information The units of measurement used for dimensions in the drawing The scale of the drawing
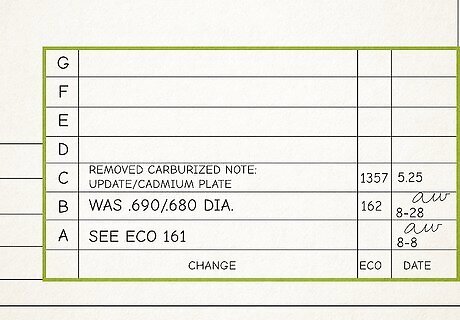
Review changes made to the original design in the revision block. The revision block, typically located either at the top or the bottom of the drawing, opposite the title block, tells you what changes, if any, were made to the original specification or design. It also lists the date those changes were made and who approved those changes. If you have any questions, follow this information back to the person who approved the changes and find out why the changes were made and why they approved them. The information in the revision block can be extremely important if you're involved in a contractual dispute with a manufacturer or a buyer of a product you manufactured.
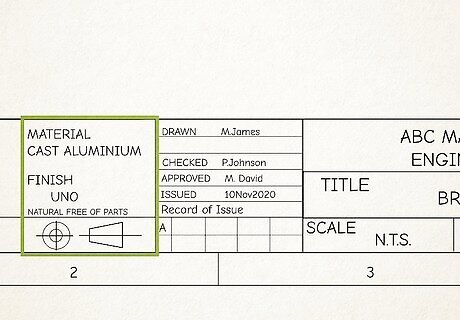
Find out the items required for assembly in the bill of materials block. This block is located in the upper left-hand corner of the drawing or next to the title block. If the object drawn requires additional parts for you to build it, these are listed here. You might see it called a "schedule" or a "parts list." For example, if the object requires screws, the bill of materials will list the part number for the screws along with the size and length so you can gather them. The bill of materials allows an engineer to maximize space in the drawing by including dimensions for small parts in a separate block. For more complex objects with lots of parts, the bill of materials might be a separate page. If you're looking at engineering drawings with an unfamiliar system of measurements, check the ANSI/ASME equivalency tables.
Symbols and Abbreviations
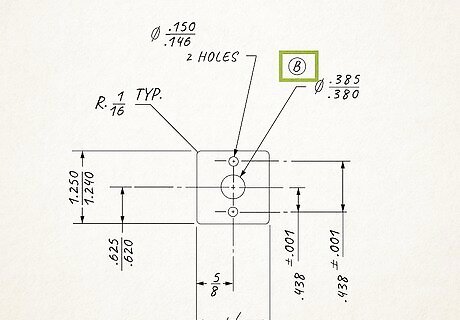
Check numbers in circles for keynotes. Keynotes identify specific products and materials on the drawing so the engineer doesn't have to write an individual note to provide the specifications for every product or material that goes into the object. The drawing's references provide a list of what part or material corresponds to each number. For example, if keynote 1 is "concrete masonry," every instance of concrete masonry on the drawing would have a 1 in a circle to identify that material. For more detail about the makeup or configuration of the material identified in the keynotes, check the specification for the object. Unlike keynotes, general notes apply to an entire set of engineering drawings. They typically provide information related to a particular discipline that helps an engineer of that discipline better understand or interpret the drawings. For example, general notes applicable to a civil engineer would be listed under "general civil notes." Avoid assuming what a symbol means and always double-check or ask if you're confused by something.
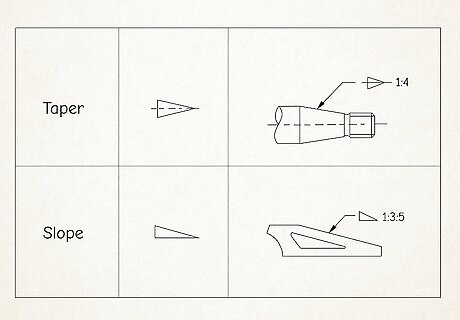
Use small triangles to find taper or slope. If the object has a single sloped side, the ratio next to the small triangle gives you the slope. For objects with 2 sides that taper together, look for a small triangle with a bisecting line. The ratio next to that triangle gives you the taper for each of those sides. Typically, a solid line with an arrow connects the symbol and its corresponding value with the line on the drawing it applies to.
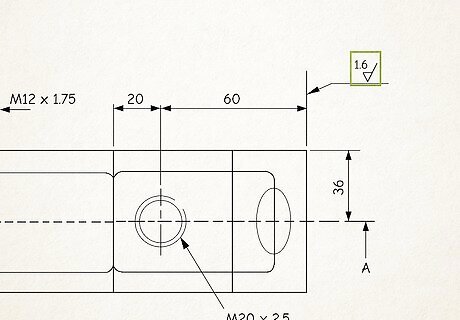
Match each part's surface finish to the values in the "√" symbol. Engineers use this symbol to indicate both the surface finish and the technique that should be used to produce that finish. The number in the checkmark corresponds to the roughness value. If the value has a line underneath it, the finish should be done by a machining process. A value with a circle under it indicates that the surface must be finished without removing any material in the process.
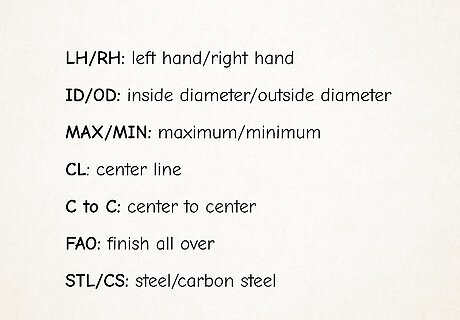
Memorize common abbreviations so you'll quickly recognize them. It's okay to use a cheat sheet at first, but you'll find it much easier to read engineering drawings if you automatically know common abbreviations. While there are hundreds of symbols and abbreviations based on the specific type of object, some common abbreviations include: LH/RH: left hand/right hand ID/OD: inside diameter/outside diameter MAX/MIN: maximum/minimum CL: center line C to C: center to center FAO: finish all over STL/CS: steel/carbon steel
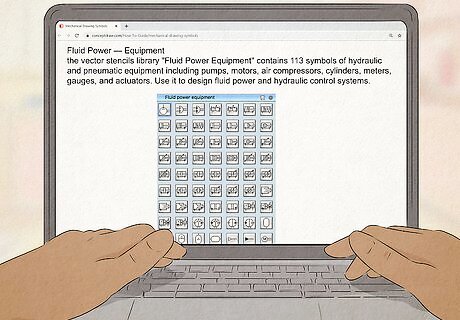
Cross-reference other symbols based on the type of object. More complex mechanical objects include additional symbols related to the specific type of machine the drawing depicts. Depending on your specialty and the reason you're reading engineering drawings, you may not encounter any of these. If you do, search for a key or guide you can use to decipher them. For example, if you're looking at an engineering drawing for a fluid power machine, you might see any of 113 symbols for equipment, 93 symbols for valves, and 74 symbols related to hydraulic pumps and motors.
Dimensions
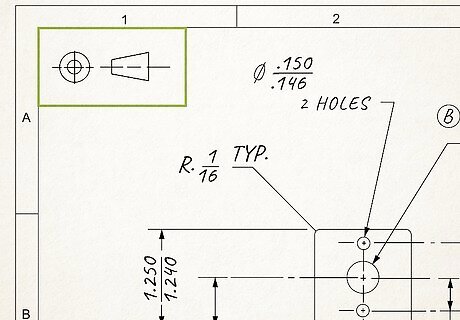
Follow projection lines to read most dimensions. In isometric drawings, projection lines are drawn away from the object to give you the dimension of a side of the object. Lines drawn up or down indicate length and width, while those out to the side indicate height. Some drawings might place the dimensions directly on the side of the object if it's clear in the drawing what side that dimension refers to.
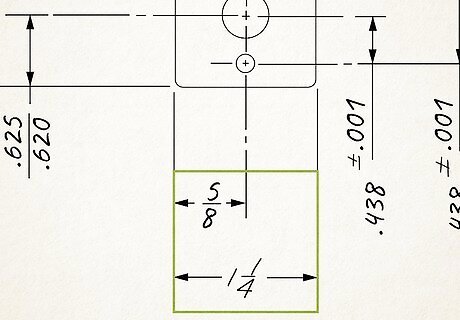
Find the dimension above the line between the projection lines. Look for a line drawn between 2 projection lines with an arrow on either end. The number written above that line corresponds to the dimension of that side of the object. Check the units of measure being used to make sure you have the dimensions correct, especially if you're looking at an engineering drawing drafted in another country. If you see an "=" over a line, that indicates the dimension is the same as that of a parallel side.
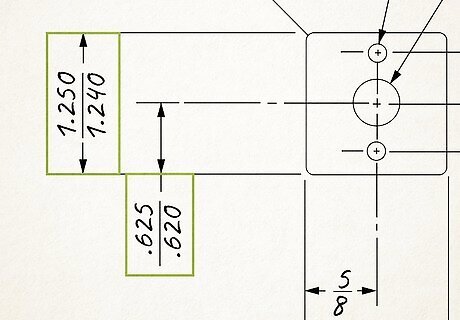
Read above and below the line to find the tolerance. If 2 dimensions are given, the difference between them is the tolerance. Typically, the maximum dimension will be on the top of the line between the projection line, while the minimum dimension will be below it. If you see 2 dimensions given, that means you can construct that portion of the object to be any value between the maximum and minimum value. The value you use might impact the dimensions of other parts of the object, but the object will function correctly as long as all dimensions remain within the tolerance.
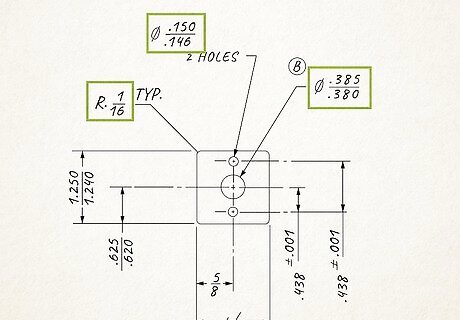
Look for an "R" or a "Ø" to find the dimensions of circular parts. The number after "R" is the radius and the number after "Ø" is the diameter of that area. These symbols are typically located next to the circular part. A solid line with an arrow tells you which circular area the value applies to. You might also see a dashed line or cross to indicate the center of the circle, particularly if the part is designed to rotate.
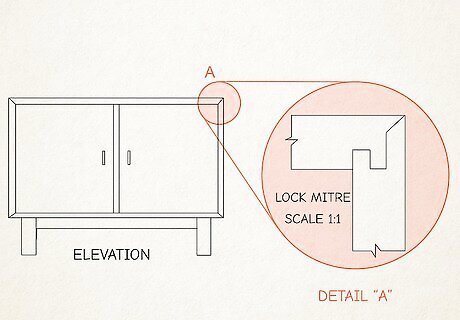
Use the same dimensions even if the drawing is scaled. If the engineer reduced or enlarged the view of the object for the purpose of the drawing, the dimensions listed on the drawing still reflect the correct size of the object as it exists in 3-dimensional space. Don't adjust the dimensions to account for the scale of the drawing. For example, an engineer drawing an extremely small object might enlarge it for the purposes of the drawing to show necessary detail so the object could be recreated. However, the dimensions listed on the drawing still correspond to the dimensions of the actual object.
Lines and Views
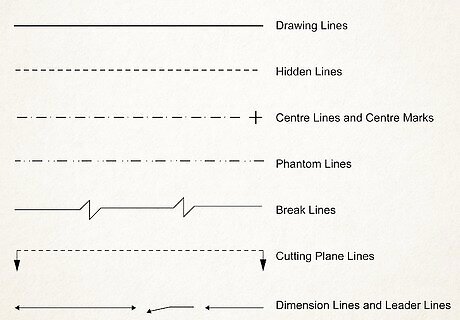
Use the solid lines to visualize the object in 3-dimensional space. An engineering drawing is a 2-dimensional representation of a 3-dimensional object. Only solid lines on the drawing represent visible edges. Broken lines that appear in the drawing represent other aspects that are important for you to visualize the object: Hidden line: made by dashes; indicates an edge hidden behind the solid face of an object Phantom line: made by a series of dots and dashes; indicates an alternate position for a moving part Center line: made by a series of lighter long and short dashes; indicates the exact geometric center of the object Break line: made by a solid line with zig-zags; indicates part of the object is excluded from the drawing
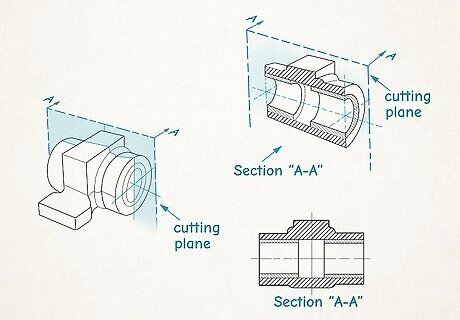
See hidden parts through cross-sectional views. Read a cross-sectional view by mentally placing it within the exterior drawing of the object. Line up the parts of the exterior that you can recognize to correctly place the hidden internal parts within the exterior. If the drawn object is opaque, you can't see its internal workings simply by looking at a drawing of the outside of the object. To show internal components that are necessary for the object to function, engineers draw cross-sectional views. Depending on the type of object, a cross-sectional view might not be necessary. If there is no cross-sectional view, you can assume that the object is hollow on the inside.
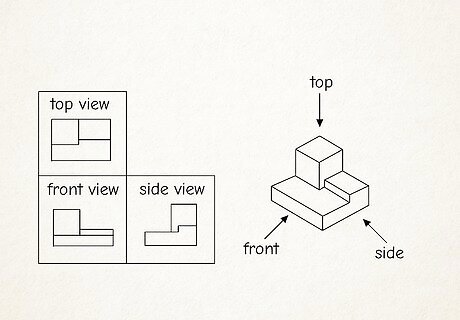
Combine the views in your mind to envision a 3D object. The purpose of a set of engineering drawings is to show every detail about the object so it can be successfully reproduced. With most engineering drawings, this means you have to put together at least 2 or 3 views to create a mental image of the whole object in your mind. For example, if the object is opaque, you won't be able to see the interior of the object from the outside. When you imagine the object in your mind, put the drawing of the interior inside the object and imagine yourself turning or opening the object to view the inside.




Comments
0 comment