views
Getting into Position
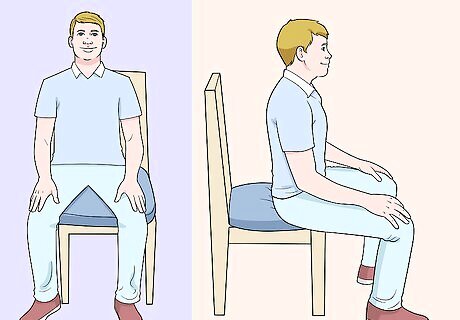
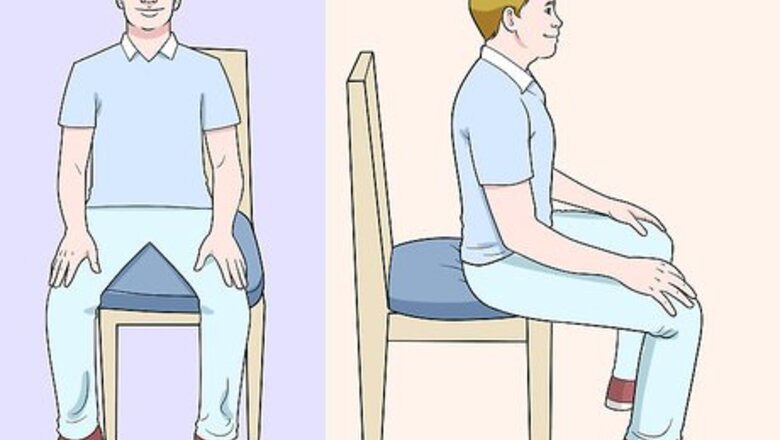
Learn to play in a sitting position. Sit on a straight back chair that allows you to plant both feet on the floor. Slide over to the right side of the seat, so that your right leg is hanging slightly over the edge. This frees up that side of your body to hold the saxophone and prevents you from banging it against the chair. You can play the sax standing up, but beginners find it easier to learn the instrument while sitting down. Avoid comfortable chairs with arm rests, like recliners, since these make it difficult to maintain good posture. Go for a harder chair like a folding chair or kitchen chair.
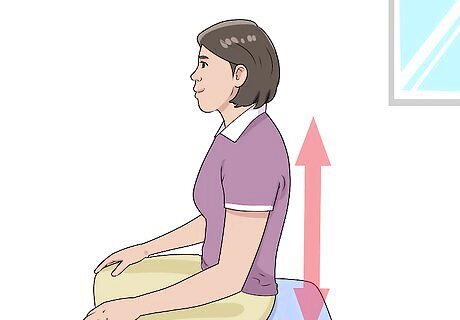
Sit up straight and relax your neck and shoulders. Good posture allows you to play comfortably and avoid injury. Sit tall, with your back straight and your shoulders relaxed. It may help to scoot up to the front of the seat, rather than sitting all the way back in it. Keep your head level and avoid tilting it to the right or left. Avoid raising your shoulders, stiffening up your neck, and sitting too far back in the chair.

Pull the neck strap over your head and adjust the length. Once you're sitting comfortably in the chair, pick up your saxophone and pull the neck strap over your head. Place the sax gently on the right side of your lap. Tighten the strap by pulling the plastic adjuster until there is no slack. There should be tension in the strap when the instrument is in your lap.

Make a “C” shape with both of your hands. Place your 4 fingers together and curve the thumbs of both hands so that your hands look like the letter "C" (your right hand will form a backwards "C"). Your "C" hands should be large enough to wrap around the neck and base of your saxophone. You may need to adjust the width of your hand position depending on the size of your instrument.
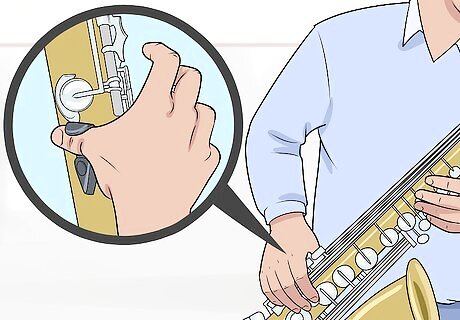
Place your right thumb under the lower thumb rest. The lower thumb rest is the curved piece of brass on the back of the instrument, right below the neck strap. With your right hand in the "C" position and the saxophone resting in your lap, place your right thumb underneath the lower thumb rest. Wrap your fingers gently around the instrument and rest your right fingers on the bottom 3 keys. The lower thumb rest allows you to move the saxophone and hold it firmly in place while playing.
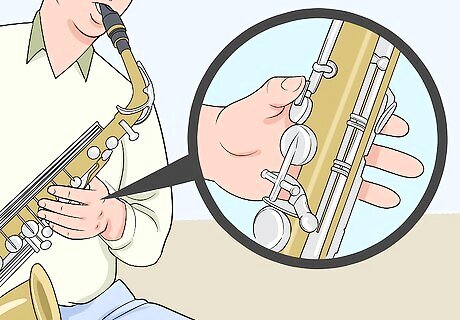
Place your left thumb on the upper thumb rest. Halfway up the backside of the saxophone's neck, you'll see a small key. With your left hand in the “C” position, place your left thumb against that key. Wrap your fingers around the neck and place them on the 3 keys on the upper neck of the saxophone. The upper thumb rest stabilizes the instrument while leaving your fingers free to hit the keys.
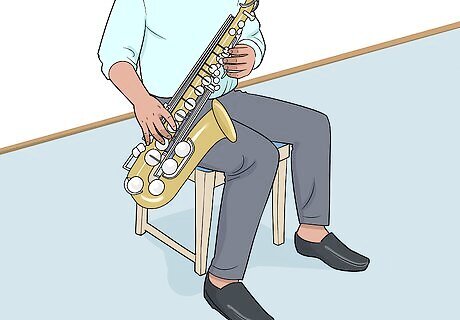
Hold the saxophone on your right side against your right leg. With your thumbs firmly on the thumb rests, let the saxophone hang gently from the neck strap. Position the part of bell (the curved bottom of the instrument) without keys so that it's resting directly against your right leg.

Bring the mouthpiece up to your mouth. Use your right hand to push the body of the sax up and slightly forward with your right hand to bring the mouthpiece up to your mouth. If your neck strap is properly adjusted, the mouthpiece should come up directly in front of your mouth. If the mouthpiece isn't coming all the way up to your mouth, your neck strap is too long. Adjust it as needed.
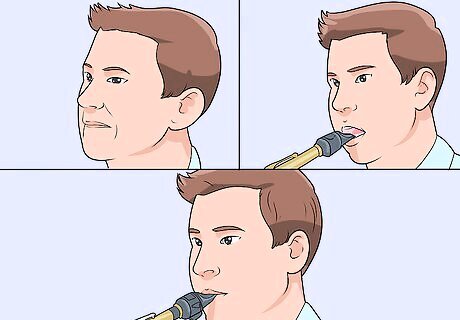
Make an EW sound with your lips. Close your mouth over the mouthpiece, creating an airtight seal with your lips. Rest your top teeth gently against the mouthpiece. Don't bite down with your top teeth! Keep them relaxed. This is the proper mouth position for playing the sax. The position is called an "embouchure."
Playing Basic Notes

Blow air into the mouthpiece without pressing any keys. Your goal is to create a clear, consistent sound as you blow into the mouthpiece. When blowing, refrain from puffing your cheeks. It develops bad habits and is harder to keep an equal tone and quality. If you are getting flat, airy sounds from the instrument, bring the corners of your lips closer to the mouth piece. If it sounds weak and incomplete, then you're hearing a flat sound. Place more of the mouthpiece into your mouth if you hear a faint, unclear sound. There should be about three quarters of an inch of mouthpiece in your mouth, never more than that. Make adjustments to your positioning as needed until you can make a clear, consistent sound with the instrument. Once you get that clear sound, you know your embouchure is correct.

Place your left index finger on the second key to play a B note. Find the first key down from the top on the neck of the sax. Place your left index finger on this key and press down gently. Blow through the mouthpiece. The sound you hear is the B note.
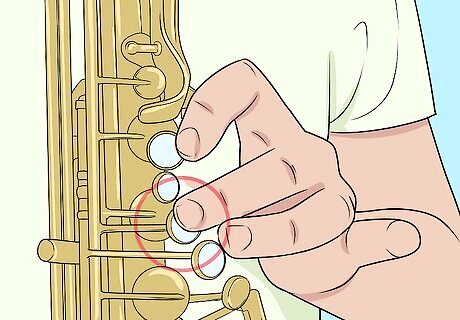
Place your left middle finger on the third key to play the A note. Keep your left index finger on the "B" key. Place your left middle finger on the key right below that one, which is the third key down from the top. While holding the "B" key down, press the third key with your left middle finger. Blow through the mouthpiece. The sound you hear is the A note.

Play a G by pressing down the fourth key with your left ring finger. While keeping your left index finger on the B key and your middle finger on the A key and holding them both down, press down the fourth key with your left ring finger. Blow through the mouthpiece. This is the G note. B, A, and G are played with your left fingers on the top 3 keys.

Use your right fingers to play the notes F, E, and D. These notes are created with your right fingers on the bottom 3 keys. To create them, your left fingers must continue to press down on the 3 top keys while blowing through the mouthpiece. Make sure you maintain a proper embouchure as you blow, and be sure to keep your cheeks tucked in. Press the first bottom key down with your right index finger for an F. Use your right middle finger to press the second key while continuing to press down on the F key to create an E. Use your right ring finger to press down the third key while keeping all of the other keys (top and bottom) pressed down for a D.
Learning Advanced Skills
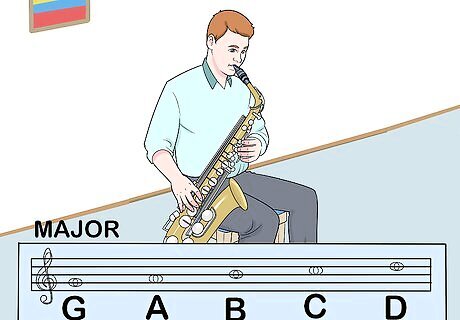
Learn major scales to add advanced notes to your repertoire. Each of the basic notes you just learned has an associated major scale to go along with it. Major scales are created while holding down that key and running through a series of other keys in a specific succession. Find the most common scales in a beginner’s alto saxophone book online, and practice each one until you are able to play through them with clear, pure and consistent sound. Begin with the G Major scale, which is usually considered to be the easiest. Major scales are the most common beginner scales and will allow you to play notes in succession.

Practice minor scales to learn more challenging progressions. Minor scales are created by playing a succession of keys, just like the major scales. However, the minor scales sound much lower, and they are typically trickier to play. Find the key charts for minor scale progressions online or in a beginner's book. Practice minor scales until you feel comfortable and familiar with the progressions and are able to play each note with a consistent pitch. Minor scales are very common in alto saxophone songs, including many jazz tunes. Knowing minor scales will help you improvise if you are interested in playing in a jazz group later on.

Learn your favorite alto saxophone songs. Find sheet music at a local music store or online and practice your favorite songs. If you don't know how to read sheet music, look for fingering charts that will guide you. Once you are familiar with your favorite songs, you can write your own or begin improvising with a group of other performers. You can begin playing beginner songs, and then progress into playing your favorite songs.


Comments
0 comment