views
Calculating Rise and Run
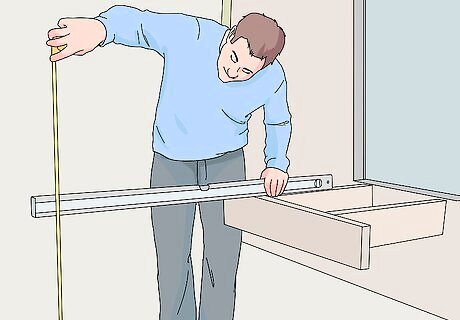
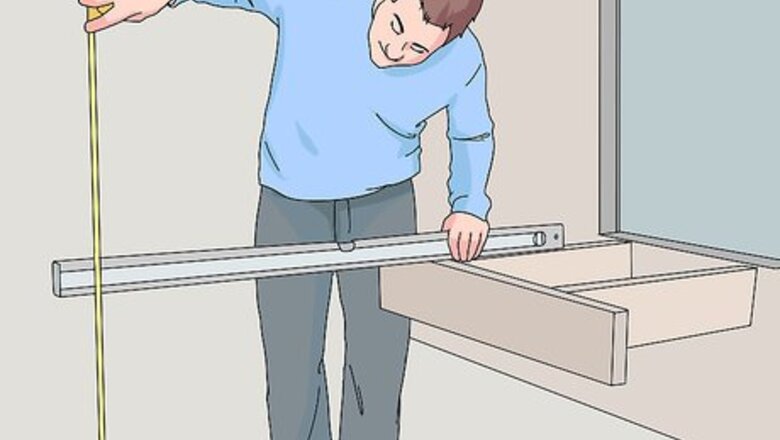
Determine the overall height of the stairs. Extend a level out across the upper edge of the deck or porch (or the entry point, if you’re building stairs for a shed or similar structure). Stretch your tape measure from the bottom of the board to the ground. This will tell you exactly how high the new stairs will reach. The stringers are the notched, sloping boards that will go on either side of the stairs to hold the steps and support the weight that’s placed on them. When fashioning them, you’ll need to account for both the height and length of the stairs.
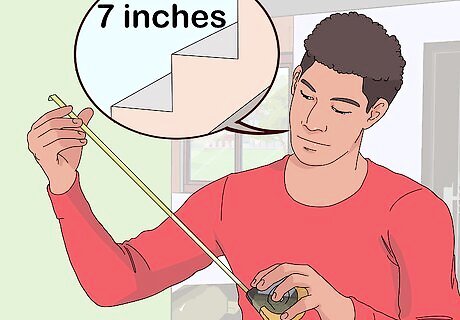
Decide how tall each step will be. Most steps have a height, or “rise,” of about 7–7.5 inches (18–19 cm). Taller steps can be difficult to climb, while shorter ones make ascending and descending feel awkward and may present a tripping hazard. The height of each stair has to be enough for a person to safely walk up. For your own safety and ease of construction, it’s recommended that your steps have a rise that doesn’t deviate too far from the average. Prior to drafting up a set of detailed plans, review the International Residential Codes (IRC) for building stairs. This document contains strict guidelines dealing with the required dimensions of stairs for different types of structures.
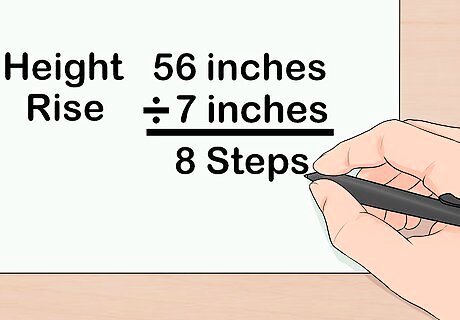
Divide the height of the stairs by the desired rise. If your deck is 56 inches (140 cm) off the ground, for example, and you’ve chosen a rise of 7 inches (18 cm), you’ll get 8, which is the total number of steps you’ll need. If the difference of the height and planned rise is a fraction, round down to the nearest whole number. Double check your work using a calculator to ensure that your measurements are correct. A 57 inch (140 cm) deck divided by a 7 inch (18 cm) rise will give you 8.14, which means you’ll be measuring for 8 steps. If your calculations leave you with an extra half step, round down and adjust the rise for slightly shallower steps to make sure they’re in compliance with the IRC.
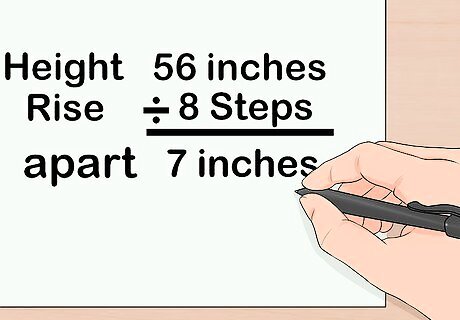
Divide the height again by the number of steps. Repeat the same formula, but this time, plug in the numbers in reverse. Continuing with the example above, 56 inches (140 cm) divided by 8 gives you 7 inches (18 cm), or the actual rise of each step. This means that the steps will need to be spaced exactly 7 inches (18 cm) apart. Don’t do any rounding here. In order for your stairs to be consistent (and to avoid a cumbersome head or foot step) it’s important that the distance between each step be as precise as possible.
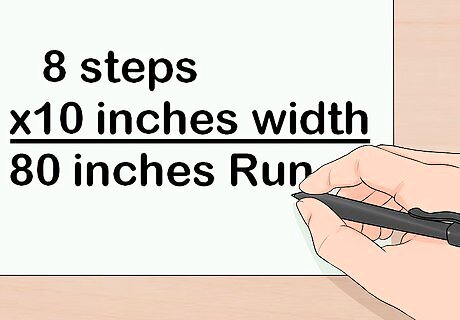
Multiply the number of steps by their desired width to find the run of the stairs. The run is the distance that the finished stairs will project outward. In order to arrive at this measurement, it will first be necessary to come up with an estimated run for each step. The building codes laid out in the IRC recommend that each step by a minimum of 10 inches (25 cm) wide in order to provide secure footing. A total of 8 steps multiplied by 10 (the width of each step in inches) gives you an overall run of 80 inches (200 cm). For most sets of stairs, a pair of 5.5 inch (14 cm) deck boards will be just the right size to form the treads of each step.
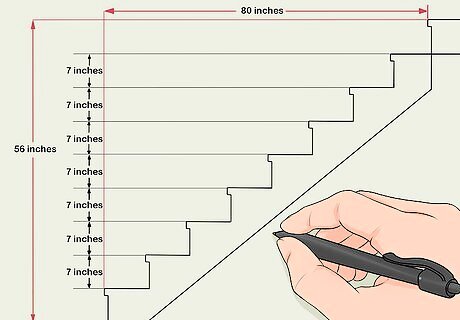
Draw out your plans on paper. Before you begin marking your actual building materials, sketch out a rough schematic to use as a visual reference. Be sure to include the individual dimensions of each part of the stairs, including overall height, step rise, step run, and total distance. This will give you an idea of how the finished stairs should look. Keep your plans more or less to scale so it will be obvious how everything is supposed to fit together.
Marking Your Measurements on the Stringer
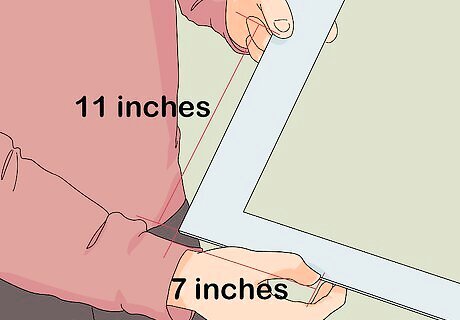
Use a framing square to trace the stair pattern on your stringer board. One of these tools will allow you to lay out consistent, precise angles down the length of the board. Measure 7 inches (18 cm) from the center of the square on one arm to set the rise and 10–11 inches (25–28 cm) on the other arm for the run. It may help to highlight each position with a strip of colored tape to make them easier to see and line up quickly. For maximum efficiency, consider attaching adjustable stair gauges to your framing square. These can be adjusted to your exact specifications, making it easier to ensure that each angle comes out identical without the need to realign the square every time. Stair stringers are most often cut from a single 2x12 stock board.
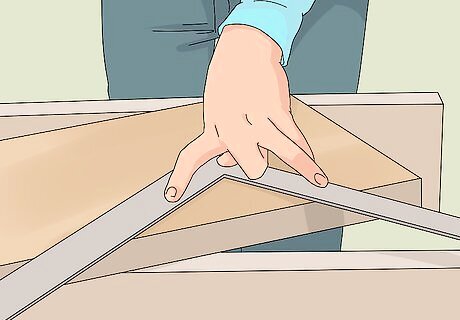
Situate the tread arm of the square nearest to the end of the board. The tread arm is the one you’re using to indicate the run of the steps, while the riser arm will serve as a guide for marking the rise. Make sure the square is centered on the board so that each step will come out at a perfect 90 degree angle. Make sure you leave at least 7 inches (18 cm) inches at the head of the board for the final riser, which you can trim to fit later. If you have the square positioned the wrong way, the rise and run dimensions will be reversed.
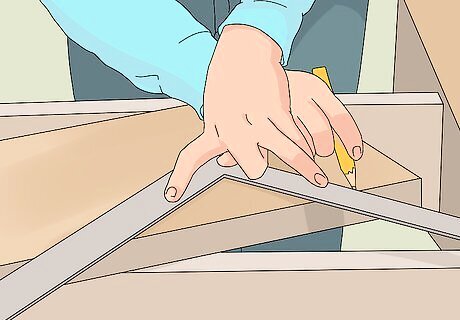
Mark the first step. Holding the square in place with one hand, run the tip of a pencil along the outer edge of the angle. The resulting lines will create a jagged pattern that when cut will form a notch for the tread and riser of one step. Draw all the way to the edges of the board so there will be no guesswork involved once it comes time to begin sawing. Be careful not to left the square shift while you’re drawing your lines. The slightest movement could throw off the measurements of the finished stairs. When you’re done, check both lines with your tape measure to confirm that they’re the right length.
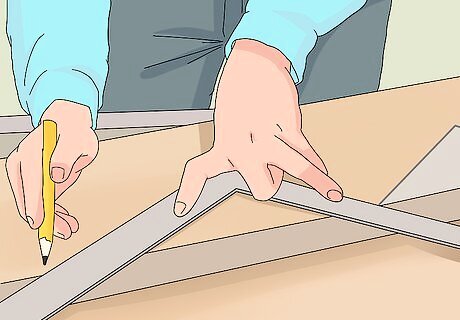
Slide the square down to draw every next step. Once you’ve marked the first step, move the square down the board so that the tread arm intersects with the line you just drew for the second riser. Trace the next step in the same fashion. Continue until you’ve outlined the total number of steps you’ve planned for your stairs. You’ll be able to cut a maximum of 14 steps into a standard 16 foot (4.9 m) 2x12 stringer board. This should be more than enough for most types of structures.


Comments
0 comment