
views
- You can protect your privacy on Facebook by managing your Privacy Settings.
- Open your account settings and navigate to Privacy Settings.
- Adjust your posting privacy for posts, timelines, and tags by clicking each option.
Using the Mobile App

Tap the ≡ menu. It's at the bottom-right corner of the app on an iPhone or iPad, and at the top-right corner on an Android.
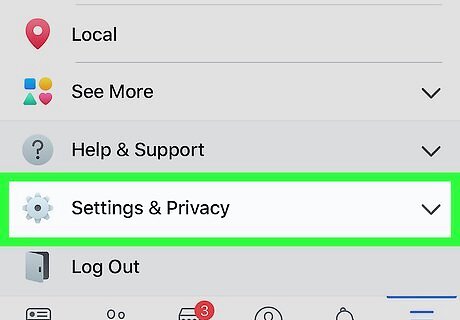
Scroll down and tap Settings & Privacy. It's near the bottom of the menu. This expands another menu.
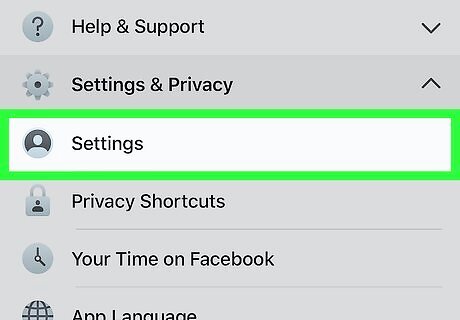
Tap Settings. This opens your account settings.
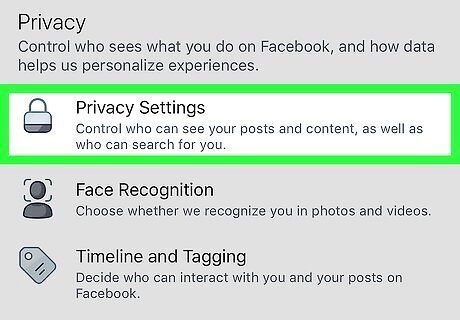
Scroll down and tap Privacy Settings. It's under the "Privacy" header.
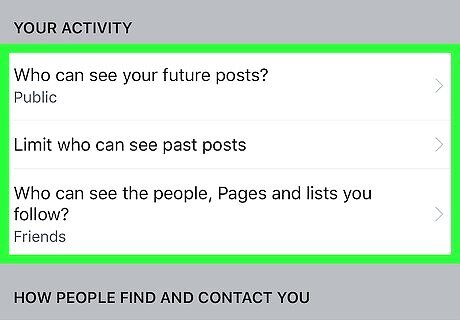
Adjust your posting privacy. The options under the "YOUR ACTIVITY" header help you control who can see your posts by default, the privacy levels of your past posts, and who can see the information you follow. Tap Who can see your future posts? to select who can see the posts on your timeline. The posts you share on Facebook will be visible to the audience you select unless you specify otherwise when posting. Tap Limit who can see past posts if you want to switch all of your old public posts to Friends Only. Tap Who can see the people, Pages, and lists you follow to choose who can view parts of your profile, such as your name, email address, and workplace.
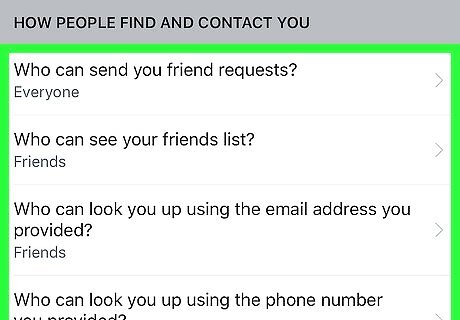
Control who can find and/or contact you on Facebook. Scroll down to the "HOW PEOPLE FIND AND CONTACT YOU" section to specify how readily-available you want to be to others. Tap Who can send you friend requests? if you want to require that someone have mutual friends before being able to add you. Tap Who can see your friends list? to adjust who can see your entire list of friends. Even if you make your friends list private, mutual friends will always be seen. Tap Who can look you up using the email address/phone number you provided? options to choose whether people can find your profile by entering that info. Tap Who can look up your timeline by name? to control who can search for your name to view your profile. Tap Do you want search engines outside of Facebook to link to your profile? to choose whether people can find your profile by searching for you on Google or Bing. Tap the back button to return to the previous screen.
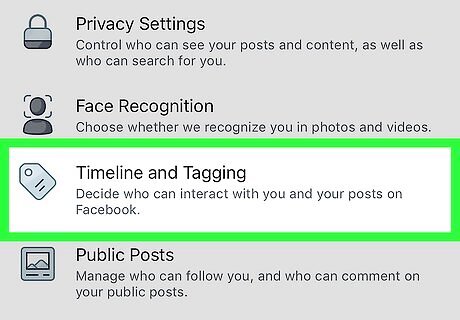
Tap Timeline and Tagging. It's below the "Privacy Settings" option near the top.
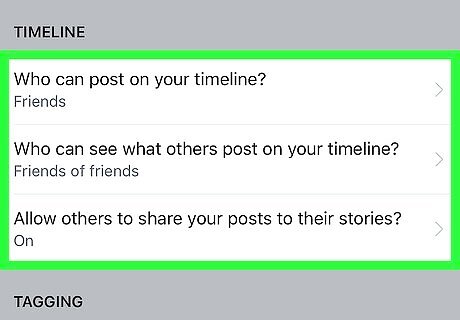
Control how posts appear on your timeline. The first section, "TIMELINE," gives you a chance to control who can see the posts on your timeline. If you want to be the only one who can post to your timeline, tap Who can post on your timeline? and select Only Me. If not, you can skip this step. If you want to control the audience of your friends' posts on your timeline, tap Who can see what others post on your timeline? and select an audience. To manage whether people can share your posts on in their stories, tap Allow others to share your posts to their stories?
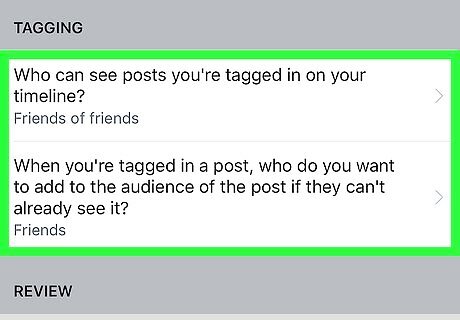
Adjust how tags work. If someone tags you in a post or video, it'll be posted to your timeline by default. The "TAGGING" and "REVIEW" sections allow you to choose what happens when someone tags you in a post or video. To change who sees the posts you're tagged in on your timeline, tap Who can see posts you're tagged in on your timeline? If you have facial recognition enabled (which it is by default), friends who share photos of you will be prompted to tag you in their posts. To disable this feature, tap Who sees tag suggestions when photos that look like you are uploaded? and select No One. To manually approve tags other people leave on your timeline, tap Review tags people add to your posts before the tags appear on Facebook? and tap On. If you don't want tags to appear on your timeline without your approval, tap Review posts you're tagged in before the post appears on your timeline? and select On. Tap the back button to return to the menu.
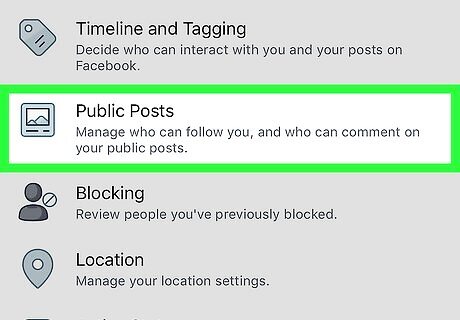
Tap Public Posts to control the public version of your timeline. If you don't post anything public you won't need to use this section. If anything on your timeline is public, use these options to manage how people interact with that info. Tap the back button to return to the main menu after making your edits.
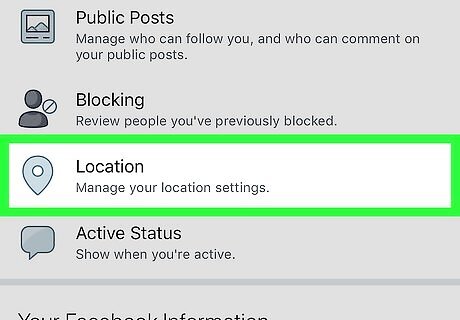
Tap Location to adjust your location preferences. When you enable location services, Facebook will always know where you are and offer you suggestions based on that area. Toggle the "Location History" switch On or Off to control whether Facebook can keep track of everywhere you go. Tap View Your Location History to see which of your locations Facebook has saved. Tap the back button to return to the previous menu.
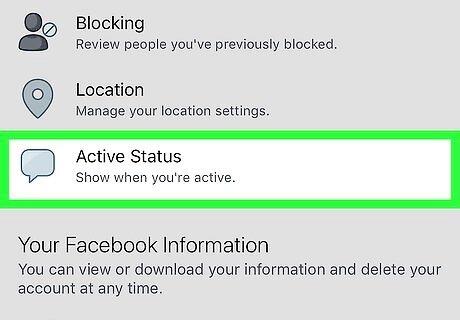
Tap Active Status to toggle your "active" status on or off. Toggle the switch to On (blue) if you want people to know when you're active on Facebook or Messenger, or Off to keep that info private. Tap the back button to return to the previous menu.
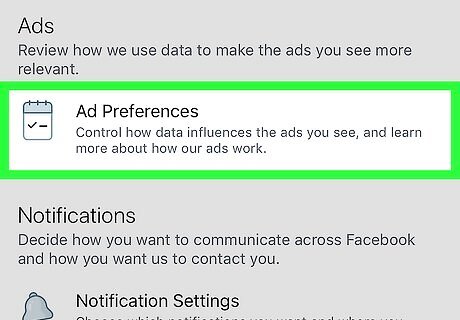
Scroll down and tap Ad Preferences to update your ad settings. Facebook uses your private info to show you relevant ads. This section gives you some control over how that info is used. Tap Your Interests to view and edit the information Facebook has collected about things you like. Tap Advertisers to hide or unhide ads from businesses who have your contact information. Tap Your Information to manage which details Facebook can use to show you relevant ads. Tap Ad Settings to adjust how ads are displayed. Tap the back button until you've returned to your timeline.
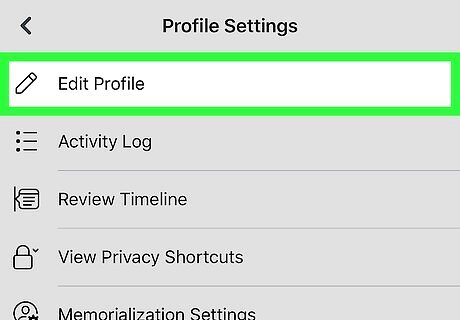
Control who can view your profile. Now that you've gone through most of your privacy settings, the last step is to control out which parts of your profile are visible to others. Here's how: Tap the profile icon to return your profile. Tap the gear icon below your photo. Tap Edit Profile. Scroll down and tap Edit under the "Details" section. Tap the pencil icon to the right of each option to bring up the privacy options. Select an audience from the drop-down menu and tap Save.
Using Facebook.com on a Computer
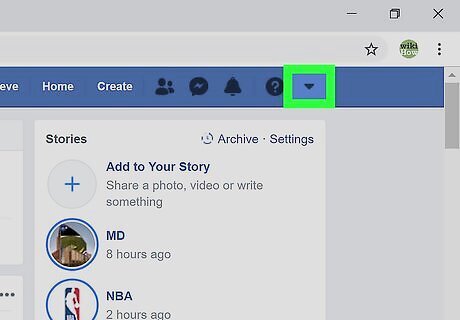
Click the upside-down triangle ▼. It's at the top-right corner of Facebook. This expands the menu.
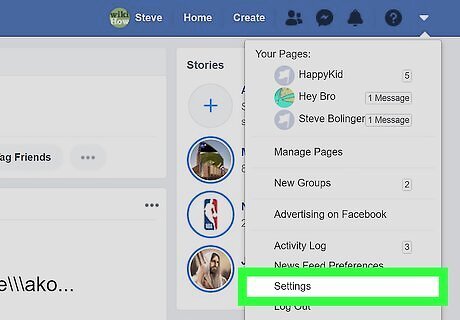
Click Settings. It's toward the bottom of the menu.
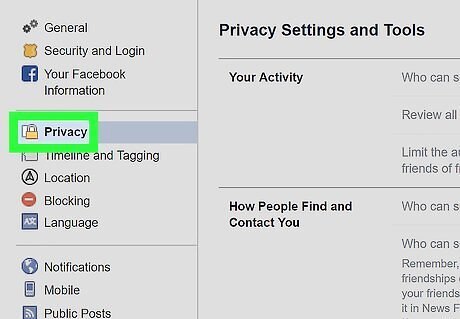
Click Privacy. It's near the top of the left column. This opens your Privacy Settings and Tools.
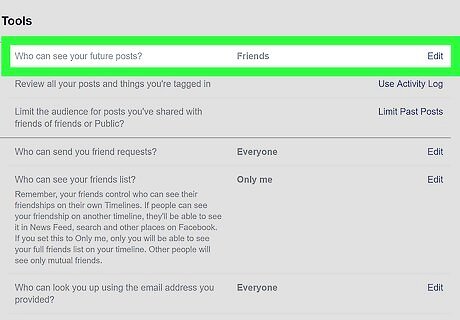
Choose who can see your posts. Post privacy options are in the "Your Activity" section at the top of the right panel. The posts you share on Facebook will be visible to the audience you select unless you specify otherwise when posting. Click Edit next to "Who can see your future posts?" Select an audience from the menu below the sample post box. Click Close to save your changes. Click Use Activity Log to see a list of all of your posts, their corresponding privacy settings, and the posts in which you've been tagged. If you want to change the privacy of all of your posts to Friends Only, click Limit Past Posts at the bottom of the "Your Activity" section, and then click the Limit Past Posts button.
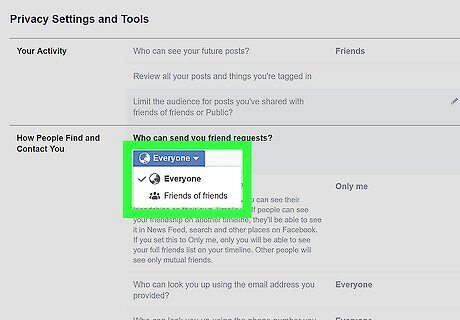
Manage who can find and contact you on Facebook. The bottom section of the right panel contains all of your options for controlling how people can look you up, add you to their friends lists, and send you messages. Click Edit next to "Who can send you friend requests?" to restrict friend requests from anyone who is not a friend-or-friend. To manage who can see who is on your friends list, click Edit next to "Who can see your friends list?" and select an option from the menu. Click Edit next to "Who can look you up using the email address you provided?" and "Who can look you up using the phone number you provided?" to manage your preferences. Click Edit next to "Do you want search engines outside of Facebook to link to your profile?" to control whether people can find your Facebook profile by searching your name on Google.
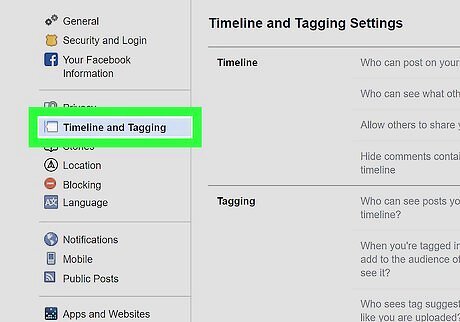
Click Timeline and Tagging. It's in the menu that runs along the left side of the page. This is where you can control what appears on your timeline and who can see what you're tagged in.
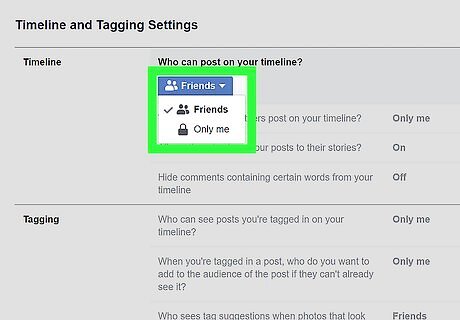
Manage your Timeline privacy. All of your friends can post to your timeline by default. If you want to be the only one who can post to your timeline, click Edit next to "Who can post on your timeline?" and select Only me. If you just want to restrict posts that contain certain words or phrases, click Edit next to "Hide comments containing certain words from your timeline" instead. To manage whether people can share your posts on in their stories, click Edit next to "Allow others to share your posts to their stories?"
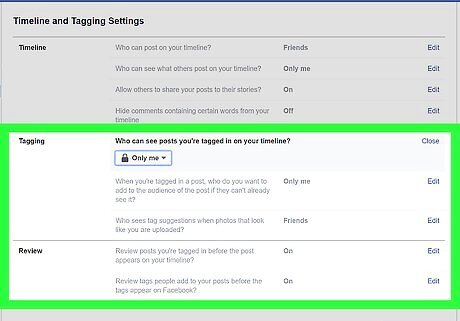
Adjust how tags work. If someone tags you in a post or video, it'll be posted to your timeline by default. The "Tagging" and "Review" sections in the right panel allow you to choose what happens when someone tags you in a post or video. To change who sees the posts you're tagged in on your timeline, click Edit next to "Who can see posts you're tagged in on your timeline?" If you don't want tags to appear on your timeline without your approval, click Edit next to "Review posts you're tagged in before the post appears on your timeline?" If you turn this feature On, you must approve tags before they will appear on your profile. If you have facial recognition enabled, friends who share photos of you will be prompted to tag you in their posts. To manage your preferences for this option, click Face Recognition in the left column.
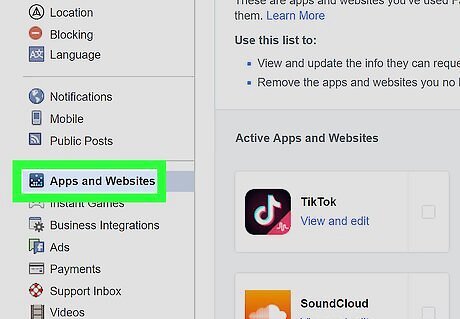
Click Apps and Websites to control your data shared with other apps. A list of apps and websites that you log into with Facebook appears on this page. You can modify your privacy preferences for each app by clicking View and edit below the app.
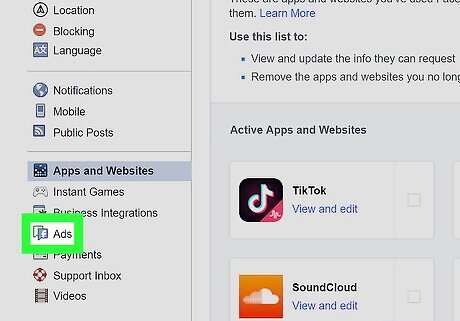
Click Ads to manage your ad preferences. This option is at the bottom of the left column. Facebook uses your private info to show you relevant ads. This section gives you some control over how that info is used. Click Your Interests to view and edit the information Facebook has collected about things you like. Click Advertisers and Businesses to hide or unhide ads from businesses who have your contact information. Click Your Information to manage which of your personal details Facebook can use to show you relevant ads. Click Ad Settings to adjust your preferences for how ads are displayed.
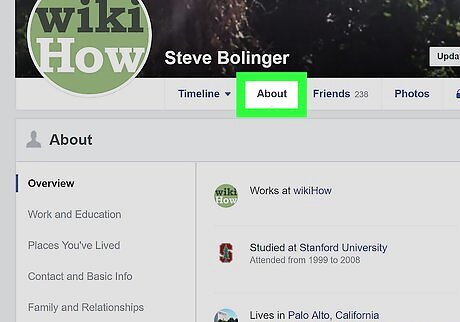
Control who can view your profile. Now that you've gone through most of your privacy settings, the last step is to control out which parts of your profile are visible to others. Here's how: Click the small version of your profile photo in the blue bar at the top of the page. Click About in the row of links below your cover photo. In the "About" section at the top of the page, click through each of the links in the left side of the box (Work and Education, Places You've Lived, etc.) to see which information you've provided Facebook. To adjust who can see each bit of information, hover your cursor over the info until a small icon of a lock, globe, or two overlapping gray heads appears. Click the small icon to bring up the audience options and then make your selection.


Comments
0 comment