views
WH.shared.addScrollLoadItem('34b6f8a6b0f0595f9e7d927c637faa02')
Creating an Origami Dragon
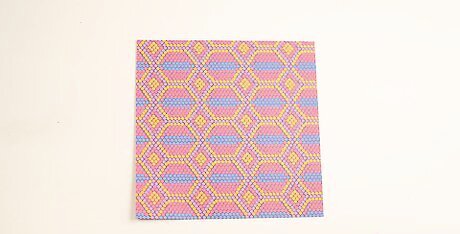
Start with a square piece of origami paper. A good size is 7 centimeter (2.8 in) x 7 centimeter (2.8 in) paper but other sizes will work. If you are a beginner it is best to start with bigger paper (20cm by 20cm) because it is easier to work with. You can find a range of origami paper on Amazon. If you only have a regular letter size piece of paper, make it square by folding the left corner diagonally down to the right side. Then take the upper right corner and fold it down to the left, connecting to the left corner where the first fold was made. There will be a bottom rectangle left over; fold this backwards and crease it well. Unfold the whole paper and cut (or tear if you creased it really well) off the rectangle. You will now have a square piece of paper.
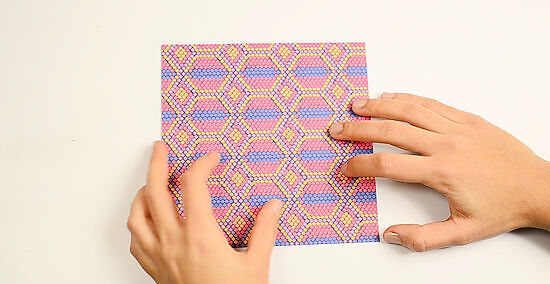
Fold paper diagonally, horizontally and vertically to create asterisk-like creases. You should do each of these individually, unfolding before the next fold. Be careful and exact with your folds, making sure the creases are deep and the corners are sharp.
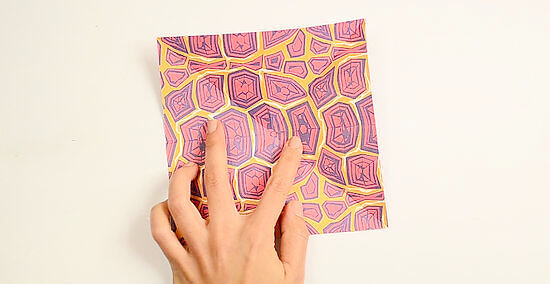
Squash fold the paper into a square base. Fold the top corner of the paper down to the bottom, bringing the right and left corners to the bottom at the same time. Bring the right and left corners to the bottom by folding the paper in between the bottom and top layers, or squash folding it. It should now look like a square diamond. If you are using colored paper, the colored side should be on the outside at this point. Start with the colored side down when making the square base to do this.
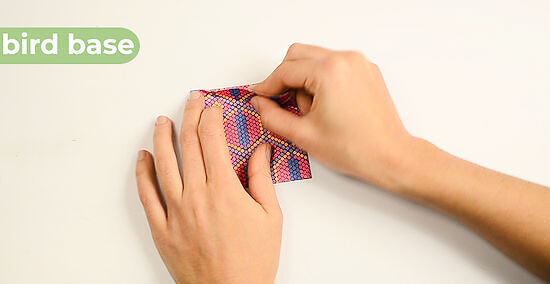
Turn it into a bird base. Fold the top layers of both sides to the center and then fold the top triangle down. Unfold these three folds. Do a petal fold by lifting the top layer from the bottom corner all the way up, folding in the sides at the same time along the crease to create a diamond. Turn the paper over and do the same thing on the opposite side: fold along the sides to the center and the top triangle down, unfold these folds, lift up the top layer all the way to the top and fold in along the sides to create a diamond. This is the bird base. While completing the bird base and bringing the bottom corner to the top corner the paper will look a bit like an open flower.
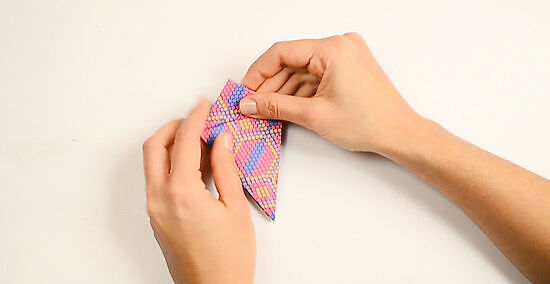
Pull up the flap of paper on both sides and then squish the layer so it overlaps. This makes the head and tail. It will now look very pointy, with a point on the left that will be the head, a point in the middle that will become the wings and a point on the right that will become the tail. To make the head, lift the left side flap slightly and pull the top corner of the paper down in between the back and top layers. Bring it so that it is angled slightly down (so the head will eventually be pointing diagonally up) and crease the fold. To make the tail, lift the right side flap slightly and pull the top right corner down in between the back and top layers. Crease it where it is horizontal when you look at it so that it will extend straight out.
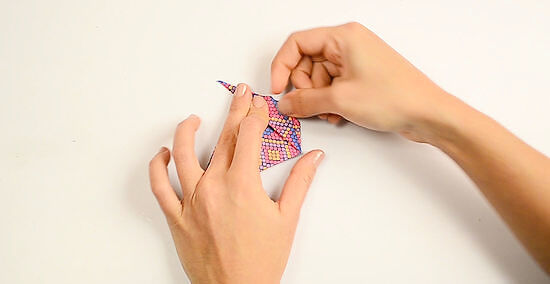
Turn the diamond around so the head is facing upward. Rotate the paper 180 degrees. You want the unfolded point of the diamond pointing to the top so that you can add detail and continue with your folding. Now the head will point up on the left side.
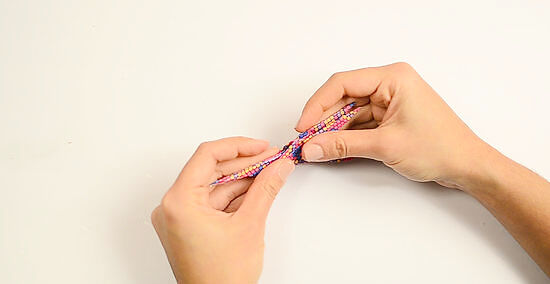
Add details to the head. You can add a jaw and horn and/or thin the neck to add detail to the head and make it more dragon-like. To add a jaw, fold the tip of the head down to the lower corner on that side and unfold. Hold the neck with one hand and push the head against the neck with your other hand. The neck should fold inwards so that the head folds slightly over the neck, creating a jaw. To add a horn, fold the tip of the head down to the bottom point of the jaw and unfold. Open the head by separating the top layer from the bottom layer so you can fold this small piece backwards. This will create a horn on the top of the dragonhead. To thin the neck, fold in both sides. Take small parts of the bottom edges of the neck and fold them in between the layers. Do this in about three different pieces to trim the fat on the neck and make it slimmer.
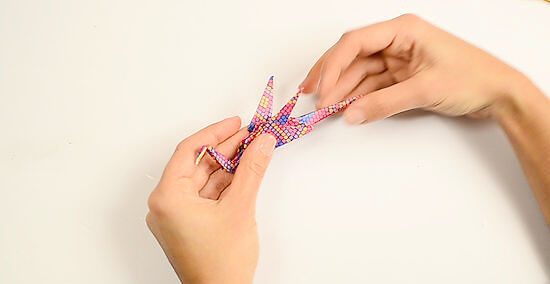
Add details to the tail. Fold to make it look thinner and/or spikier. It's up to you. Be creative! To put spikes in the tail, open the layers of the tail and fold back the tip upwards wherever you wish your spike to be. Then fold most of the rest of the tail back out, leaving a small crimp in the tail. You can do this near the tip or in the middle of both. You can do a few crimps as well. Reclose the tail. To thin the tail, open the layers and fold the bottom edges inwards. This can again be done in multiple locations to create a thin, whippy-looking tail.
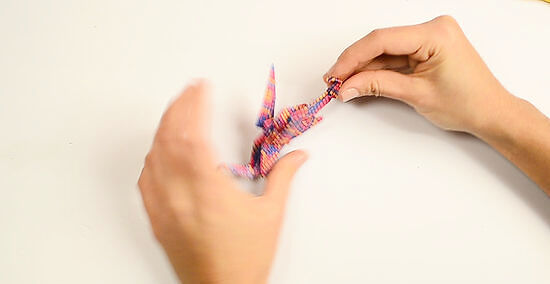
Add details to the wings. Starting with the left wing (with head facing to the left), fold the top layer of the top corner down to the bottom corner between the head and tail and unfold. Open the left flap of the wing and then fold down the entire wing and tuck inside the loose flap, closing down over the wing. Then fold the loose flap to the left and open the wing by bringing the bottom corner to the top again. Fold the right and left corners to the inside and unfold. Push in the right side (should be colored) of the wing so that it pops in. Re-crease the left side by bringing the left corner to the colored side. Keep a thumb over the right side while you do so to prevent it from popping out again. Repeat with the right wing.
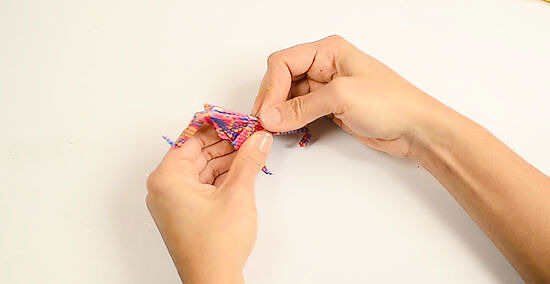
Open the wings by pulling on the chest and tail. Pull gently on the chest and tail of the dragon to make the wings pump as if it is flying.
Creating a Beginner Level Dragon
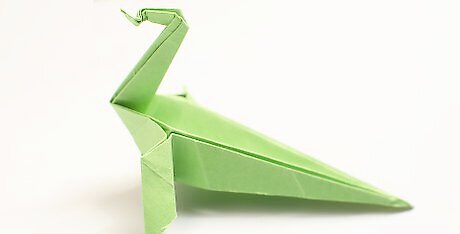
Try this dragon if you are a beginning origami folder. This simple dragon is perfect for those who are learning how to fold origami. You will learn how to make a kite-fold and an inside reverse-fold by completing this dragon.
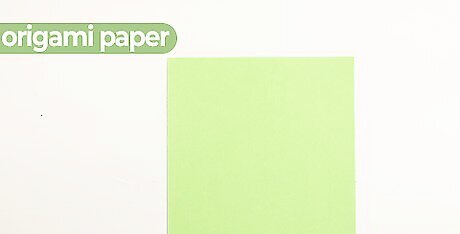
Start with a square piece of origami paper. A good size is 7 centimeter (2.8 in) x 7 centimeter (2.8 in) paper but other sizes will work. If you're a beginner, consider to start with bigger paper (20cm by 20cm) because it is easier to work with. If you only have a regular letter size piece of paper, make it square by folding the upper left corner diagonally down to meet the right side. Then take the upper right corner and fold it down to the left, connecting to the left corner where the first fold was made. There will be a bottom rectangle left over; fold this backwards and crease it well. Unfold the whole paper and cut (or tear if you creased it really well) off the rectangle. You should now have a square piece of paper.
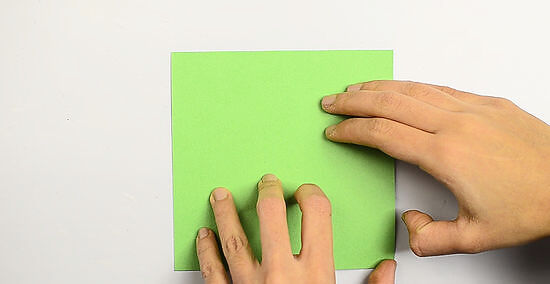
Turn the paper so that the crease runs vertically. Fold the paper in half along the crease, then unfold. Fold the side corners so that they meet at the center line, then crease. This is called the kite-fold.
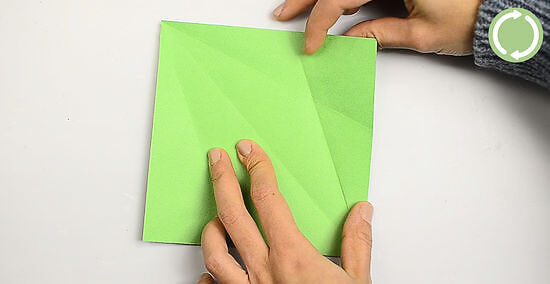
Unfold, and then repeat the kite fold from the top corner. Fold the right and left corners again into the center diagonal line, starting from the top corner this time. Keep these sides folded for now.
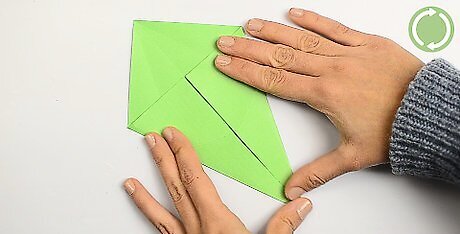
Turn the paper over and bring the new side corners again to the center from the bottom corner. Bring the edges created by the kite-fold into the center diagonal line in a valley-fold. Then again bring the outside corners of the top layer into the center diagonal line from the bottom corner. There will now be what looks like pleats on each side of the diamond.
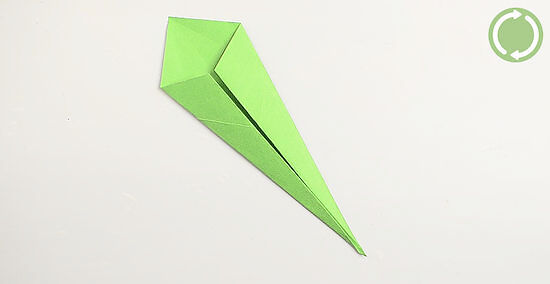
Open the paper and repeat these folds from the top corner. Again make the first kite-fold again with the original side up and turn the paper over. Bring the side corners again to the center diagonal line from the top corner. Then again bring the free edge corners to the center diagonal line from the top corner and unfold.
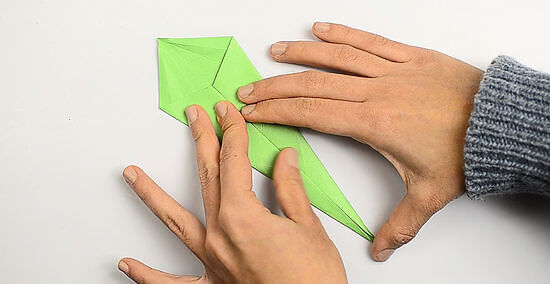
Fold along the other diagonal. Fold along the opposite diagonal that does not already have a crease along it, forming a triangle, and unfold.
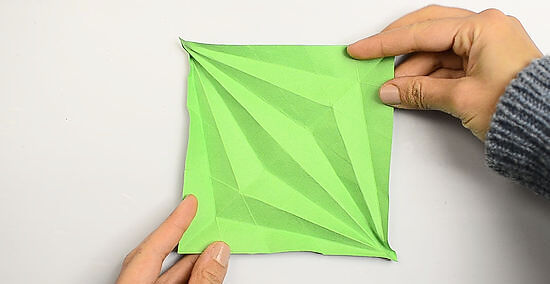
Pinch the corners together into a pleated diamond. Pinch the two corners at which you have just made the diagonal by pushing the edges up towards you. Then bring your hands together, folding along the kite-folds you made earlier. The first kite-fold crease should go down on each side, the second up and the third down. The corners that you are pinching should be sticking up. It will look like a diamond with two pieces sticking up in the middle on each side.
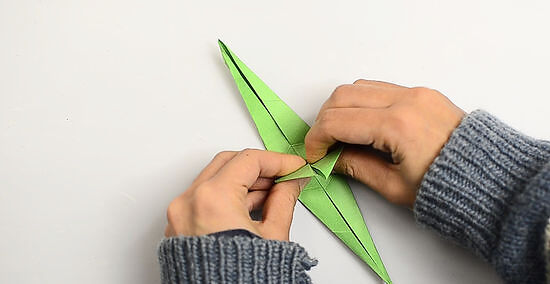
Push the two flaps down towards the top corner. Push the two flaps that are sticking up down along to the top corner. It will now look like an arrowhead, or like a kite with a point sticking out the top of it.
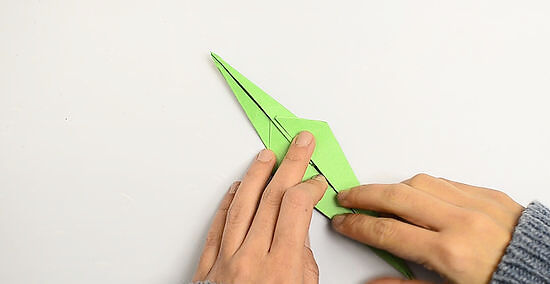
Rotate the origami so that it is horizontal and turn it over. Rotate the origami dragon so that the corners point right and left. The flaps that you just pushed down should be facing towards the right. Then turn the origami dragon upside down, keeping it pointing in the same direction.
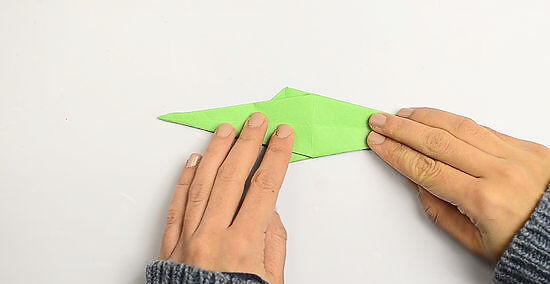
Fold the bottom corner to the top corner along the center diagonal. Bring the bottom corner to the top corner along the centerline to fold the diamond in half lengthwise. It will now look like a wide and short triangle.
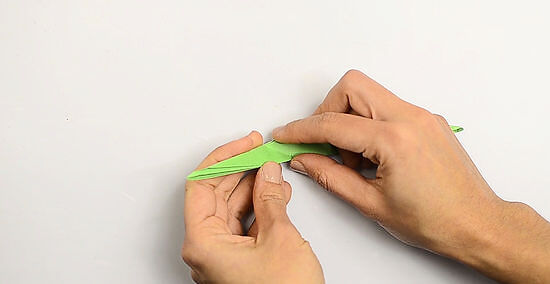
Bring the left corner up in between the two layers. Apply the inside reverse fold to bring the left corner up between the two edges. You will have to slightly spread apart the top and bottom layers to pull the left corner up inside the two layers. It should now have a piece sticking up on the left side of the paper while the middle and right side of the triangle are horizontal.
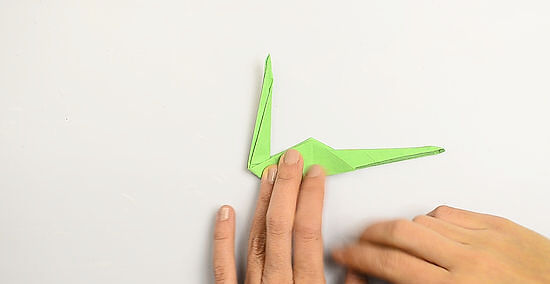
Make the head using another inside reverse-fold on the left side. Bring the corner down in between the two layers of the neck to create the head. The head should be a bit less that half the length of the neck. It will now look like a head with a pointy beak on the end.
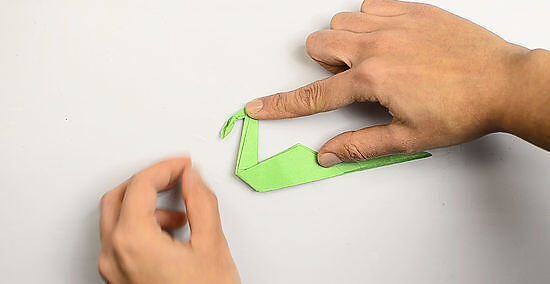
Bring the left corner down to the right along a diagonal and then back right along a diagonal to create the mouth. Bring the left corner down to the right about halfway down the length of the head. This should be along a horizontal line so the corner point directly to the right. Then bring the corner from the right diagonally downward to the left to create the lower jaw. There will now be a short piece hanging down, creating the look of a jaw.
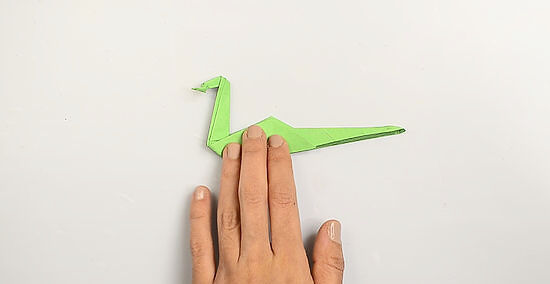
Fold the wings down. Fold the flap in the middle of the dragon down from the right top corner to the bottom edge. Do the same in reverse on the opposite side to create the wings. It will look like a swimming animal now because it will look like it has flippers.
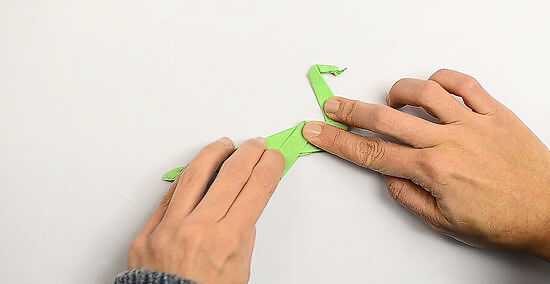
Open the wings to the sides. Open the wings to make the dragon look like it is flying and the dragon is finished.




Comments
0 comment