
Molding Your Kydex Sheath

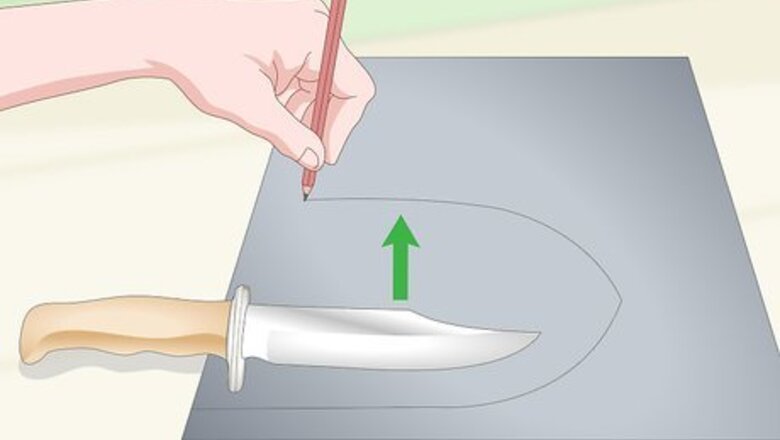
Measure how much Kydex you need to cover your knife. Fold a piece of Kydex over the knife blade so you can make the sheath out of a single piece. Trace the outline of the blade on the Kydex with a pencil, adding 1 inch (2.5 cm) to the perimeter. This does not need to be an exact measurement, but it is always better to err on the side of caution and make the sheath bigger than it needs to be. Making the sheath bigger than it needs to be allows you to trim it down when the time comes. If you make the sheath too small, you won’t be able to add Kydex to make it bigger. You don’t want your Kydex sheath to cover the hilt because that will prevent you from taking the knife out of the sheath easily.
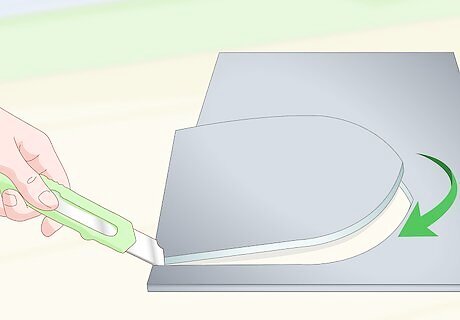
Cut the Kydex to get 1 piece that covers the whole knife. Remove the knife from the Kydex and set it aside. Use a utility knife to cut around the outline you drew on the Kydex. While it is possible to use 2 pieces of Kydex to make a sheath, the easiest way to do this is to use 1 big piece of Kydex.

Bake your sheath in the oven for 5 minutes at 275 °F (135 °C). This makes your sheath pliable and gives you the best chance at getting a custom fit for your knife. Stay safe and wear oven mitts when removing the sheath, as it will be incredibly hot once it comes out of the oven. While you do not need to put the Kydex on a baking sheet, overheating the material can cause it to melt, so constantly monitor the Kydex when it is inside the oven. If you are using a toaster oven, set it to 325 °F (163 °C) and let the sheath sit in there for around 5 minutes. The Kydex is ready when the consistency is like leather.
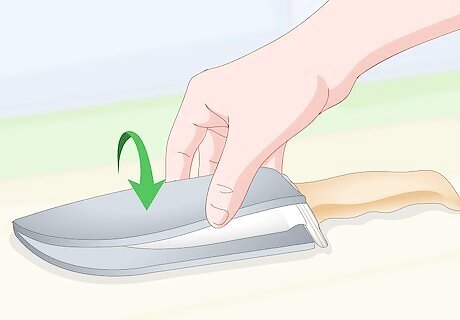
Wrap the warm sheath around the knife to give the material its shape. Do this within 15 seconds of taking the sheath out of the oven, because Kydex hardens quickly as it cools. Put your knife on top of the Kydex and fold the Kydex over the knife. If you are using 2 pieces of Kydex, put the knife on top of 1 piece and cover the knife using the other piece. If you make a mistake in positioning the knife, that’s okay! You can simply reheat the Kydex again to give it its flexibility and start the process over.
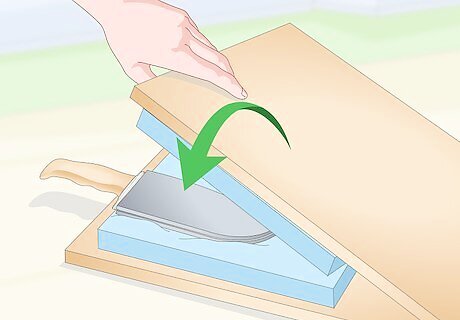
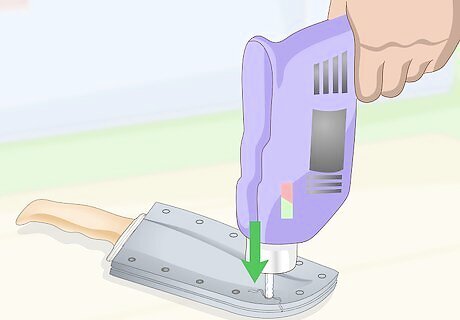
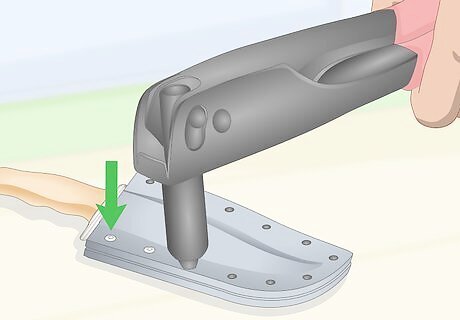
Put the sheath inside a foam press to set it around the knife. A foam press is a machine that pushes the Kydex together and turns the material into 1 sheath by wrapping it around the knife to create a holster. Take a cotton sheet and put it in the foam press first, then put the Kydex sheath with the knife in it into the press. Once you’ve closed the press, keep it on the sheath for about 10 minutes before taking it out. This gives the Kydex enough time to cool. The cotton sheet keeps the Kydex from sticking to the foam and prevents the knife from shifting when you close the press. Make sure that the Kydex has firmed up before moving on the next step. If it has not, keep it in the foam press for another 5 minutes and check again after that time. You can buy a foam press online or at a home improvement store.
Putting Finishing Touches on Your Sheath

Draw 0.25 in (0.64 cm) circles to mark where the rivets go. Mark the circles at the open edge of the Kydex to close the sheath and secure the blade inside the material. Make the circles 0.5 inches (1.3 cm) apart from each other and ensure that they’re evenly spaced. Leave about 1 inch (2.5 cm) of space between the rivet holes and where the knife is within the sheath. Depending on the color of the sheath, you can use a pencil or colored pencil when doing this. A pencil works better on a darker-colored sheath, while a colored pencil is good for lighter-colored sheaths.
Drill 0.25 in (0.64 cm) holes in your sheath using a drill. Put the knife in the sheath and make sure that placing rivets at the marked locations will ensure the knife is both secure in the sheath and easy to remove from it. The rivets will tighten the space within the sheath, so you need to confirm that the blade will still fit in the sheath once you’ve punched the rivets in. Then, drill a hole where you made each mark. Do not close the area where the knife will be inserted.
Punch the rivets into the holes using the rivet punch. You can use a hand-held rivet punch or a machine punch to do this. For a hand-held punch, stick the rivet through the hole and squeeze the rivet punch to attach the rivet. If you’re using a machine punch, stick the rivet through the hole and place the Kydex sheath under the punch. Press the rivets in slowly and smoothly to prevent the Kydex from splitting. If you are left-handed, have the outside of the knife handle facing left and punch rivets to the left of the outside of the handle. If you are right-handed, make sure the outside of the knife handle is facing right and punch rivets to the right of the outside of the handle. Start with the rivet closest to the top of the knife and work down. Then, do the other side the same way. Both hand-held and machine rivet punches are available at hardware stores and online.

Cut off the excess Kydex from the sheath. Once your rivets are in, it’s time to begin cleaning up. Take your utility knife and cut along the pencil outline to get rid of the extra Kydex. You can throw the extra Kydex out or keep it for a future project. Don’t cut the extra Kydex until your rivets are in because if you accidentally cut too much of the Kydex, you won’t have any room to punch the rivets in.

Sand the surface and edges of the sheath with fine grit sandpaper. Select 360- to 600-grit sandpaper, which is great for putting finishing touches on your sheath. Rub the sandpaper over each part of the sheath multiple times in a gentle, circular motion. By sanding the sheath, you’ll make it smoother and give it a professional look. Put some masking tape inside the sheath to prevent sand from getting inside and scratching the blade. Sanding also makes the sheath more paint-ready in case you want to paint the sheath at some point down the road.
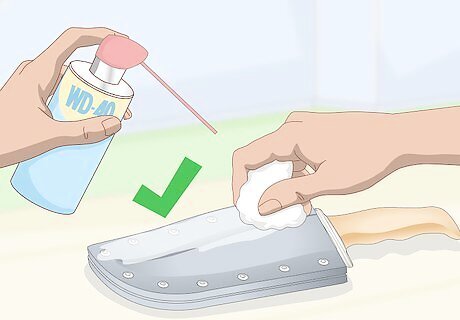
Clean up the sand and pencil marks with WD-40. Put some WD-40 on a cloth and wipe down the entire sheath as part of a general cleanup. This will get rid of dust and dirt buildup, as well as sand and pencil marks to give your sheath a polished look. Go over every part of the sheath evenly and wipe the finished product a few times to help it look its best!
Finished.


Comments
0 comment