
Disconnecting the Dishwasher

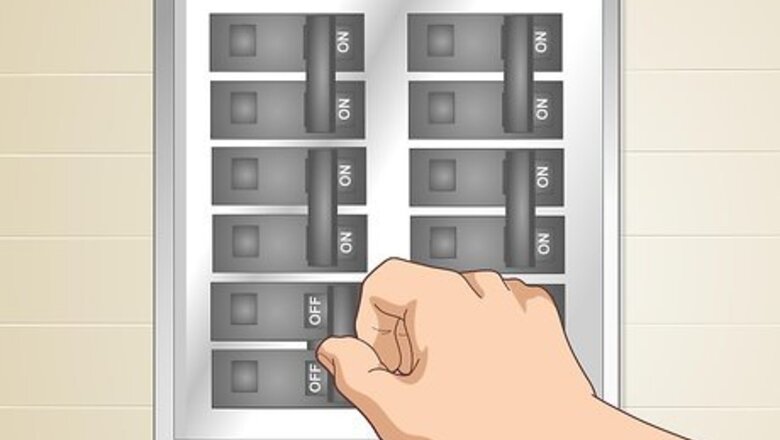
Turn off the electricity through your home’s circuit breaker. Your home’s circuit breaker is located inside a metal box placed on the wall. It is usually located in a spot that doesn’t receive a lot of foot traffic, such as in the basement, garage, a storage closet, or even outside. Check the labels on the switches to figure out which ones control power to the dishwasher. After flipping the breaker switch, try turning on the dishwasher to ensure it is off. Some homes have fuse boxes instead, but they work the same way. If the circuit breaker switches aren’t labeled, test them individually or flip the big, main switch at the top to deactivate all power in your home.

Shut off the water supply line leading to the dishwasher. Look underneath the sink for the valve. Check for a silver, flexible pipe leading from the wall to the dishwasher. The valve will be on the pipe close to where it enters the wall. Turn the valve clockwise until it’s tightly closed. If you’re unable to locate the valve, go to the main valve on your home. You can find it by following the main water line from the street to where it enters your home. Use it to shut off the water supply.
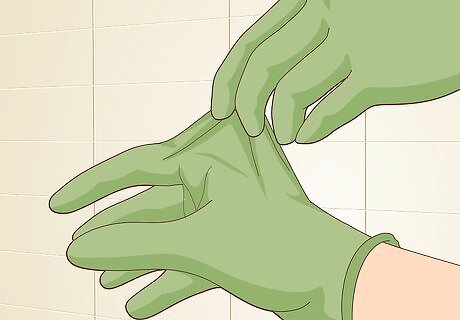
Put on a pair of damage-resistant gloves for protection. They will protect you from any lingering static or sharp edges. They also help prevent you from spreading grime from the floor to inside the dishwasher. You don’t have to use bulky, expensive gloves. Thin, lightweight gloves made from a material like leather are fine. Thinner gloves are better than thicker gloves. You might have a harder time reaching underneath the dishwasher and grasping the leveling mechanisms with padded gloves. Leveling a dishwasher is easy and safe, but there is no harm in taking all possible safety precautions.
Testing the Levelness
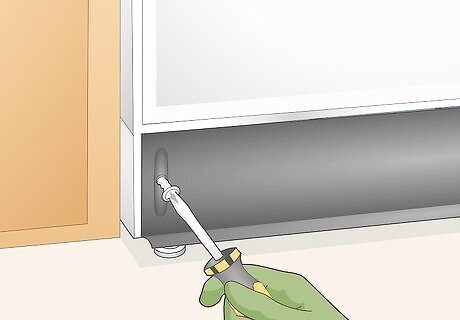
Use a Phillips screwdriver to remove the toe kick. Crouch down to reach the toe kick at the foot of the dishwasher. It’s the long panel running across the front of the dishwasher, covering the legs. Check along the panel’s sides for the screws. They are usually centered on the panel and stick out a little, making them easy to spot. Turn them counterclockwise to remove them. After taking off the screws, pull the toe kick panel off of the dishwasher and set it aside. If you don’t have a screwdriver, you could also use a ⁄4 in (0.64 cm) nut driver.

Remove the access panel if there is one covering the toe kick. Some dishwasher models have double the number of protective panels. Look at the panel’s corners to find the screws. Turn them counterclockwise with a Phillips screwdriver to remove them, then pull the access panel off of the toe kick underneath it. You can then just pull the toe kick off as well to access the legs. Access panels tend to have 4 screws, or 1 for each corner. These screws also hold the toe kick in place.

Undo the mounting bracket if your dishwasher is under something. These screws are on brackets stuck to the underside of your countertop or cabinet. Get down close to the floor so you are able to see them above the dishwasher. They will be near the front edge and have 1 screw each. Use a Phillips screwdriver to turn the screws counterclockwise and remove them. You won’t have to take the brackets off. They likely will have a second screw along the back end keeping them pinned to the countertop or cabinet.

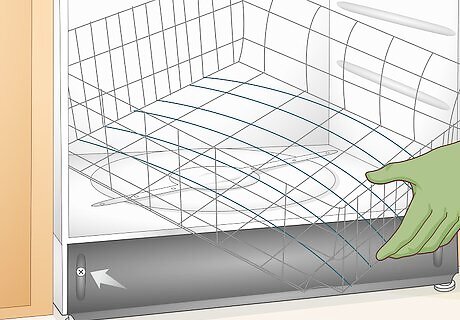
Remove the lower rack from the dishwasher. Open the dishwasher door, then pull out the lower rack and set it aside. Leave the door open for now. You can use the empty space inside the dishwasher to monitor its levelness. Make sure you have plenty of room to fit a level inside of it. If you’re unable to remove the lower rack, leveling the dishwasher is still possible. It’s just a little easier to do without the rack. You may need to make more adjustments to get it truly level.
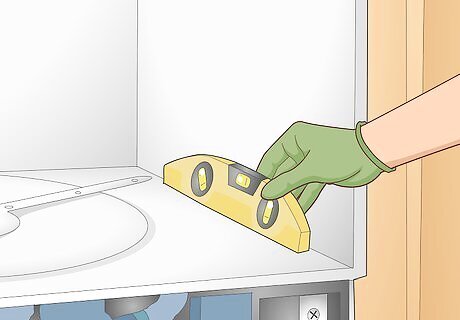
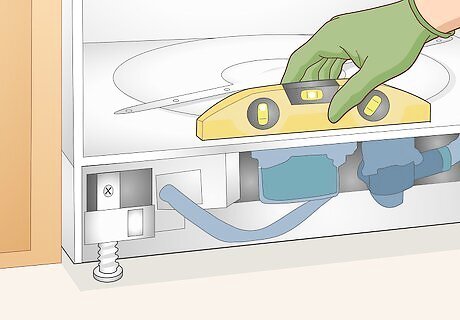
Position a level front to back inside the dishwasher. Take a look inside the dishwasher for a flat spot to place the level. For instance, yours may have raised railings along its sides. Set the spirit level down, then check the tube of liquid in its middle. The bubble inside of it will move toward the side that is higher. For example, if you see the bubble move toward the back, it means that the dishwasher is higher in the back. Try lowering the back legs. You could also raise the front legs, but lowering the dishwasher is usually easier. If removing the lower rack isn’t an option, reach inside the dishwasher and hold the level against the upper edge of its opening.
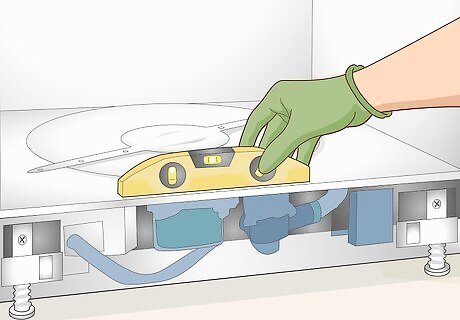
Place the level on the dishwasher’s door to check it from left to right. Set the level close to the edge of the open door. Make sure you pick a flat spot, or else the reading won’t be accurate. Check which way the bubble moves to figure out what adjustments need to be made to level out the dishwasher. When you’re done, close the dishwasher’s door. The bubble moves toward the right if the right side is higher. Lower both of the right legs or raise the left legs. Do the opposite if it moves toward the left. Some levels have magnetic edges, and you can use this to your advantage if you’re unable to find a good spot for it. Close the door, then secure the level to its front.
Adjusting the Legs
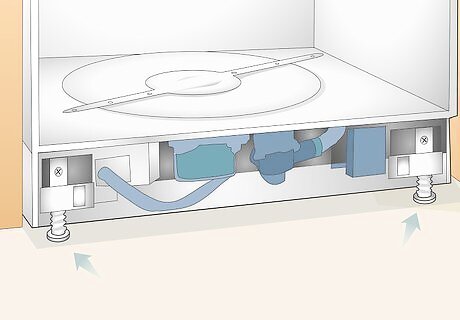
Locate the adjustment screws at the base of each leg. Dishwashers have simple leveling mechanisms, but they can be a little tricky to reach if you’re unprepared for them. They usually look like big, metal bolts with a big white or black cap on the end. Some versions won’t have this cap, so you have to rotate the bolts manually. Most dishwashers have the nut and bolt-style levelers. Make sure you’re able to access the nuts and rotate them freely. You can usually reach them from underneath the dishwasher, even when it’s under a cabinet or countertop. If you don’t see these big screws, look for smaller ones above the legs. Some types of dishwashers have them, particularly on the back legs.
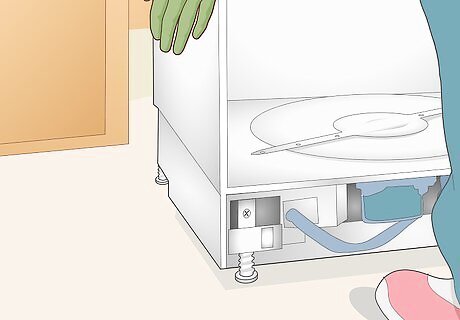
Pull the unit forward gently to reach the back legs. Shift the dishwasher’s weight onto the front legs. It will raise the back end up so the adjustable nuts back there are easier to see and reach. It’s best to have someone else do this while you reach for the back legs. Start with the back legs, since they are harder to reach in most cases. If you’re doing it on your own, pull the dishwasher forward just enough to expose the leveling nuts. You don’t have to use any force to shift the unit’s weight.
Rotate the nuts on the back legs to raise or lower them. To adjust the legs, turn the nut on each one by hand. Twist them clockwise to raise the legs and counterclockwise to lower them. Try to keep the legs at the same height. Adjust them according to the front to back and left to right measurements you took with a spirit level. If the bubble moved toward the back, the back legs are high and should be lowered. If it moved toward the front, lower the front legs instead. If you have to level the dishwasher from left to right, work on its back leg first, shift its weight forward, then adjust its front leg. If you’re unable to rotate the nuts by hand, turn them with an adjustable wrench instead. Another option is to place a ⁄16 in (0.48 cm) socket wrench on top of the bolts and twist them that way. Some dishwashers have screws instead of bolts. For these, use a Phillips screwdriver to rotate the screws

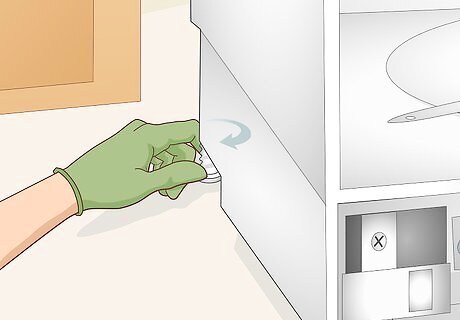
Adjust the front legs by turning the nuts on them. Push back on the dishwasher’s door to shift the unit’s weight onto the back legs. This will expose the leveling nuts on the front legs. They can be easily turned by hand on most models. Rotate them counterclockwise to raise the legs and clockwise to lower them. Repeat the same adjustment you did with the back legs. For instance, lower the front legs if the spirit level bubble shifted toward the front. If you’re leveling from left to right, lower one of the legs to match the back leg you adjusted. Note that some dishwashers work in reverse. Rotating the nuts clockwise raises the legs, while turning them counterclockwise lowers them. You will see which way yours works as soon as you start adjusting the legs. If you can’t turn them by hand, use an adjustable wrench or socket wrench instead. Try to level the dishwasher so its top is flat and its sides are flush with nearby cabinets.
Use a spirit level to test and make further adjustments. Repeat the tests you did before making the initial adjustments. Start with the unit’s front to back levelness by placing the level inside the dishwasher. Then, measure it from left to right by placing the level on its open door. If the dishwasher still isn’t level, close the door and continue making adjustments to the legs. Leveling out the dishwasher can take a few attempts. It’s best to make gradual adjustments, lowering the higher legs until they are all even. If you’re unable to level the dishwasher using the legs, you could also purchase some wood shims from a hardware store. Shims are small pieces of wood or plastic you can place underneath the lower legs to raise them.

Close the dishwasher door to test its alignment. Make sure the door doesn’t get stuck on anything you have above the dishwasher, such as mounting brackets. The door should close completely. After shutting it, check that the gap between the door and tub on the left and right sides is equal. If it isn’t, make more adjustments to the legs until everything is in working order again. If you keep your dishwasher under something, such as a countertop or cabinet, closing the door might become a problem. It’s because the legs are too high. Try raising each of them by an equal amount. Remember to check the dishwasher again with a level after each adjustment. If it looks like it’s tilting despite the door working as intended, it could leak.
Replace the screws, panels, and lower rack. Once your dishwasher is stable, you can prepare it for its next use. Slot the mounting screws back into the mounting brackets and through the holes in your countertop or cabinet first, if you’re using them. Then, place the toe kick over the front legs and screw it in place, followed by the access panel if your dishwasher has one. When you’re done, turn the water and electricity back on and use your dishwasher to produce some sparkling clean dishes. If you had to pull your dishwasher out to adjust it at all, push it back underneath the countertop or cabinet to secure the mounting brackets.


Comments
0 comment