
Setting up the Indoor Unit
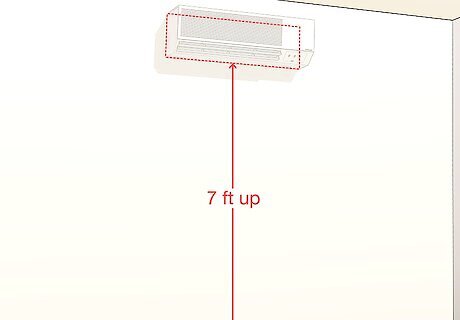
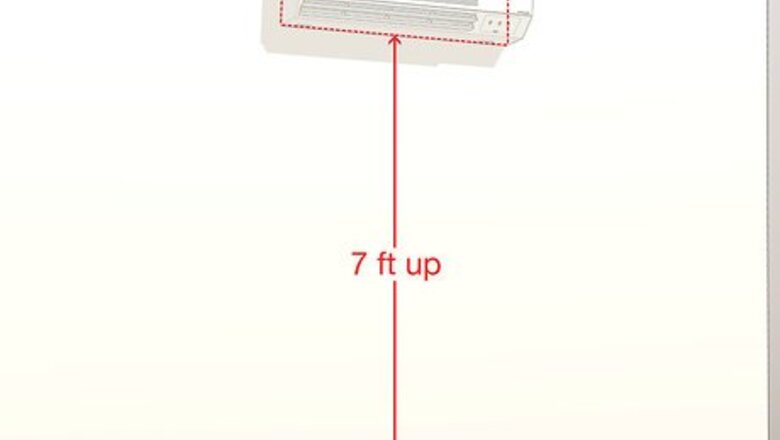
Select an unobstructed location on your interior wall to mount the indoor unit. You'll need to cut a hole through the wall to feed the pipes from the indoor unit to the outdoor unit, so make sure the location you choose will allow you to do so. Choose a spot away from direct sunlight and heat sources for the best results. Mount the unit 7 feet (2.1 m) off the floor and ensure there’s at least 6–12 inches (15–30 cm) of open space on every side of the unit to allow for proper airflow.Tip: Choose a central location for the indoor unit where the cool air can easily flow through your home, such as in the living room. Choose a location with studs to ensure the wall is strong enough to hold the weight of the unit. Install the unit at least 3.3 feet (1.0 m) away from antennas and power or connecting lines that are used for television, radio, home security systems, intercoms, or telephones. The electrical noise from these sources could cause operational problems for your air conditioner. Avoid locations where gas may leak or where oil mist or sulfur exists. Most of these units have remote controls so that you can easily turn them on or off and adjust the temperature even if they’re mounted high on the wall.

Secure the mounting plate to the interior wall. Hold the mounting plate against the wall where you want to install the indoor unit. Use a level to make sure it is both horizontally and vertically level. Use a pencil to mark the locations of the screw holes, remove the plate, then drill a hole into the wall where each screw will go. Position the plate so it matches up with the holes, insert plastic anchors into the holes, and secure the plate to the wall with tapping screws.

Drill a 3 in (7.6 cm) hole through the wall so you can feed the pipes outside. Make a mark in the center of the hole in the mounting plate. Use a keyhole saw or a drill with a hole-cutting attachment to create a circular 3 in (7.6 cm) opening through the wall that slopes slightly downward toward the ground to ensure adequate drainage. Make sure there are no pipes or wires behind the wall before drilling or cutting the hole.
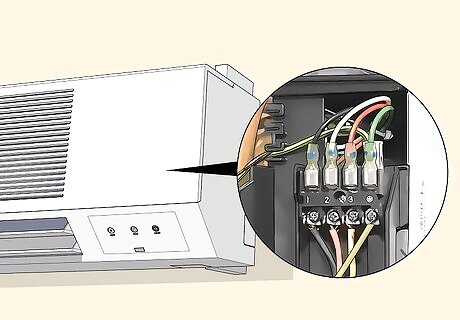
Check the electrical connections on the indoor unit. Lift the A/C unit’s front panel and remove the cover. Make sure the cable wires are connected to the screw terminals and that the wiring matches the diagram that came with the unit.
Run the pipes and cables through the hole in the wall, then connect them to the unit. Secure the included copper pipes, power cable, and drain pipe together with electrical tape. Place the drain pipe on the bottom to ensure a free flow of water. Run the pipes and cable through the hole in the wall, then secure them to the designated spots on the indoor unit as directed by the instruction manual. Each line comes pre-insulated, so you don’t have to worry about adding extra insulation. Do your best to minimize how much the pipes and cable bend to ensure that the unit performs well. Make sure that the drainage pipe allows water to drain in an appropriate place. See the instruction manual included with your kit for more information.
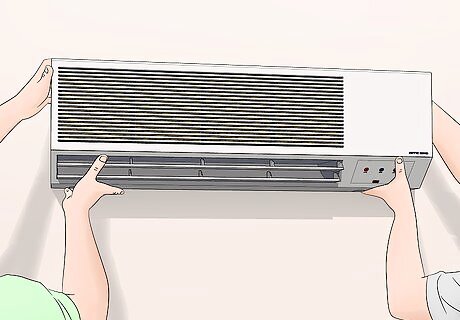
Secure the indoor unit to the mounting plate. To attach the air conditioner to the wall, simply align the female connections on the back of the unit with the male connections on the mounting plate and press firmly to secure the unit in place. Make sure the unit tilts backward 2-3 degrees so that water can flow out of the drain pipe. It may help to have a friend hold the unit in place while you secure the connections.
Installing the Outdoor Condenser

Position the outdoor unit away from any heavily trafficked, dusty, or hot areas. Find the hole you drilled through the mounting plate for the interior unit and position the exterior unit within 50 feet (15 m) so the piping and cable can easily be attached. Choose a location with at least 12 inches (30 cm) of space surrounding its perimeter to ensure proper functioning. If possible, select a shady location that’s sheltered from the wind in addition to dust and traffic to keep your unit functioning at its best. Make sure that no antenna of a radio or television is within 10 feet (3.0 m) of the outdoor condenser.

Lay a concrete pad on the ground. Don’t place the outdoor unit directly on the ground, as it’s heavy and can shift around on dirt or rocks. It’s necessary to install the condenser on a concrete pad, which you can find at home improvement stores. Position the pad where you want to install the unit and use a level to make sure it’s flat and even.Tip: Situate the concrete pad so that it’s high enough to keep the unit out of any water that may puddle on the ground due to rain or snow.

Secure the outdoor unit on top of the concrete pad. Lay a rubber cushion on top of the pad to minimize vibration, then set the outdoor condenser unit on top of the pad. Secure the unit to the concrete with anchor bolts.
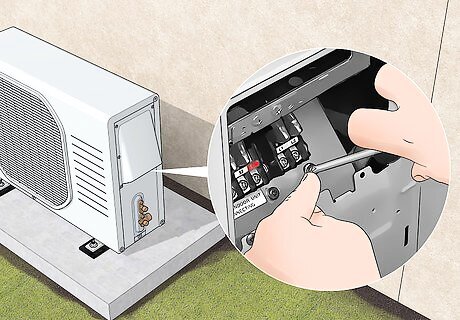
Check the electrical wiring in the outdoor unit. Remove the cover on the condenser. Refer to the unit’s wiring diagram in the instruction manual and make sure the wires are connected as the diagram suggests. Make any adjustments as necessary. Fasten the cables with a cable clamp and replace the cover.
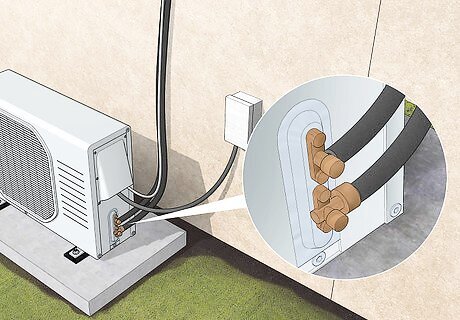
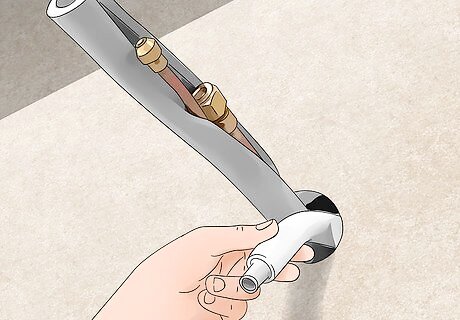
Connect the piping and cable to the outdoor unit. Use flare nuts to secure the 2 copper pipes from the indoor unit to the outdoor unit as per the instruction manual. Connect the power cable that runs from the indoor unit to the outdoor unit as well. Finally, connect the power supply to a designated outlet. If necessary, you can trim the copper pipes to eliminate excess.
Completing the Project

Bleed the air and humidity from the refrigerant circuit. Remove the caps from the 2-way and 3-way valves and from the service port and connect a vacuum pump hose to the service port. Turn the vacuum on until it reaches an absolute vacuum of 10mm Hg. Close the low pressure knob and then turn off the vacuum. Test all of the valves and joints for leaks, then disconnect the vacuum. Replace the service port and caps.

Affix the piping to the wall with clamps. To ensure the pipes and cables don’t move around or become disconnected, attach them to the exterior wall of your home using the clamps that came with the kit. Follow the directions in the manual to ensure the clamps are spaced adequately.

Seal up the hole in the wall using expanding polyurethane foam. Spray expanding polyurethane foam into the hole you drilled to feed the cable and piping through the wall. Make sure the hole is completely sealed to prevent hot air or insects from getting through. Let the foam dry as per the instructions on the label before turning on your air conditioning.
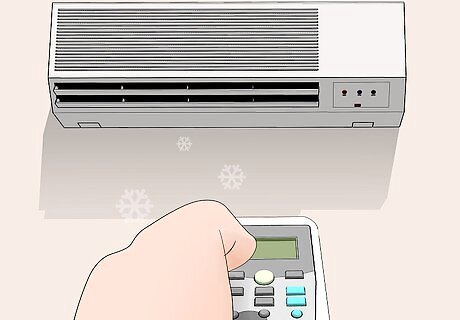
Turn on the unit and enjoy the cool air! All that’s left to do is to start the A/C, which you can do from the indoor unit. It should only take a minute or 2 for cool air to start blowing into your home. Refer to the instruction manual if you have any trouble operating your new air conditioner.


Comments
0 comment