
X
Research source
Regardless of the model, you can install a new tremolo bridge in a matter of minutes as long as you have a Philips-head screwdriver, some screws, and a new bridge on hand.
Uninstalling Old Hardware
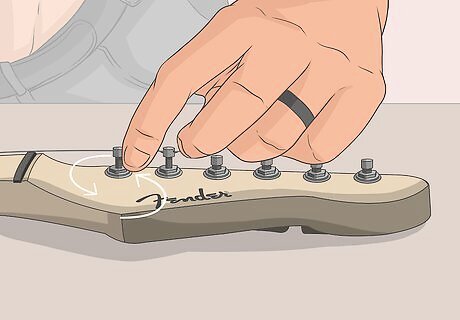
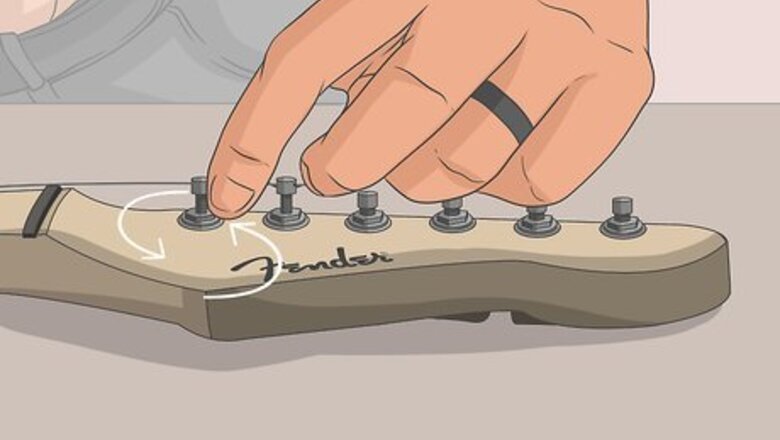
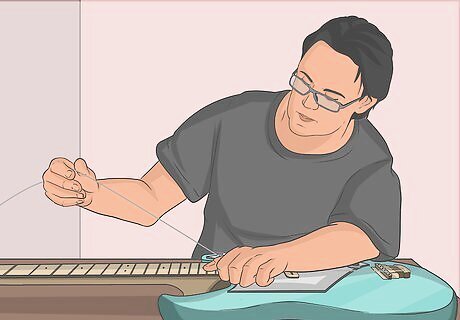
Remove the strings from your guitar. Loosen the strings on your instrument by rotating a string winder along the side of the neck. Take a set of string clippers and cut all 6 strings along the center of the instrument. Twist the upper portion of strings off the tuning pegs and remove them completely from the guitar. At this point, flip your instrument over and push the other portion of your strings out through the bottom of the tremolo bridge. Pull these cut strings out from the bridge, then discard them. The strings need to be completely removed before you can install a new tremolo bridge. You can get a string winder from any music supply shop.
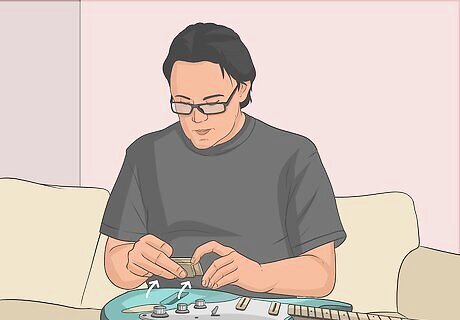
Pull out the old tremolo bridge from your instrument. Unhook the springs from the back of your instrument and set them aside. At this point, unscrew the metal posts or screws that are attached to the top of your bridge, then lift and remove the bridge from your instrument altogether. Take a Philips-head screwdriver and remove the screws from the tremolo claw, or the metal section attached to the opening on the back of your instrument. Pull the ground wire out of the side opening, then remove the tremolo claw altogether.

Shop for a Fender-brand bridge for your guitar. Visit a guitar supply shop or go on Fender’s website to find a tremolo bridge that will fit your exact guitar model. Double-check the exact name and model of your guitar to find a tremolo bridge that will fit your instrument exactly. Keep in mind that some bridges cost over $100, depending on the model. For instance, if you have a Fender American Vintage Series Stratocaster guitar, you wouldn’t install a bridge designed for a different kind of Fender instrument. Fender guitars made after 1986 require different tremolo bridges than some of the company’s vintage instruments. Double-check the year your guitar was made as you shop for a new bridge.
Attaching the Tremolo Claw

Flip your Fender guitar over to find a large opening on the back. Drape a blanket over your work surface, then place your guitar upside-down on top of it. Look for a large, rectangular opening along the center of the guitar. Since you’re working with a Fender guitar, this opening is designed to fit a Fender-specific tremolo bridge, and not any other brand. A blanket will help prevent your instrument from getting scratched or dented. The opening along the back of your guitar will partially resemble a top hat. Note that the actual bridge will fit through the “brim” of the hat.

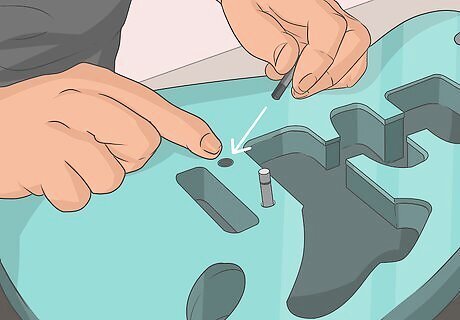
Place your tremolo claw against the edge closest to the guitar neck. Find the tremolo claw, a rectangular metal piece that helps hold your bridge in place. This piece will have 2 small screw holes on the side edge, along with several circular grooves going across the front. Take the claw and place it along the edge that’s closest to the neck of the guitar. The tremolo claw is placed against the top portion of the “top hat.”

Apply wax to the small screws that go into the tremolo claw. Take a cube of screw wax or a bar of clear soap and rub the threaded ends of 2 small, 5 mm wide screws. This will help the screws fit snugly into the back of your guitar. Your Fender guitar should have 2 holes drilled into the upper edge of the back opening, which is where you’ll install the tremolo claw. These screws should come packaged with your new tremolo bridge. You can find screw wax at most hardware or home improvement stores, or you can use any kind of clear wax to get the job done.

Attach 2 screws halfway in both ends of the tremolo claw. Place each screw through the 2 openings along both sides of the tremolo claw. Slide the waxed, threaded ends of the screws into the holes and begin tightening them into place with a Philips-head screwdriver. Once the screws are halfway in, set your screwdriver aside. You don’t want to screw them in all the way, or else you’ll have trouble installing the rest of the bridge.
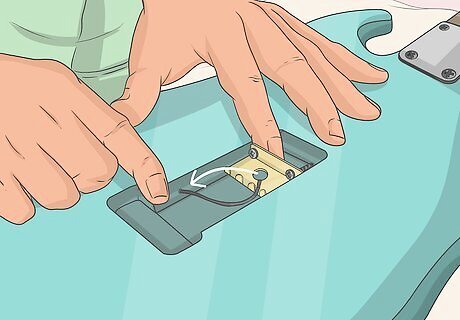
Slide the ground wire into the hole of the left side of the opening. Grab the wire that’s coming out from the center of the tremolo claw. Look along the left edge of the back opening and find a small hole, where you can feed the ground wire. Slide the wire in place to finish setting up the tremolo claw.
Tightening the Bridge

Turn your guitar right-side up. Look for a long, rectangular opening along the bottom of the guitar, as well as 2 evenly spaced holes. Note that you’ll be using these openings to install the physical tremolo bridge into your Fender guitar.
Clean out the 6 screw openings if you have an older guitar. Note that older Fender models may have 6 small screw holes along the bottom of the guitar instead of 2 larger holes, which is completely normal. Twist a Philips-head screwdriver into all 6 holes to clean out any dust or shavings stuck inside. If you have a newer Fender guitar, you don’t have to worry about this. Fender guitars made before 1986 will likely have this design.
Attach 2 metal posts into the openings along the bottom of the guitar. Take 1 of the metal posts that came with your new tremolo bridge and thread it into the base of your guitar. Start by twisting with your fingers, then tighten it with a Philips-head screwdriver. Repeat this process with the second post, double-checking to make sure both posts are tight as you go. If you have an older Fender guitar, you can disregard this.
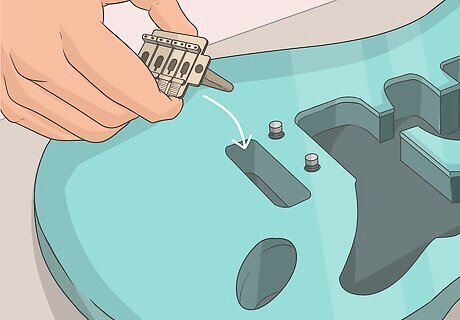
Insert the bridge into the opening beneath the 2 metal posts. Slide the large, rectangular portion of the bridge into the opening along the bottom of the guitar. If you flip your instrument over, you can see the bridge peeking out through the bottom. Newer Fender guitars have notches that fit snugly around the 2 posts, while older guitars have 6 screw holes. If you have an older guitar, line the bridge up over the 6 screw holes drilled into your guitar.

Wax and screw 6 screws along the base of your bridge if your guitar is an older model. Rub some screw wax or a clear bar of soap along the threaded portions of 6 small, 5 mm wide screws. Center each screw over an opening and tighten it into place with a screwdriver. Continue screwing until the bridge looks slightly bent from the pressure—at this point, turn your screwdriver counterclockwise to loosen the screw ever-so-slightly. This helps keep the bridge balanced and not warped.

Hold the bridge in place and flip your guitar upside-down again. Press a few fingers onto the bridge so it stays snug, then flip your guitar upside-down once more. To finish the installation, you’ll need to access the bottom opening one more time.
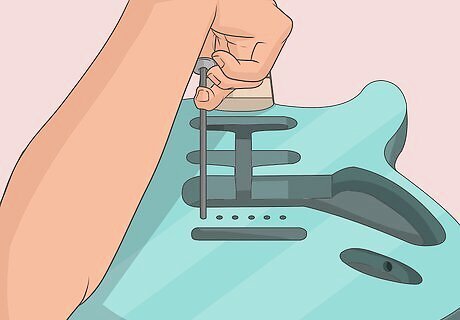
Hook 3 springs between the tremolo claw and the bottom of the bridge. Continue holding the bridge in place and loop 1 end of a metal spring onto 1 of the rounded grooves on your tremolo claw. Use a screwdriver to pull and loop the other side of the spring into the small, pinprick-sized opening along the bottom of the bridge. Repeat this process with 2 more springs to keep your tremolo bridge taut. Three springs will help you get a clear sound from your instrument. These springs will come with the tremolo bridge. Once the springs are in place, you can let go of the bridge.
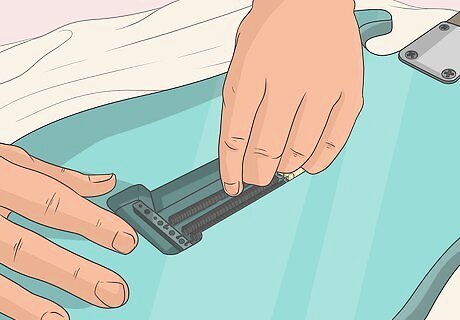
Flip over the guitar and press the notches on the tremolo bridge into the posts. Push the bridge forward, keeping the notches snug beneath the 2 metal posts. At this point, you’ll be ready to string your guitar! You can disregard this step if you have an older Fender guitar.


Comments
0 comment