
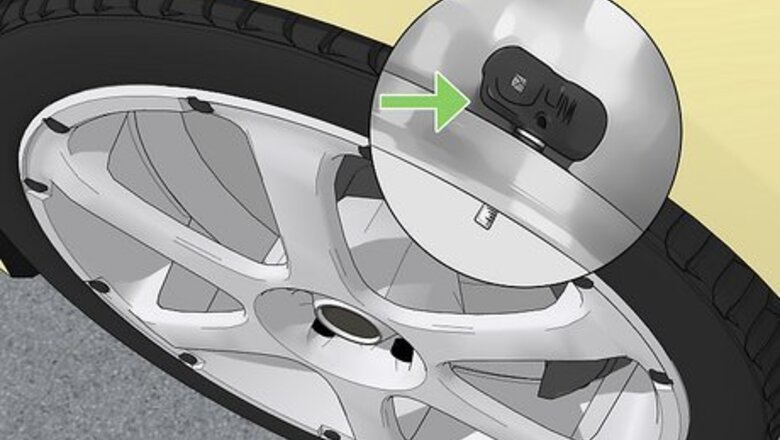
- The most common pressure sensors are attached to the base of the valve stem or act as the valve stem cap.
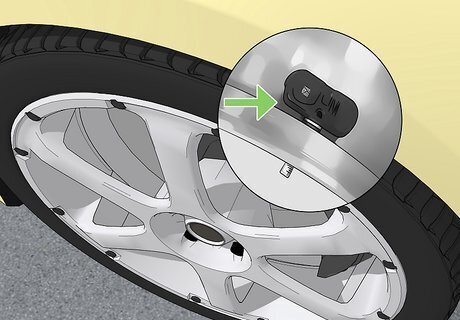
- In some cars made between 2007 and 2011, the pressure sensor is strapped to the barrel of the wheel, either directly above the valve stem or directly across from it.
- Indirect pressure sensors are part of the ABS speed sensor, which is connected to the center of the wheel.
TPMS Sensor Locations
Most tire pressure sensors are located in the valve stem. If your car has a TPMS, it’s likely to have direct sensors. Direct sensors are usually connected to the valve stem and use special technology to read the tire pressure. They send signals (think bluetooth) to a computer in the dash—if you have a live pressure display, you have a direct TPMS. Here are 3 common types of direct sensors: Snap-in sensors are the most common type. They’re attached to the base of the valve stem and snap into the underside of the rim. Clamp-on sensors are very similar to the snap-in type—they’re on the base of the valve stem, they sit in the rim of the tire—but they’re made of metal and much more durable. Valve cap sensors are the newest and cheapest sensors on the market. Instead of going in the tire, they screw onto the cap of the valve stem and take the pressure from there.

In some cases, the sensors are strapped to the barrel of each wheel. Band clamps are the oldest kind of direct sensor and aren’t connected to the valve stem. Instead, they’re strapped to the barrel of the tire itself. Band clamps are in one of two places: either directly above the valve stem or directly opposite it (180º away).
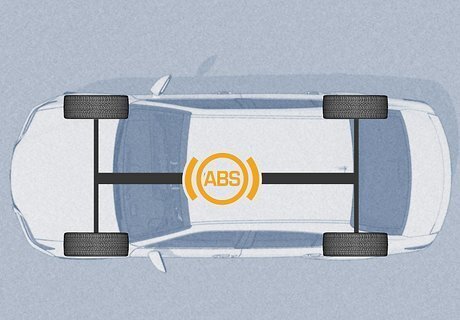
An indirect TPMS uses ABS speed sensors that are plugged into the wheel. The ABS (anti-lock brake system) has speed sensors located in the center of each wheel or the axle. When the sensor sees that one tire is faster than the others, the indirect TPMS calculates the size of the tire based on relative speeds, then uses that figure to calculate the pressure. Indirect sensors are less accurate and need to be set to a certain “base” speed to work, but they’re also less likely to become damaged and need replacement. Some vehicles have both direct and indirect sensors. If your indirect TPMS needs to be fixed or replaced, consider taking it to a mechanic. The wiring that connects it to the car can often get mixed up in a DIY.
How to Replace a Direct Tire Pressure Sensor

Jack up your car and take off the tire. Use a jack to elevate your car, then remove your tire. Use an OBD II diagnostic tool tool to determine which tire to remove if you don’t have a display that tells you which sensor is malfunctioning. To use the OBD tool, plug it into the port under the steering wheel, read the instructions to see whether your car should be on or off, and open the menu. Select the system for “active” and “pending” codes, then write down whatever code the screen displays. Research the codes to find out what exactly they mean. If you’re having trouble finding the OBD port, check your owner’s manual for the location. Look in the owner’s manual to determine if you have a direct or indirect sensor. Incorrectly replacing an indirect sensor can affect your brake system, so it’s best to have them changed in a shop.

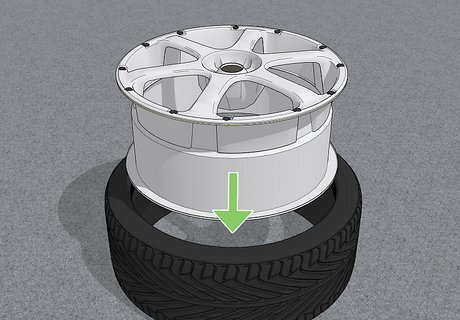
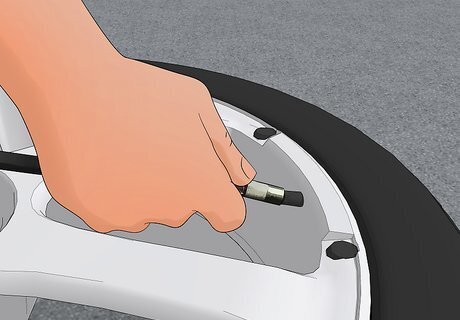
Remove the valve stem with a TPMS hand tool. Take off the valve cap, then remove the nut with a TPMS tool. Push down on the valve stem to pop up the washer, then take that off too. Push down on the valve stem again to release all of the air. Once it’s removed, the sensor will drop into the tire. When the pressure sensor is loose in the tire, it’s easier to remove the tire without damaging it.

Separate the rim and the tire. Break the seal between the tire and the rim by driving over the rubber part of the tire with another vehicle. Take the tire off its rim fully by prying it off with a crowbar. Have a second person watch the process to ensure you don’t hit the metal rim. You can also remove the tire with a tire changer.
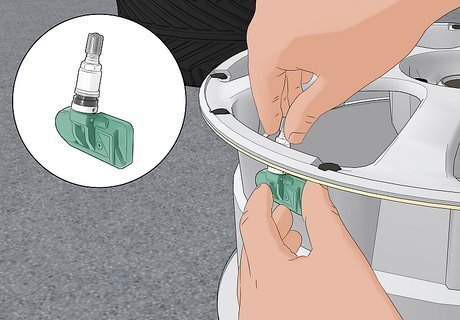
Remove the old sensor and replace it with a new one. For clamp on and snap in types, take the loose sensor out of your tire, then thread a new sensor through the opening for the valve stem on the edge of the rim (where the old sensor was). Snap it into the lip under the rim and attach it with a washer and a nut. Most sensors of the same type are interchangeable. If you have a band clamp sensor, undo the plastic clip on the side of the sensor, then use a flathead screwdriver to pry it out of its “cradle.” Attach the hooked ends of the cradle and sensor together, then press the whole thing back in place. Secure the sensor with a new plastic clip. If you have a valve cap sensor, just unscrew it from the tire and replace it with another. Each vehicle has a specific torque (tightness) that needs to be applied to the sensor to keep it in place. Look up your manufacturer’s specifications, then screw the sensor in with a TPMS hand tool until you hear a click. Search the make and model of your car online to find out which sensor type you have.
Put the rubber back on the rim. Place the tire on the rim and stand on it. Press down one side of the rubber, then the other, with your feet. Use a pry bar to get the tire fully back on.
Refill your tires. Once your rims are back on, you’re ready to refill your tires. Turn on an air compressor and press the end of the hose into the open valve stem. Fill the tire up to the psi written on the inside of the driver’s door.

Use a wheel balancer to balance your tires. Stand up your wheel balancer, then tighten the screws on the sides of the center level to balance the air bubble. Thread the center of your tire through the level, then attach weights to the edges of the rim until the bubble is evenly back in the middle. Tires need to be evenly weighted to keep them from wearing down in one specific place.

Put the tires back on your car. Put the tire on the wheel and screw each lug nut on by hand. Finish tightening the lug nuts in a diagonal pattern to be sure the tire is properly installed. For example, if you have 4 lug nuts, tighten the top left, then the bottom right, then the top right, and finally the bottom left. If you have five lug nuts, tighten the top one in the middle, then the bottom left, top right, top left, then bottom right. For six nuts, tighten the bottom center nut, then the top center nut, then the bottom right, top left, top right, and then the bottom left.

“Relearn” the TPMS. Now that you have a new sensor, you need to connect it to the receiver. Put your car into “relearn” mode, then use a TPMS programming tool to activate your sensor. The way to put your car into relearn mode varies based on make and model, so check your owner’s manual to find your specific procedure. If you have a GM with a color display, most of the time you can turn on learning mode by putting on your emergency brake, turning the keys one click in the ignition, navigating to tire pressure on the menu, then pressing on the center checkmark on your steering wheel until the horn beeps twice. You can turn on relearn mode in some Fords by putting the key in the ignition, pressing and releasing the brake pedal, turning the ignition one click three times in a row (and leaving it on), hitting and releasing the brake again, turning off the ignition, then turning the ignition three times to the first click again. The car will honk when it’s in relearn mode.
What does the tire pressure sensor do?
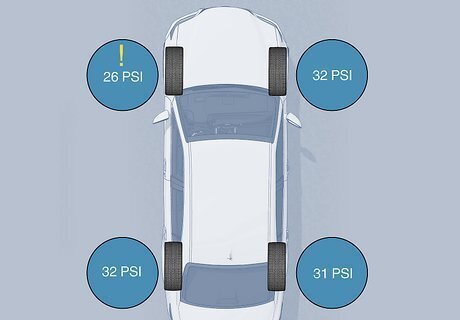
The tire pressure sensors alert you to drastic pressure changes. When your low tire pressure warning light is on, that means your pressure has fallen by at least 25%. Since the light only goes off when your tire pressure is a ¼ less full than its supposed to be, it’s a good practice to manually check your tire pressure at least once a month.

In new cars, the TPMS gives you live pressure readings. If you have a car with a touch screen or color display, there’s often an option to digitally check the air pressure in each tire. The digital readings are less accurate than when you manually check your tires, but they can be good diagnostic tools when your TPMS is acting up.
Signs Your Sensor is Malfunctioning

Your low pressure light is flashing. Most of the time, when your pressure sensor is faulty your low tire pressure light will flash. If you turn on the car and the low pressure light flashes and then stays solidly lit, your tire pressure sensors are malfunctioning. The most likely cause of your malfunction is a dead battery. Sensor batteries are sealed inside the device and last 7-10 years. If your battery is dead, it’s easiest to replace the entire thing. The low pressure warning may flash for up to two minutes.
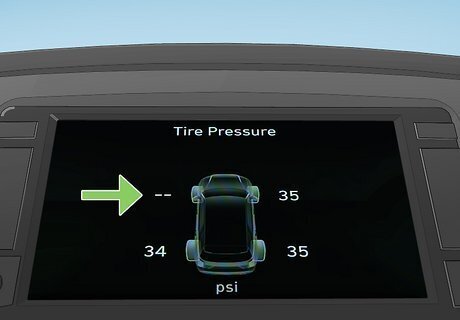
There is no pressure displayed for one or more tires. Some cars have a tire pressure display where you can digitally check each tire. If you open your display and a tire is marked “0” or “---”, that’s a sign that your pressure sensor isn’t working properly. If you don’t have a display, your car might illuminate the low pressure light when your tires are the correct pressure.
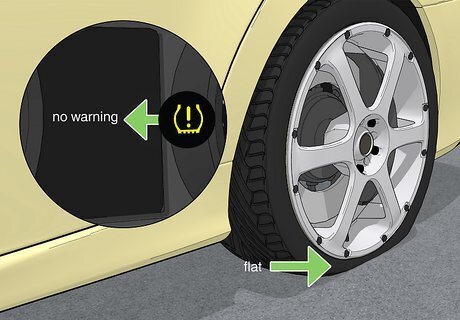
The warning light doesn’t turn on even when tires are underinflated. Worst of all, a faulty TPMS can make it so your car can’t recognize a lowered tire pressure. Check your pressure immediately if your steering is jerky or you have difficulty turning.


Comments
0 comment