
Building the Valance
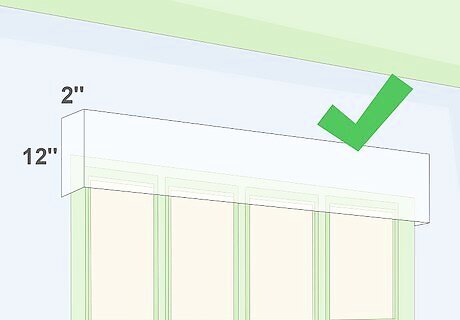
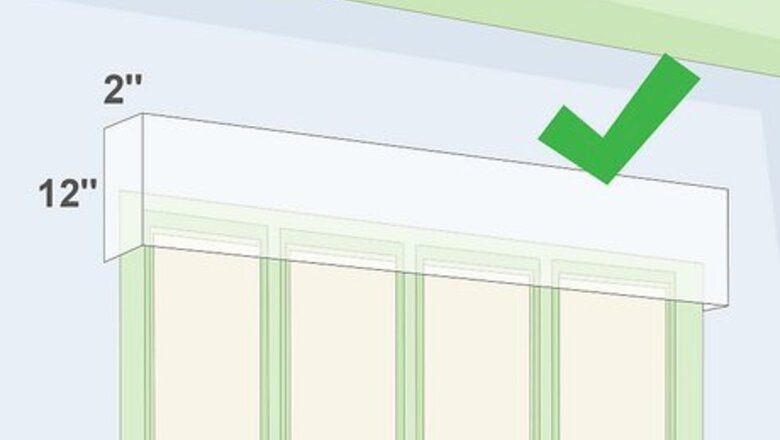
Decide on the size and dimensions of your valance. Most valances are about 12 inches (30.48 centimeters) tall and 2 inches (5.08 centimeters) deep.If you have a curtain rod, you may want to make the valance 6 inches (15.24 centimeters) deep instead. The valance can be the same width as your window (including the outer edges) of the molding or a few inches wider.

Flatten a large box. Unless your box already matches the dimensions of your desired valance, you will need to cut a box apart at the corners and flatten it into a large sheet. Use a box cutter to slice through the tape at the bottom of your box, then down one of the corners. This should allow you to unfold and spread the box flat.
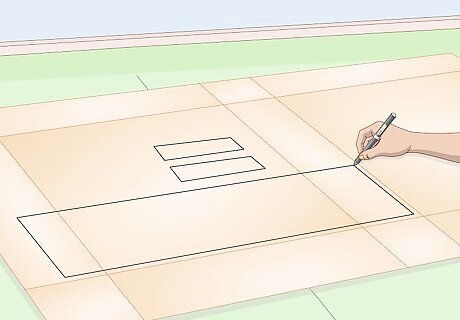
Draw the rectangles on top of the box. You will need a total of three rectangles: a front panel and two side panels. Try to draw everything on a box face/panel and not across a corner or seam. Here are the pieces you need to cut: Use the width and height to draw the front panel. Use the height and depth to draw the two side panels.
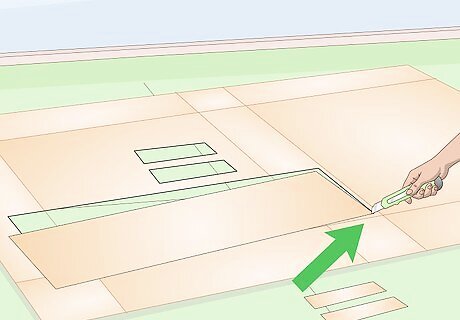
Cut your rectangles out using a box cutter or craft blade. Use a metal ruler or straight edge to help you cut the rectangles. This will give you a straighter line and more professional-looking finish.

Tape the side panels to the front panel. Set the front panel down in front of you. Place the top panel right above it, long edges touching. Place the two side panels to either side of the front panel. Lay down long strips of duct tape or packaging tape across the seams.
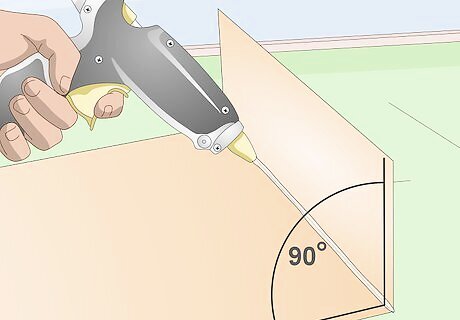
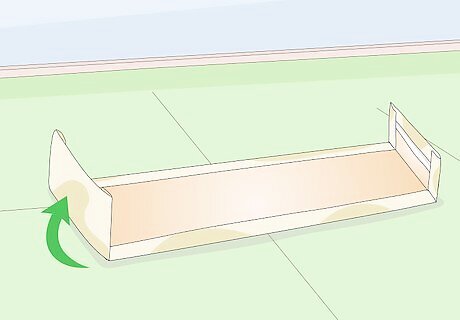
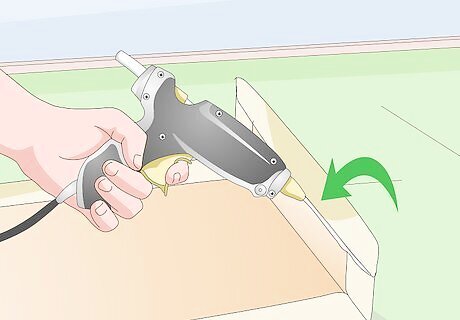
Flip the valance over, then fold and hot glue the side panels. Flip the valance over so that you can't see the tape anymore. Fold one of the side panels towards you until it is at a 90-degree angle to the front panel. Run a thick line of hot glue along the seam, then hold the panel until the glue sets. Repeat for the other side. The hot glue will help the valance hold its shape.
Covering the Valance
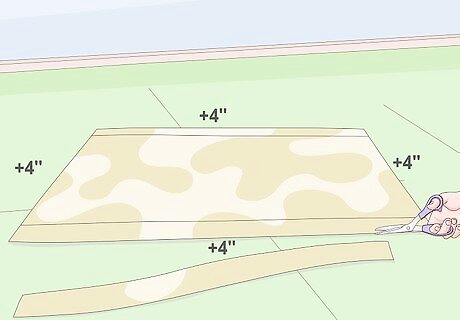
Cut your fabric. Measure the entire length of your valance, including the side panels, and add 4 inches (10.16 centimeters) Measure the height of your valance and add 4 inches (10.16 centimeters) as well. Cut a rectangle out of fabric according to those measurements. You will need the extra fabric so that you can wrap it over the edges of te valance.
Cut your batting, if desired. You don't need to add any batting, but it will give your valance a nicer finish. Cut some batting or felt to fit your valance. It needs to be the same length as your valance (including the side panels) and 2 inches (5.08 centimeters) taller. If you are using contact paper, it is not recommended that you add the batting.

Wrap and glue the batting over the top and bottom edges of your valance. Place your valance on top of the batting, making sure that there is 1 inch (2.54 centimeters) to the top and bottom. Wrap the edges of the batting over the top edge of your valance and glue it in place. Repeat for the bottom. You are not wrapping anything over the side edges of the side panels. This way, the valance will be flush against the wall. You can use fabric glue or hot glue for this step. If you choose to use hot glue, work 1 to 2 inches (2.54 to 5.08 centimeters) at a time so that the glue doesn't set too fast.

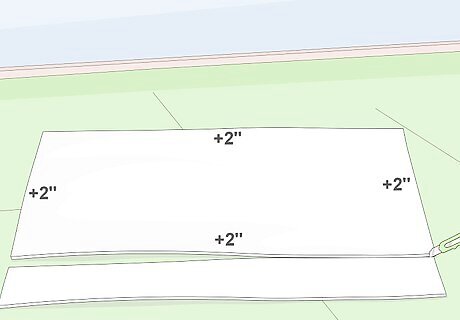
Place the valance on top of your fabric. Turn your fabric over so that the wrong side is facing you. Place your valance on top, batting-side-down. Make sure that the valance is centered, with 2 inches (5.08 centimeters) of fabric to the top and bottom.

Wrap the fabric around the top and bottom edges of the valance. Brush some glue onto the top edge of the valance, right next to the batting. Fold the fabric over the top edge and into the glue. Continue gluing the fabric down across the top edge of the valance, then do the bottom edge.
Fold the corners of the fabric. By now, the top and bottom edges of your fabric should be wrapped over the top and bottom edges of your valance. You should have about 2 inches (5.08 centimeters) of fabric sticking out over the side edges of you valance. Choose a side to start with, then fold the corners down, like wrapping a present.
Glue the side edge of the fabric down. Apply some more glue to the back of the valance, right next to the batting. Keeping the corners folded, wrap the fabric over the side edge of the valance, and press it into the glue. When you are done, fold and wrap the other side edge of the valance as well.
Hanging the Valance

Determine the placement of your valance. Have someone hold the valance against the wall for you, then make a small mark to either side of the valance. Make sure that you are making the marks on the inside of the valance and not on the outside.
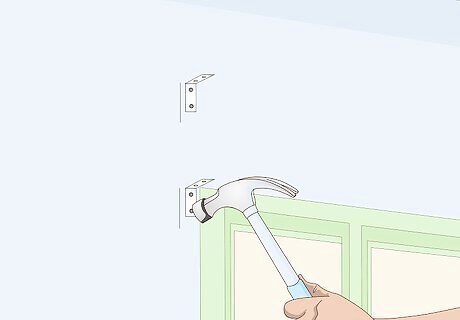
Nail four L-brackets onto the wall. Make sure that the edge of the bracket is aligned with the marks that you made. You will only need two bracket on each side of your window, one set for the top of your valance, and another for the bottom.
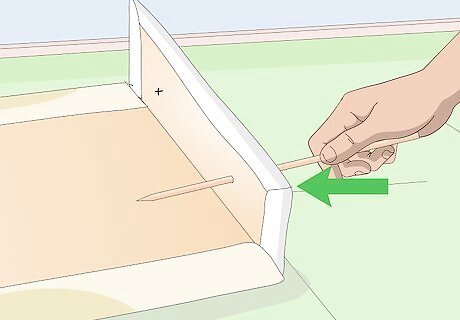
Make holes in the valance for the brad fasteners. Because of how thin cardboard is, you won't be able to nail it to the L-brackets. Place the valance over the L-brackets and make a mark through the screw holes with a pen or pencil. Remove the valance, then use a skewer to poke holes into the valance. Be sure to poke through the fabric.
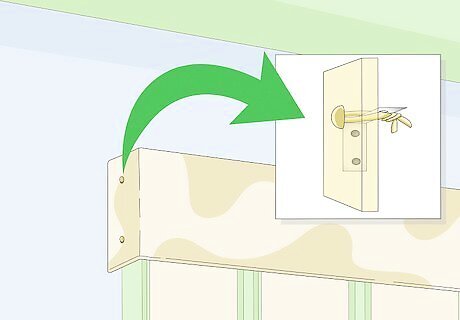
Secure the valance to the brackets using brad fasteners. Place the valance over the brackets once more. Insert a brad through one of the holes in the valance. Spread the prongs out over the bracket. Repeat with the remaining brads and bracket holes. Try to use heavy-duty upholstery brads. Craft grade brads may not be strong or long enough.


Comments
0 comment