

Single Camera

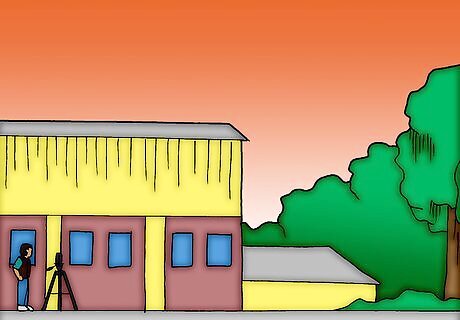
Find an immobile subject to photograph. Landscapes and places of interest are excellent for this work.
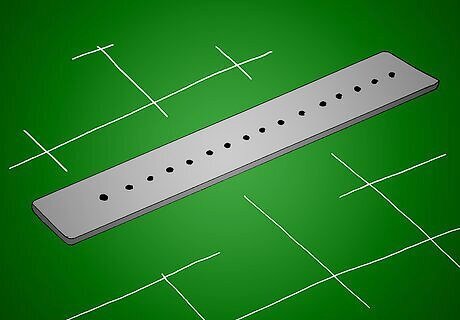
Get a piece of steel 20 cm long x 2.5 cm wide (8 x 1 inches). It must be strong enough to support your camera. Mark and drill 6mm (1/4") holes, the first 2.5 cm (1") from one end and others at 1 cm (about 1/2") centres. You will now have a slat with a series of holes running down the middle of its length.
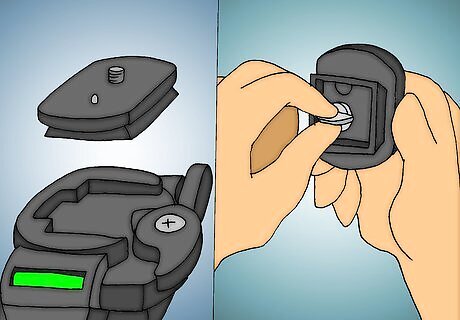
Go to your tripod and remove the screw that holds the camera to the platform. It’s normally held in place by a circlip. Push this screw through the hole in the ends of the steel slat, opposite the first hole and keep it in place with the circlip. The end of the slat that has no holes in it must go over the platform of the tripod.
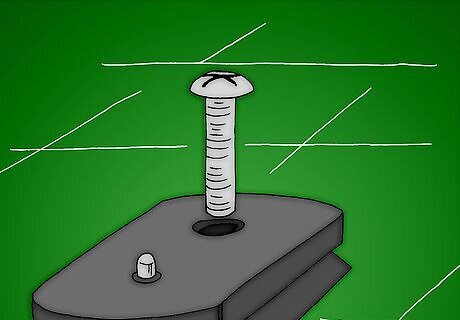
Push a 5mm galvanized steel roof bolt through the hole in the tripod platform, from which you removed the camera securing screw and through the hole in the un-drilled end of the steel slat, ensuring that the thread of the camera securing screw is uppermost. Turn its nut finger tight. Do not turn it fully tight, as the slat must be able to move freely from left to right.
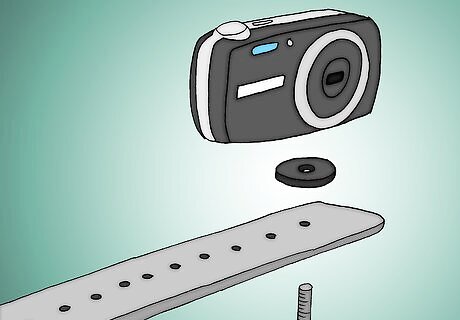
Screw your camera onto the other end of the slat. You might have to insert washers to take up slack between the slat and the camera base. Your camera should now be connected to the tripod by the slat in a cantilever fashion.
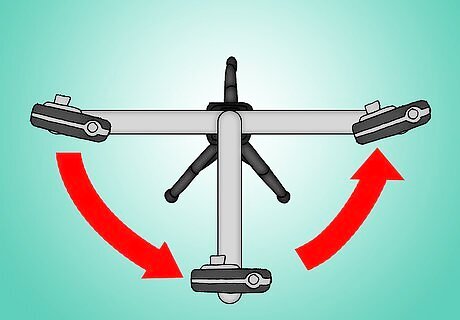
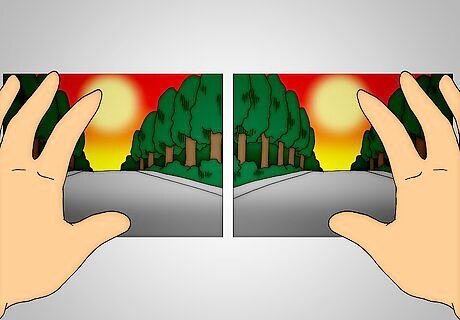
Focus on an object not closer than 20 metres (60 feet) away and take a picture. Swing your camera through 180 degrees around the centre pivot, focus on the same object and take another shot. Always focus on a definite object when you take both photographs, as this is what your eyes do automatically. This position works for objects that are from 20 metres away to infinity. For closer pictures, your camera must be nearer to the centre pivot. Just unscrew the nut of the roofing bolt and shorten the projecting arm of your slat. For a normal lens, the swing will move your camera through a short arc, so that the picture is not distorted.
Keep a record of all your shots and indicate which was taken from the left-hand position and which from the right.
Make a Stereoscope to view your new stereo photos.
Two Cameras
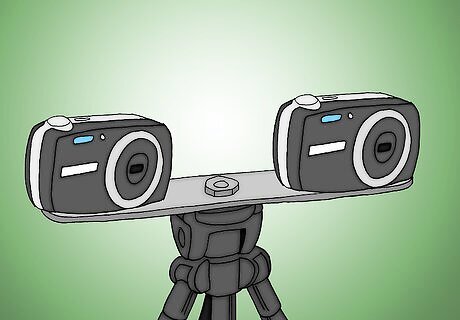
Put one camera on one end of the slat, and the second camera on the other end of the slat. For this system you will not require a tripod, as you can hand-hold the whole rig.
Focus on the same object beyond 50 metres (150 feet) away with both cameras and tighten them down so that they are completely immovable.
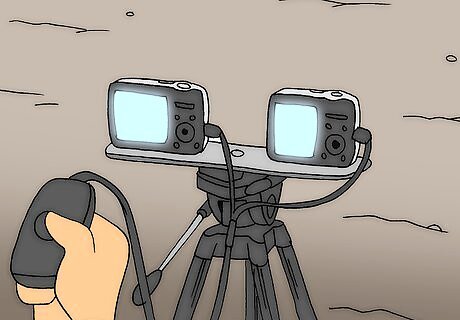
Fit cable releases to both cameras and make a rig to hold the buttons together so that you can press them both at the same time. You will have to match shutter speeds and f-stops for every shot, unless you are photographing on a sunny day, in which case you can stop down to f-8, f-16 or f-22 and set the shutter speeds according to the speed of the film you are using, to provide maximum depth of field, the speed of the action you are photographing and your lenses. Both cameras must, of course, be mounted with identical lenses. You will naturally only have to look through one viewfinder, as you have, at these f-stops, focused both lenses to infinity, haven’t you?


Comments
0 comment