
Isolating the Bad Parts of a Song
Download an audio editing program. A powerful piece of software like Adobe Audition or GarageBand will give you the greatest number of options. However, there are also plenty of free programs to choose from, such as Audacity and Ocenaudio. Any of these should have the tools you need to make basic edits. If you prefer to edit on your smartphone or tablet, try downloading a program like WavePad, Reaper or Acoustica.
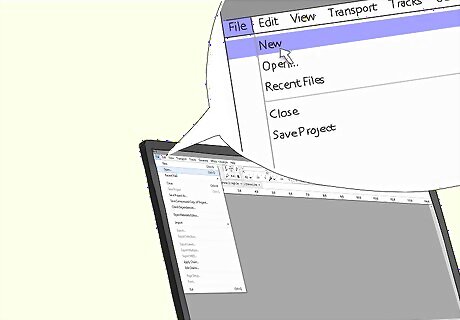
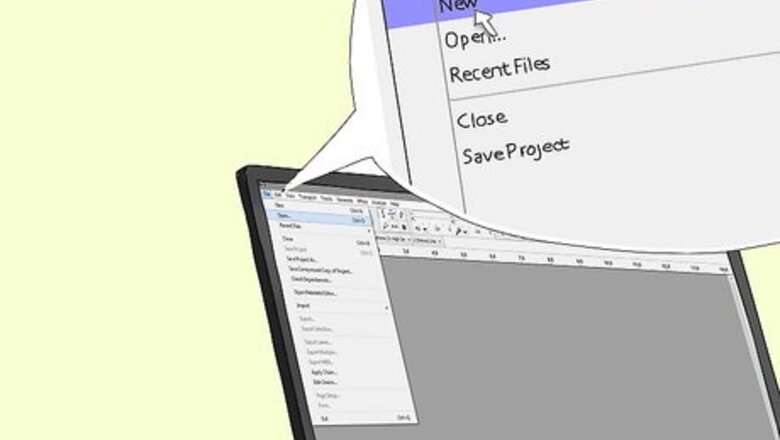
Load the song in the editor. Select the “File” tab to pull up a dropdown menu, then click "New Project" or “Open File.” Locate the song file on your hard drive and click “Open” again. The song will then appear on the program’s editing timeline. On a portable device, you may be prompted to “Import” or “Upload” audio from your local multimedia. In order to make changes to a song, it first needs to be in a digital format that the editing program can recognize (usually mp3, mp4, WAV, OGG or FLAC).
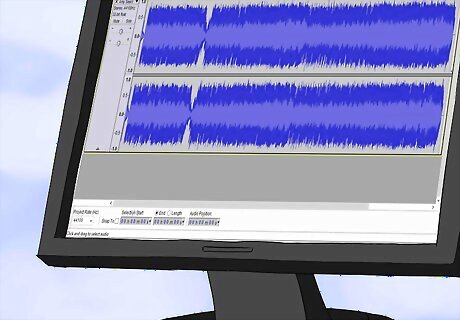
Identify the inappropriate parts of the song. Let the song play until you reach the first expletive you want to remove. Pause the file, adjusting the progress bar so that it’s right at the beginning of the section. If you need to censor multiple sections, it may help to write down the time that each instance of profanity occurs. Make a note of the time that the bad language begins in case you lose your place or have to start over. On some editors, you can add checkpoints where you intend to make cuts.
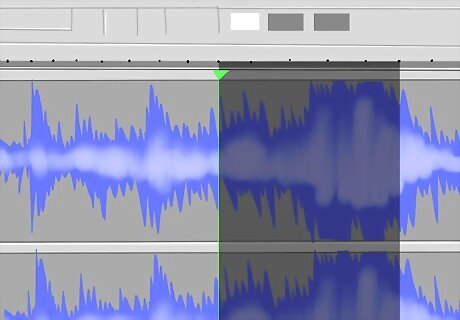
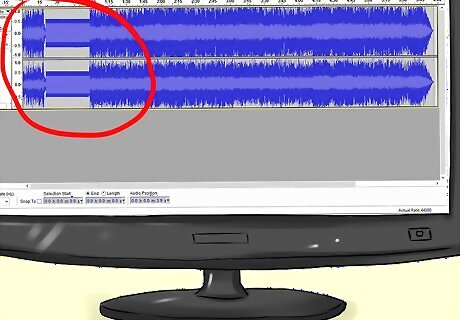
Highlight the explicit content. Click the point on the timeline where the profanity begins and drag the cursor to select the entire word or phrase. Once you’ve done this, you’ll be able to modify the specific range you’ve picked out without altering the rest of the track. Zooming in on the timeline will allow you to pinpoint the beginning and end of your selection more precisely. Play through the highlighted selection a few times to make sure you’ve timed it right.
Removing or Replacing Offensive Language
Select the option to mute the highlighted passage. On most audio editors, you’ll find a tool that allows you to turn down the volume on just the selection you have highlighted. Removing a snippet of audio from the track will create a “radio edit,” where the entire song goes silent for the duration of the bad language. This is the probably simplest way to clean up an explicit song, since it only involves a couple clicks. Muting a portion of a song will work best when the expletives are few and far between. Otherwise, it can quickly become distracting.

Keep the music playing in the background. Sometimes, muting multiple obscenities can break the song up too much and leave it sounding choppy and disjointed. In this case, you might be able to add an instrumental version of the song as a backing track. That way, it will continue playing when the objectionable parts drop out, making it sound seamless. Open the second track as a separate layer or channel in the same timeline so they’ll both play together. If you can’t find an instrumental version of the song you’re attempting to edit, try making your own. Most audio editing programs include a feature that allows you to strip the vocals from a track.

Bleep out unwanted expletives. Search the editor’s tools for a feature that allows you to modify the tone of your audio track. Then, slide the frequency of the highlighted selection as high as it will go. It will then sound like one long beeping noise, much like in censored television shows. Like muting, bleeps can be jarring if they happen too much, or if they’re used to edit soft, melodic songs. It might be wise to save this technique for things like hip-hop or spoken word tracks.
Cover profanity with another sound instead. After muting an expletive, simply plug the substitute clip into the second audio track on the timeline. This could be a prerecorded sound effect, a bit of ambient noise, or another word copied and pasted from elsewhere in the song. When you play the track, it will be profanity-free without disrupting the flow of the music. Make sure to trim the substitute clip to the exact length of the gap you’re trying to fill. Replacing the audio rather than simply eliminating it will keep breaks in the vocals from being quite so noticeable.
Finalizing the Edited Version
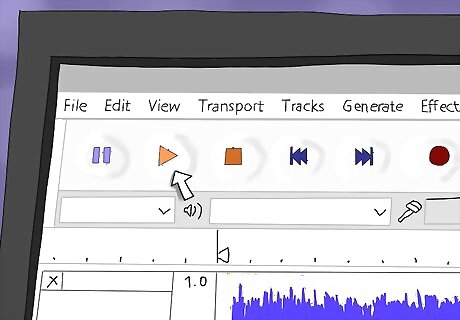
Play the selection back a few times. Listen closely to the entire song from beginning to end to make sure it flows smoothly. Pay particular attention to the parts surrounding the expletive, as this is where the alterations you made will be most obvious. If you’re unhappy with the way the track sounds, play around with it a little more until you get it just right. Correct any conspicuous imbalances in volume so the whole song sounds uniform. Don’t forget that zooming in can make it easier to target sounds more precisely.
Choose the option to export the new file. On most editors, you can simply go up to “File,” then select your preferred format and quality settings and click on “Save” or “Export.” The program will create a new audio file that includes the changes you made. You’ll typically be given a choice as to which format you want your exported tracks to be in, including the major formats like mp3, WAV and WMA. It may take a few minutes for the program to get the new file ready.

Upload your edited songs to your device. After you’ve put the finishing touches on a track, sync it to your iTunes library or transfer it directly to your smartphone or tablet for easy listening. You’ll then be able to jam out to your favorite tunes in good conscience anywhere! If you use a standalone PC, save completed songs on your hard drive so you won’t lose them in the event that something happens to your device. Give your friends access to your music using file-sharing programs like Dropbox, AirDrop or Google Drive.


Comments
0 comment