views
Building a Tabletop Dirt Jump
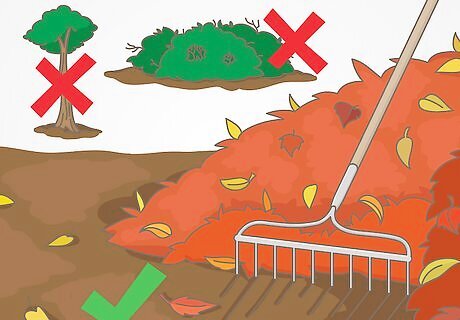
Select a flat area at least 30 ft (9.1 m) long for your jump. To build a table jump, which resembles a long solid mound of dirt with inclines at each end, select a dirt-covered area that's clear of both trees and heavy brush. Clear away all of the vegetation, debris, and trash that may be in the area with a gardening hoe, and/or your hands, before you begin to build your table jump. The average dirt jump is 2 ft (0.61 m) high, with 4 ft (1.2 m) to 5 ft (1.5 m) between the take-off and landing ramps. Make sure to have at least 10 ft (3.0 m) of clearance from the edge of the take-off and landing ramps. Depending on your experience jumping your bike, you may want to start by building a small dirt jump – say, 2 ft (0.61 m) high by 5 ft (1.5 m) long by 2 ft (0.61 m) wide, and work your way to large jumps as you practice more.
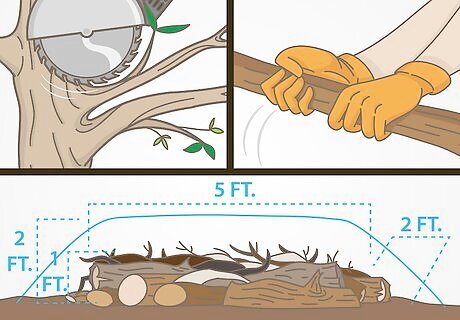
Build the foundation of the dirt jump with wood. Look for branches on the ground or saw branches off of nearby trees. Then stack your wood in a pile in the center of your planned jump to make it sturdy. Gather enough so that your pile is about half the volume of your dirt jump. For example, if your dirt jump is 2 ft (0.61 m) high by 5 ft (1.5 m) long by 2 ft (0.61 m) wide, gather enough wood to fill up a space that's 1 ft (0.30 m) by 1 ft (0.30 m) by 1 ft (0.30 m).
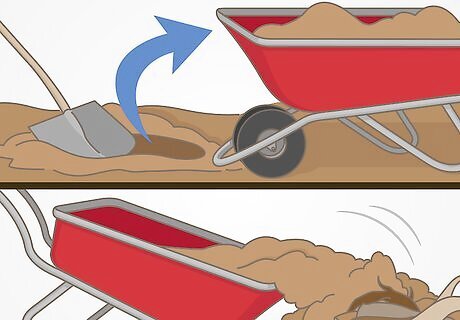
Form the central mound with dirt. Dig up a substantial amount of dirt from the surrounding area with a shovel and pack it into a wheelbarrow. Move the wheelbarrow towards your wood pile and pour the dirt on the wood. Repeat until you've created a mound 2 ft (0.61 m) high by 5 ft (1.5 m) long by 2 ft (0.61 m) wide. Pile the dirt on the wood, then pack it as tightly as possible. Shape your mound roughly into a rectangular cube.
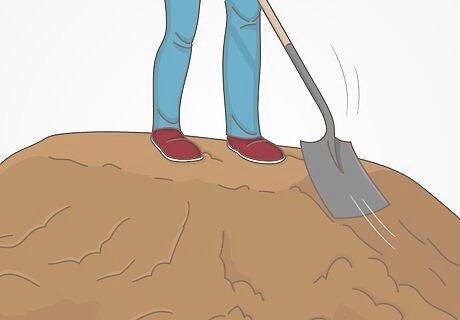
Shape each end of the mound into slopes. At opposite ends of the mound, dump more dirt – enough to form slopes for riding up and landing. Shape and flatten each slope with the base of your shovel. Mold one end of the mound – what will be your landing slope – into a longer and steeper incline than the other. If you're a beginner, create a take-off slope that is 45 degrees or even more gradual. Form a landing slope at an incline of 30 degrees or less.
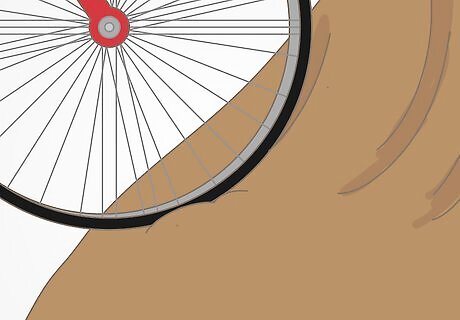
Create the lip of your take-off slope. The lip is a curve in your take-off ramp that will help you gain height as you accelerate towards your dirt jump. Take your front bike wheel and press it into one end of the mound – what will be the take-off ramp – in a few places. Using your shovel, shape the dirt of the take-off mound to resemble the curve created by the bike wheel. Using your shovel, pat down any impressions created by the tire ruts until the curve is completely smooth.
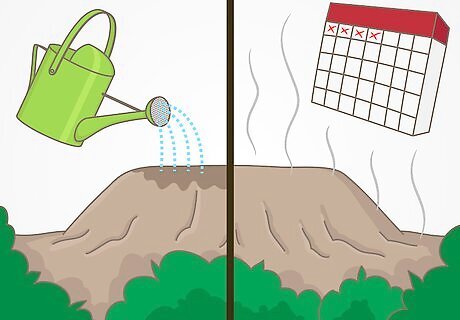
Let your dirt jump set. Pat your shovel on the mound until it is as compact as possible. Then leave the dirt to harden for at least 4 days. After this time, examine how compact the dirt is. If the dirt falls off the mound as soon as you touch it, compress the dirt again with your shovel and hands, then let the mound sit for 2 to 3 more days. If the dirt is no longer loose, try riding up and down it with your bike! Your dirt jump will harden substantially as time passes. Rain will also help strengthen it. Consider watering your dirt jump by completely soaking it with a garden hose, then leaving it to set.
Constructing a Double Dirt Jump
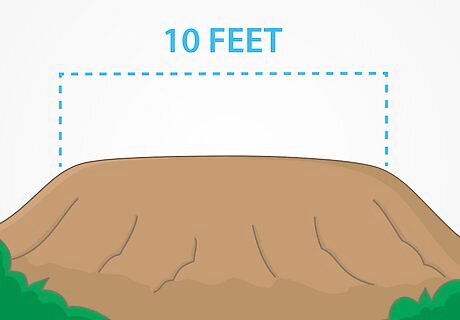
Construct a table jump twice the size of a normal dirt jump. Start building a double dirt jump by creating a table jump using the steps in the previous method. Make the central mound at least 10 ft (3.0 m) long.
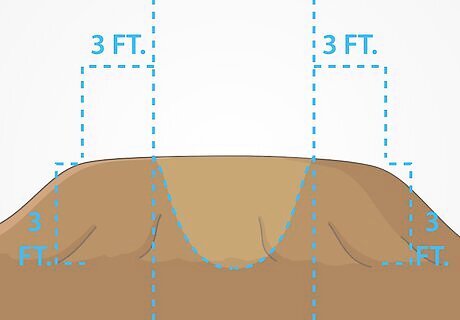
Remove the dirt between the 2 ramps. Take your shovel and dig up the soil away from the mound. Be careful not to disturb either ramp. As you pull dirt away from the mound, move it away from the dirt jump with your wheelbarrow. Then remove the sticks that lay at the base of the mound. Each ramp should be approximately 3 ft (0.91 m) to 3 ft (0.91 m) long and 3 ft (0.91 m) to 4 ft (1.2 m) tall with level ground in between them. Make sure to clear both dirt and wood away from the path in front of either take-off or landing ramp.
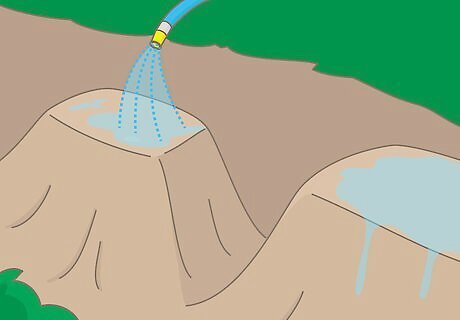
Use a garden hose to soak the take-off and landing ramps. This will help them retain their shape as they set. Use your shovel to add additional soil or compress existing soil, if the landing ramp has started to lose its shape. If the take-off ramp starts to lose shape, press the front wheel of your bike into it to create parallel grooves in the ramp. Then use your shovel to flatten the take-off ramp into a curve again. If you've had to reshape either the take-off or landing ramp, leave them alone afterward for at least 2 days to let the soil harden.
Creating a Step Up
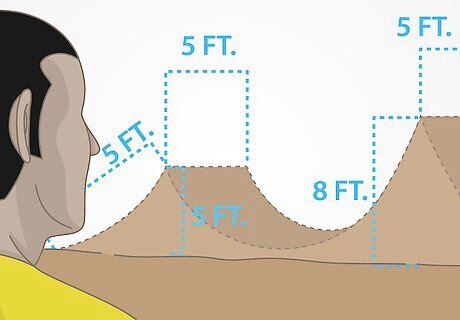
Decide how long and high you want your take-off to be. Also, determine the length of the gap between the two, which is the distance you'll be jumping your bike. Then use these dimensions to locate a clear flat space clear of plants, trash, and debris. When complete, your step-up will resemble a double dirt jump with taller and wider take-off and landing ramps. In general, the take-off ramp should be about 3 feet (0.91 m) shorter than the landing, and the base of the landing ramp should be at least twice as wide and long as that of the take-off ramp. For example, you might want to build a take-off ramp 5 ft (1.5 m) high, 5 ft (1.5 m) long, and 5 ft (1.5 m) wide. Then you'd build a landing ramp 8 ft (2.4 m) high, 10 ft (3.0 m) long, and 5 ft (1.5 m) wide. A good gap for a step up is approximately 6 ft (1.8 m). Determine how wide your gap will be based on the tricks you want to perform, your experience jumping bikes, and available space.
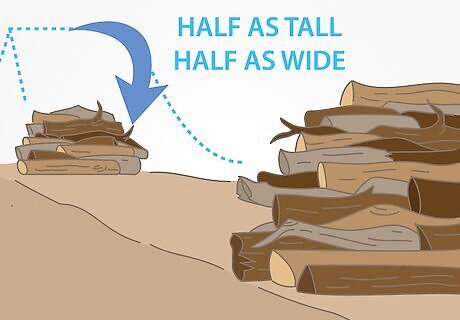
Gather sticks and branches for the bases of both ramps. Stack wood to form the first pile where you expect the take-off ramp to be, then walk to where the landing ramp will be and form the second pile there. The wood will make the ramps sturdy enough to support the weight of you and your bike. For example, if your take-off ramp is 5 ft (1.5 m) high, 5 ft (1.5 m) long, and 5 ft (1.5 m) wide, gather enough sticks to build a triangular pile 2.5 ft (0.76 m) high, 2.5 ft (0.76 m) long, and 2.5 ft (0.76 m) wide. The slopes of each pile should not face each other.
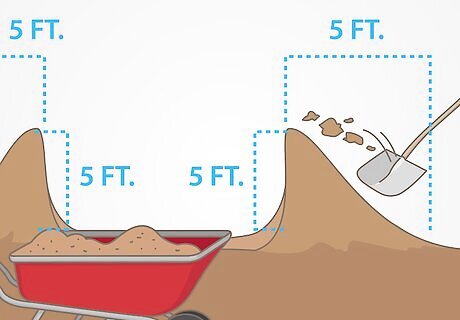
Cover the wood with dirt. Lay the dirt on each pile until you have 2 triangular mounds approximately 5 ft (1.5 m) high, 5 ft (1.5 m) long, and 5 ft (1.5 m) wide. Continue to compress the dirt on each ramp with the flat end of your shovel. You want to make each one as tight as can be, as they will each have to support your weight and the weight of the bike. Walk up and down both ramps to determine if they can support your weight. If not, add more dirt and flatten against each ramp with the flat end of your shovel. Flatten the slope of the landing ramp with the back of your shovel until the mound resembles an incline of 30 degrees or less.
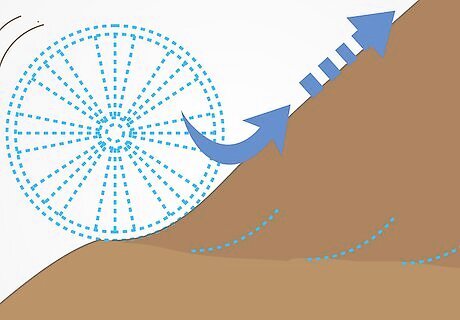
Shape the take-off ramp with the front wheel of your bike. Press the wheel into the ramp about 1/3 of the way up the slope. Do this several times in parallel locations until the take-off ramp has several circular grooves in it. Use your shovel to smooth the slope into a circular shape that resembles the curve of the wheel. Pat the dirt down so that the take-off ramp is smooth and circular. Pack any loose dirt down with the flat end of your shovel. Make your take-off ramp as compact as possible.
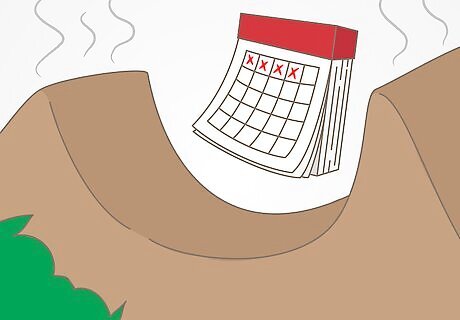
Let your take-off and landing ramps set for at least 4 days. If they do not hold their shape, gather additional dirt with your shovel and pile it on areas of the ramps where soil has come loose. Then flatten the dirt with the back end of the shovel, and let set another 2 to 3 days, before testing them again. Add water to your ramps to help them retain their shape. Use a garden hose to cover the area of each with water. After this period, test them by walking up and down both ramps. If they hold their shape, try riding on them with your bike. Time and rain will reinforce the shape of your step up. Riding up and down will as well. Make sure your step up gets plenty of use to keep it as sturdy as possible!


Comments
0 comment